booleansplit.com

photos, tips, tricks, and thoughts from an avid amateur photographer


Archive for how to

Pentax K10D Lightroom custom develop settings

lr_large_screenshot

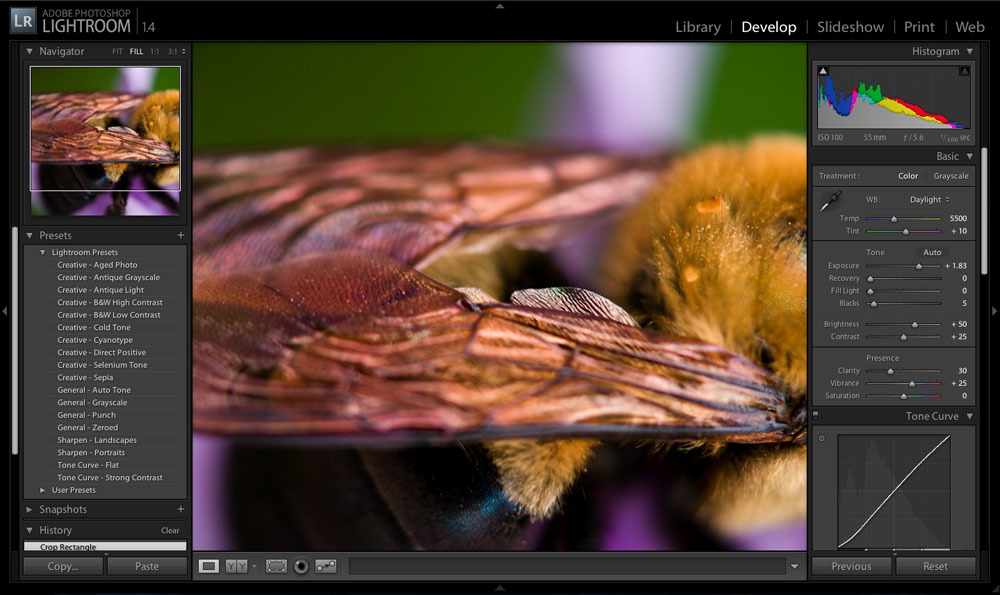
After shooting digital for 10 years I finally started shooting RAW exclusively in September 2008. What took me so long? Probably the same thing that keeps most amateur photographers from shooting RAW: the added time and complexity of post-processing RAW images. That all changed when I discovered Adobe Photoshop Lightroom’s customizable default development settings. By creating a custom set of image adjustments I get Lightroom to do most of the work for me as I import my images. I often refer to my “default import settings” in my blog posts so I figured I should share what those settings are. Here are the settings that I have found that work best for me and my Pentax K10D in Lightroom v1.4 and make shooting RAW work so well for me: More »

De-booger your laptop

cleaning the Mac

Once a week I make it a habit to give my MacBook Pro a good cleaning. While I may be a bit more OCD about this than most folks I still think it’s a good idea. I’m always amazed when I see laptops that look like they have spent their life on the floor of a preschool. (Those of you who have children will appreciate this reference.) Think about all those germs, food particles, hair, dried spit, dust, coffee, dead skin cells, and boogers that collect on your laptop over the course of a single day. A good weekly scrubbing doesn’t seem so out of the ordinary anymore, does it?

To clean your laptop all you really need is a soft paper towel and some Windex (or other glass cleaner). I prefer glass cleaner as it does not leave streaks on my aluminum 15″ MacBook Pro. Glass cleaner with an antibacterial additive is even better. I suggest avoiding using a vacuum cleaner with a  brush attachment as I have actually sucked the scissor style keys from a laptop keyboard. Digging through the filter bag was no fun. Trust me. Those tiny electronics vacuums may be OK, though I’ve never used one.

Begin by shutting down your laptop to prevent any errant input errors. I like to start with the screen to prevent transferring any grit or grime from the keyboard area to the display. Simply fold a paper towel into fourths and give it a couple of squirts of glass cleaner. I like to start with the screen, lightly wiping back and forth across the display and then once around the perimeter. Fold the paper towel over to expose a clean dry section and repeat the wiping to expedite the drying of the screen and prevent any streaking.

Next, use a clean section of paper towel (with another squirt of glass cleaner if needed) to gently wipe across the keyboard. You’ll find that the paper towel will glide more smoothly in one direction or another depending on the design of your keyboard. Keep the pressure light to prevent snagging on the edges of the keys and use the direction that provides the least resistance. Brush any large particles to one side and dab away with a damp section of the paper towel. Using an edge of the folded paper towel helps to get into tight spots.

Give the palm rest and trackpad area a good wiping then shut the lid and give the outside a thorough once-over. Here, unlike on the inside, I usually spray some glass cleaner directly to the housing (as shown above). Use your best judgment here though as you don’t want to be spraying glass cleaner into any vents or openings in your laptop’s housing. Pay special attention to the rubber feet on the bottom of your laptop- getting them nice and clean will help restore their grippiness. (Grippiness? Is that even a word?)

That’s it. Now you can enjoy your laptop knowing that it is booger free…at least for a few minutes, anyway. Make this a weekly routine and you’ll find it goes much easier next time.

DISCLAIMER: This cleaning method has worked for me for at least 15 years. However, it IS NOT the manufacturer’s recommended cleaning method. Most of the time I have been using this method with Apple laptops with metal housings and tight seams. Your mileage may vary with other laptops. Use your best judgment and don’t try it if you are not willing to take responsibility for any potential damage cleaning your laptop causes.

Christmas tree photo tutorial

Christmas ornament detail

With Christmas just a couple of days away there is no doubt that many of you have been enjoying taking artistic photos of your Christmas tree and other Holiday decor. All those colorful and tiny lights make perfect bokeh fodder. And highly processed detail shots like this are also fun.

Problem is, many of us (present company included) forget to take good documentary photos of our holiday decor that we can pull out and reminisce over with the grand kids 30 years from now. While all those artsy detail shots are nice, none of them capture the full majesty of your 2008 Holiday decor. Going through my photos a few days ago I ran across this image I took of my mom’s Christmas tree back in 2005:

IMG_0096_2

This is one of my favorite Christmas photos of all time. Even in black and white (shot in B&W mode so there is no color version) I can totally feel the warmth of the twinkle lights and even smell the fresh pine fragrance of the Frasier fir tree. With this in mind I decided to figure out what makes good Christmas tree photos and do a bit of a tutorial aimed at DSLR users while I was at it.

Step 1: Turn off your flash!

flash tree

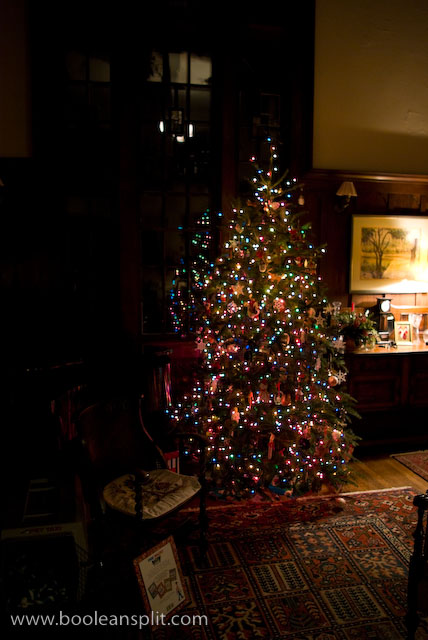
Out of the box in Program Auto mode just about all DSLRs are going to pop the flash in an attempt to achieve “proper” exposure. While this may accurately capture the image, I doubt that anyone will find the results very warm and inviting.

Switch your camera into Program mode and turn off the flash. With the flash off you’re likely to get something like this:

no flash, default settings

This is a 1/8 second hand-held exposure at f/3.5 and ISO 400. I actually had to dial in +1EV of exposure compensation because my Pentax K10D’s matrix metering was underexposing the image considerably trying to compensate for the brightness of the tree lights and lamp to the right just off frame. While the image more accurately captures the look and feel of the decorated tree, it isn’t very dynamic and compelling.

Steps 2 & 3: Get out the tripod and close down the aperture.

small aperture, long exposure

This shot is essentially identical to the previous shot except it is a 15 second exposure at f/16 and ISO 100 (shot in Aperture Priority mode). The small aperture does three things here. First it creates all those dreamy starbursts. Second, and more notably, it forces a long exposure. This long exposure time pulls in more ambient light, giving the entire scene more apparent dynamic range. Finally, it sharpens up the details. Zooming into this image you will find much crisper detail than the rather soft previous f/3.5 shot. As a bonus, using a lower ISO means richer colors, better detail, smoother gradients, and less noise.

Step 4: Attend to the details.

improved details

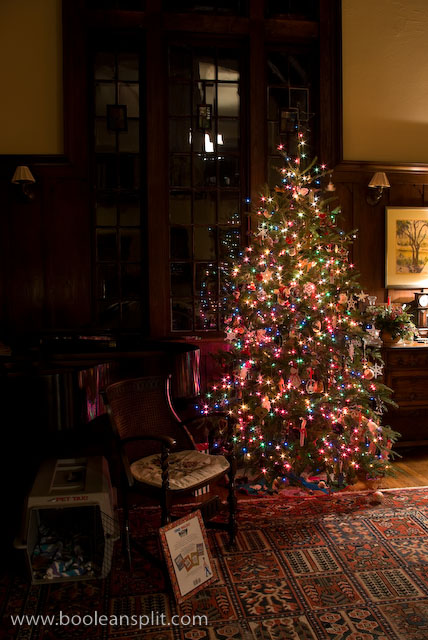
While the previous shot had come a long way from the Program Automatic blown-out flash shot, I felt there was still room for improvement. I didn’t like the reflections in the windows behind the tree coming from the upstairs lights and the lamp to the right was a bit harsh. Also, there were a few unsightly items cluttering up the foreground of the earlier shots and I wanted to add a better sense of grandeur to the shot.

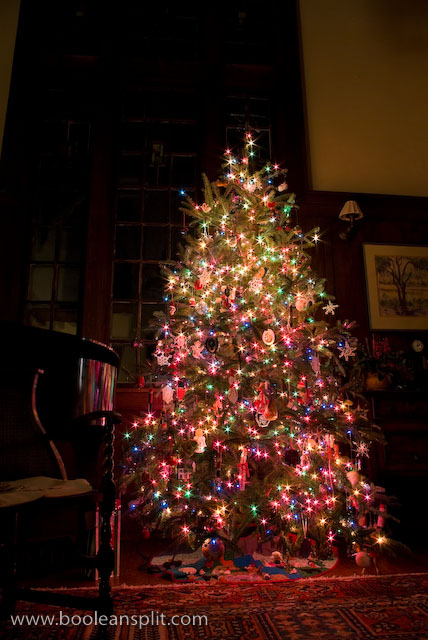
For this final shot I turned off all the lights in the house except for a single 60 watt desk lamp behind the camera to add just a tad of ambient fill to the high ceilings. I moved the dog kennel and Where’s Waldo book. I then repositioned the tripod closer to the tree and lower before zooming out wider to exaggerate the scale of the tree and height of the room. This ended up being a 10 second exposure at f/16 and ISO 200- I bumped the ISO to 200 because the rest of the family was complaining about sitting in the dark during all my 20+ second shots ;-)

RAW file post processing in Lightroom was limited to setting the white balance (tungsten) and dialing in a bit of Sharpness, Clarity and Vibrance. You may want to tweak the Recovery slider a tad to compensate for any blown-out Christmas lights from the long exposure.

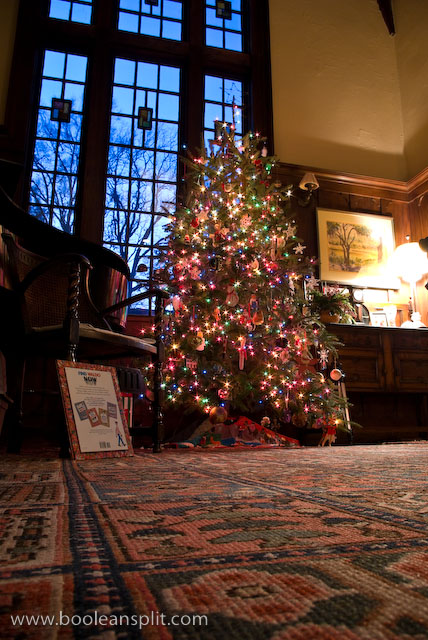
While I recommend shooting your Christmas tree photos at night, depending upon the situation, decent results can be achieved during the day. The wall of windows behind the tree here made daytime shots pretty much impossible. However, waiting until dusk I got this shot which was pretty nice:

Christmas tree at dusk

Step 5: Share!

my Christmas tree

This is a picture of my Christmas tree I took last week using the small aperture/long exposure technique described above. The photos for this tutorial were shot at my in-laws house. When you travel to visit friends and family this Christmas be sure to pack your camera and tripod. Take pictures of your non-photographer friends’ trees and send them a copy as a Holiday treat! Tis the season of giving, right?

Merry Christmas!!

DIY super macro DSLR lens

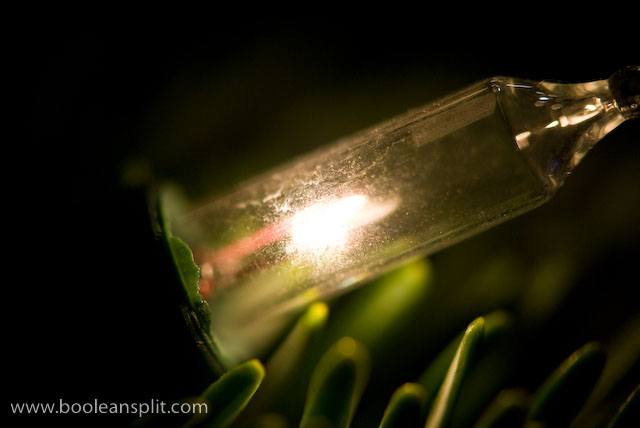
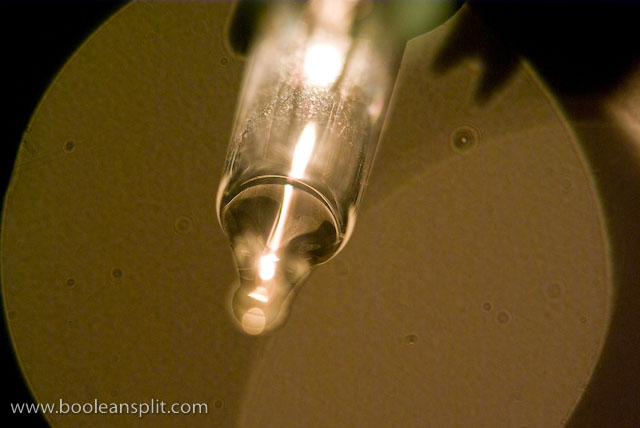
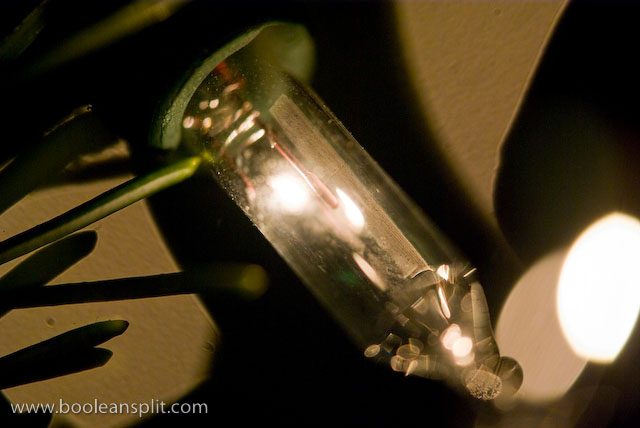
Christmas light super close-up

I got this idea from my Flickr friend Jim. I’ve played with this idea in the past but didn’t have the right combination of lenses to really make it work. Seems the kit lens on my Pentax K10D and my 20 year old Pentax-A 50mm f/1.7 make a pretty super duper super macro lens.

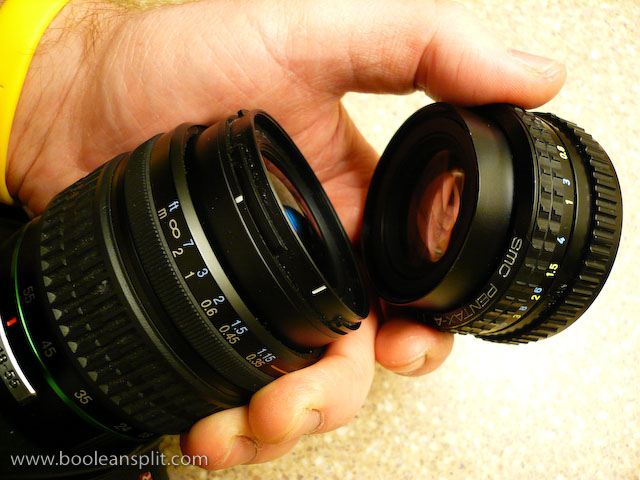
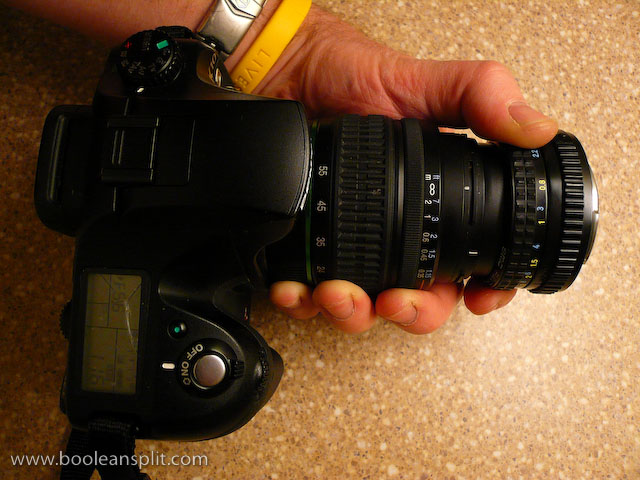
The trick is to shoot through a second lens, thus dramatically shortening the minimum focus distance of the combined lenses. This works best with a medium focal length primary lens (attached to the camera) and a fast secondary lens held (typically backwards) in front of the primary lens.

super macro lens assembly

Pentax 18-55mm kit lens with 50mm f/1.7 on front

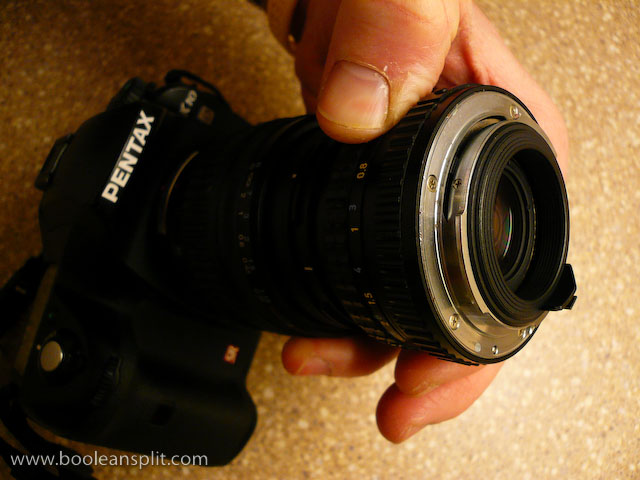
business end

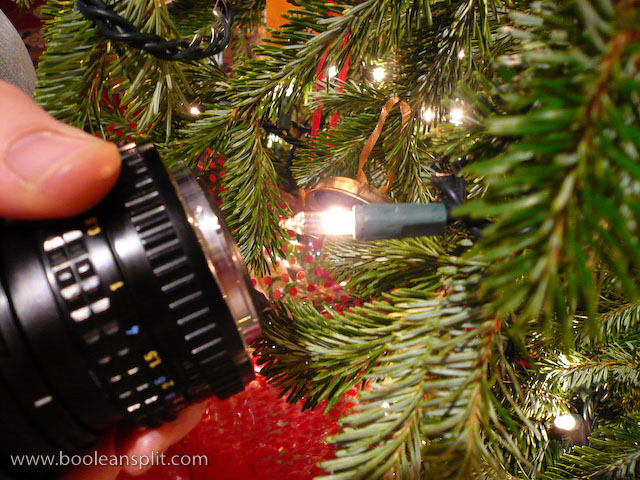
In this case, the 49mm diameter front element on the 50mm fits perfectly inside the 52mm diameter of the 18-55mm Pentax kit lens. I found that I had to zoom the kit lens all the way out to 55mm to eliminate vignetting. I tried reversing the set-up but the 18-55’s  smaller maximum aperture resulted in vignetting at all focal lengths (hence the need for a fast secondary lens). For the shot above I simply switched the camera into manual focus, dialed in a handful of positive exposure compensation and got up close on a bulb on our Christmas tree:

taking the shot

Depth of field is essentially non-existent- as is typically the case with all macro lenses. Changing the focus of ether lens had very little effect on the focal distance to the subject. To achieve focus you have to simply move the camera back and forth while composing through the viewfinder. The problem is that with such a micro thin slice of DOF any movement will throw off your composition. I ended up dialing up the ISO to 800 so that I could get a decently fast shutter speed (around 1/100 sec) and taking a bunch of hand held shots to get a couple of winners. Use of a tripod would have certainly helped, though holding the secondary lens in position while composing the shot on a tripod might be tricky.

A couple of additional shots taken with this set-up:

imgp6272

ISO 800, 50mm, f/5.6, 1/250sec

My understanding is that you can get similar results by simply reverse mounting certain types of lenses. There are accessories available to do this. Also, I think you may be able to use a threaded step-up adapter ring to attach the two lenses like in my set-up. The $20 screw-on close-up lens adapters (the kind that look like filters) IMO are pretty worthless unless you buy very nice quality ones but you might as well put that cash towards a dedicated macro lens.

The most popular macro accessories (besides a dedicated macro lens, of course) are extension tubes. Again, the price of entry here comes close to a decent dedicated macro lens (or zoom lens with macro capibility). There are cheaper alternatives and quality is less important if you are OK with losing auto focus and communication with your lens. I got some very nice results with my old Canon 5D and 85mm f/1.8 + 12mm Canon extension tube:

Keep in mind that all of these options will limit your focus distance to macro applications. A dedicated macro lens typically will be able to focus to infinity, making it usable as a regular lens in addition to a macro. However, if you have a couple of the right kind of lenses laying around and you want to take some close-up shots, now you know how. Thanks, Jim!

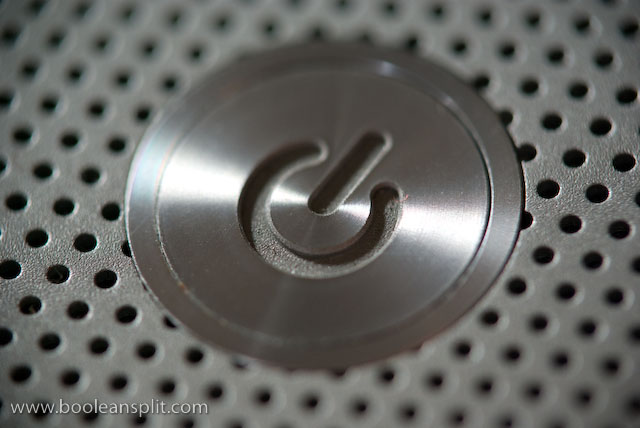
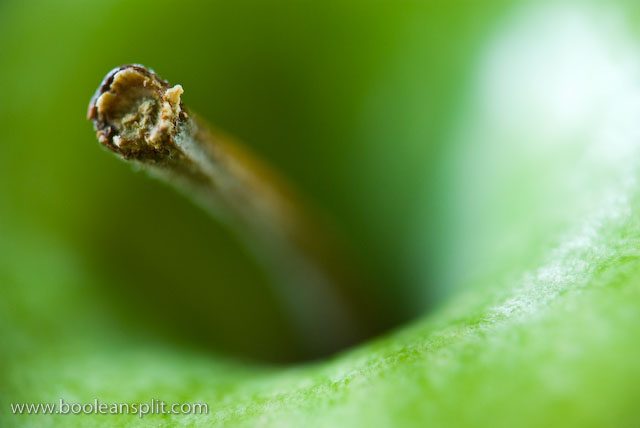
UPDATE:

Playing around a bit more with this set-up and I got these shots:

MacBook Pro power button

granny smith apple stem

It also occurred to me that one of the reasons my set-up works so well is that my old manual focus 50mm lens has an aperture ring. This means I can crank it open to f/1.7 to get a clear shot through. More modern lenses often lack an aperture ring and default to the smallest aperture when removed from the camera body. If this happens to you, look for the aperture lever on the inside face of the lens and try sliding the aperture open to get a clear view through your secondary lens.

Pocket Camera Bokeh Tutorial

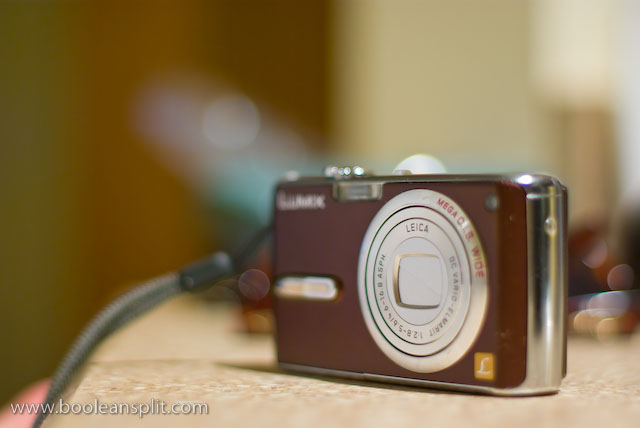
Panasonic Lumix FX07

Yesterday I posted a tutorial on photographing bokeh with a DSLR. Today I am going to attempt to do the same about pocket cameras. Please take a minute to read over the first part of my DSLR Bokeh Tutorial to familiarize yourself with the basic concepts of what bokeh is and how it is typically created. The photo above (taken with my Pentax K10D & 50mm f/1.7 SMC-A lens) is the closest most people think you can get to photographing bokeh with a compact pocket camera ;-)

The truth is you can shoot bokeh with a pocket or “push here dummy” (PhD) camera, but there are a few things you need to understand about the way they work first so you can set the camera up and compose your shot properly. The two biggest hurdles for getting good bokeh shots on the typical pocket camera are the extremely small objective lens (and resulting small aperture) and the auto focus system. At this point I should mention that there are “pocket” cameras with manual controls. Users of these cameras will have to read both tutorials and combine steps and settings to find what works with their cameras.
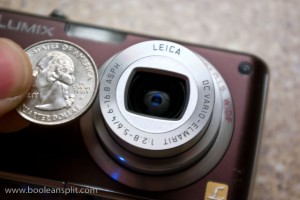
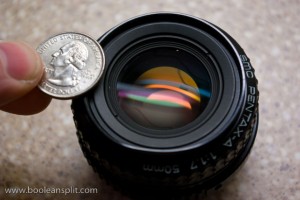
typical p&s lens & aperture size typical DSLR lens and aperture size

The first rule of bokeh is the bigger and rounder the aperture opening, the bigger and rounder the bokeh. The photos above do a pretty good job of illustrating the challenge facing PhD camera bokeh seekers. Also, since we don’t typically have control over the aperture setting used by the PhD camera, we have to be sure the camera is set up to give us the desired results.

The second challenge to overcome is the PhD camera’s fully-automatic-do-everything-for-you mindset. If you recall from my DSLR tutorial, to get good bokeh you need:

  • out of focus pin point light sources in the background
  • the largest possible aperture setting your lens will provide (f number)
  • a medium to long focal length (zoom in)
  • a short focal distance to the foreground subject
  • significant distance between the foreground subject and background points of light

Trying to get all of this in combination at the same time can be very frustrating with a PhD camera. PhD cameras are typically programmed to produce photographs where everything is in focus and evenly exposed. To get decent bokeh out of your pocket camera you have to play a few tricks on it’s single-minded little silicon brain. I did a little playing around with the trusty little Panasonic Lumix FX07 above this afternoon to illustrate this tutorial.

TUTORIAL:

First, we need to set up the camera. Most PhD cameras come out of the box in full-on idiot mode. These “Auto” settings are great for taking snapshots but leave very little room for creative control. There is usually a “Manual” or other mode that allows greater control over the camera’s settings. I suggest that you use this mode for this exercise (and everything else). However, since there are so many PhD cameras out there (with each having its own user interface) I’m going to stick to settings that should be universally addressable. If you are unsure how to change any of these settings please refer to your camera’s user manual.

Step 1: Turn off the flash (IMO you’ll be a better photographer if you never turn it back on).
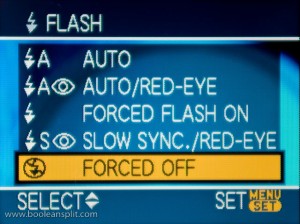
flash off

The PhD camera is going to try and fire the flash to fill in all the darkness between your bokeh balls. Not very helpful.

Step 2: Set the ISO to 200.
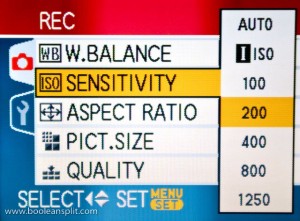
ISO 200

By forcing the camera to use a relatively slow ISO speed we ensure that the PhD’s brain will dial up the largest aperture opening to try and compensate for the lack of light while keeping the shutter speed as fast as possible.

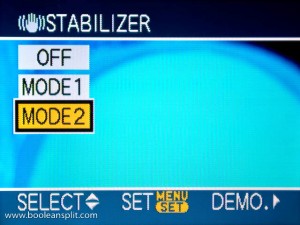
Step 3: Turn on Image Stabilization (if available).
IS on

Image stabilization will help compensate for camera shake in what is bound to be a rather slow exposure. If you do not have IS you may have to play around with your ISO setting and/or use a tripod.

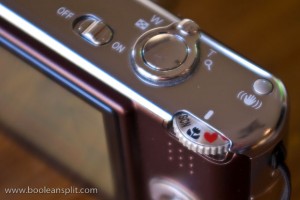
Step 4: Select MACRO focus mode.
MACRO focus mode

Macro focus mode will enable us to dial in a very short focal distance to maximize depth of field.

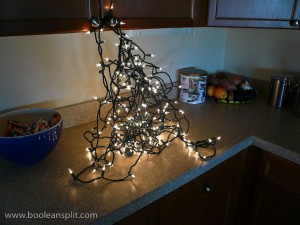
Now that the camera is properly set up you need some nice pin point sources of light. Again, a Christmas tree on the far side of your living room makes an excellent subject this time of year. As we have not yet decorated our tree, some Christmas tree lights on the kitchen counter will have to do for this tutorial. Remember the Golden Rule of tutorials: “do as I say, not as I do” :D

Step 5: Find some pin point sources of light in a relatively dark setting.
Christmas lights

My Lumix has a 3X zoom but the macro setting only works in the widest zoom position so these series of shots are at the widest zoom setting. If your camera can still focus in macro mode within about 6″ of the front of the lens when zoomed out then try zooming out for this tutorial. Otherwise, just do what I did and play with the distance to the lights (I was only 4-5′ away from this small section of lights- 10-12′ is likely a better distance from a full-on Christmas tree).

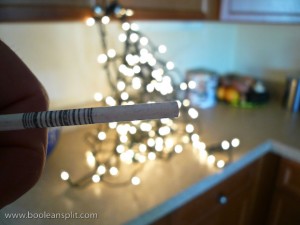
Step 6: Focus on something small up as close to the front of the camera lens as possible (half press and HOLD of the shutter button only-do not take the picture yet).
focus the camera

Here I’m using the stick from a Dum Dums lollipop. I like the sucker stick because it is small and white but its round shape provides enough highlight and shadow for the contrast detect auto focus to lock onto it. If you use your finger the camera will have difficulty focusing and the exposure will likely be blown out. Since PhD cameras lock exposure and focus at the same time, the trick here is to pre-focus on something very small in the foreground while not blocking too much light from the background and ruining the exposure of the bokeh.

Step 7: Move the foreground object from in front of the camera and fully depress the shutter button to take the picture.
pocket camera bokeh

Admittedly this has a lot to be desired as it has not reached the heights of bokeh-dom as are possible with a DSLR and large aperture lens. However, it is bokeh and it was shot with a PhD pocket camera. Adding a subject back into the foreground after pre-focusing on the small foreground object (using the LCD viewfinder to achieve focus by manually moving the camera and/or subject in front of the lens while continuing to hold the shutter button at the halfway point) can make for some pretty interesting bokeh shots that will impress your friends and neighbors (unlike this example).
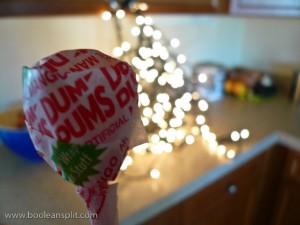
Dum-Dum bokeh

Happy pocket camera bokeh-ing! Let me know how it goes.

UPDATE:

So, we finally got our tree up and I took the opportunity to try my technique out for reals. This is the best I could get with my Panasonic Lumix FX07:

Panasonic Lumix FX07 bokeh

Not bad, but I figured the limited macro capability of my Lumix might be holding things up a bit so I borrowed the wife’s 3 year old Canon PowerShot SD400. Canon PhDs tend to feature extremely close macro focus capability. Sure enough, the results this time around were really not half bad:

Canon SD450 bokeh

Merry Christmas!

About

I'm an industrial designer and an avid hobbyist photographer. People are always asking me "how'd you do that?" So, I decided to create this site as a place to share my experiences and insights about photography, the gear and what it all means to me. I'm not sure if this site will make anyone besides myself a better photographer but I figure it's worth a try. Take a look around and let me know what you think. Thanks for stopping by!

Subscribe

Recent Posts

Categories

Pages

Flickr Friends

Links

My Sites

Archives