booleansplit.com

photos, tips, tricks, and thoughts from an avid amateur photographer


Posts tagged Christmas

Merry Christmas!

Christmas tree

Just a quick note to say Merry Christmas and thank you for your support. I started this blog less than 3 weeks ago and I have already had over 1,100 views! I hope everyone is enjoying this site and getting something out of it. I’ve got some new topics I’m working on that I’ll be posting over the next few days as time permits. Meanwhile, have a very merry Christmas, safe travels and take lots of pictures!

Christmas tree photo tutorial

Christmas ornament detail

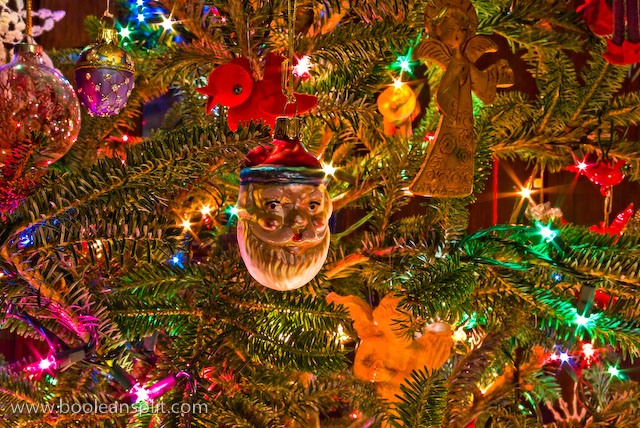
With Christmas just a couple of days away there is no doubt that many of you have been enjoying taking artistic photos of your Christmas tree and other Holiday decor. All those colorful and tiny lights make perfect bokeh fodder. And highly processed detail shots like this are also fun.

Problem is, many of us (present company included) forget to take good documentary photos of our holiday decor that we can pull out and reminisce over with the grand kids 30 years from now. While all those artsy detail shots are nice, none of them capture the full majesty of your 2008 Holiday decor. Going through my photos a few days ago I ran across this image I took of my mom’s Christmas tree back in 2005:

IMG_0096_2

This is one of my favorite Christmas photos of all time. Even in black and white (shot in B&W mode so there is no color version) I can totally feel the warmth of the twinkle lights and even smell the fresh pine fragrance of the Frasier fir tree. With this in mind I decided to figure out what makes good Christmas tree photos and do a bit of a tutorial aimed at DSLR users while I was at it.

Step 1: Turn off your flash!

flash tree

Out of the box in Program Auto mode just about all DSLRs are going to pop the flash in an attempt to achieve “proper” exposure. While this may accurately capture the image, I doubt that anyone will find the results very warm and inviting.

Switch your camera into Program mode and turn off the flash. With the flash off you’re likely to get something like this:

no flash, default settings

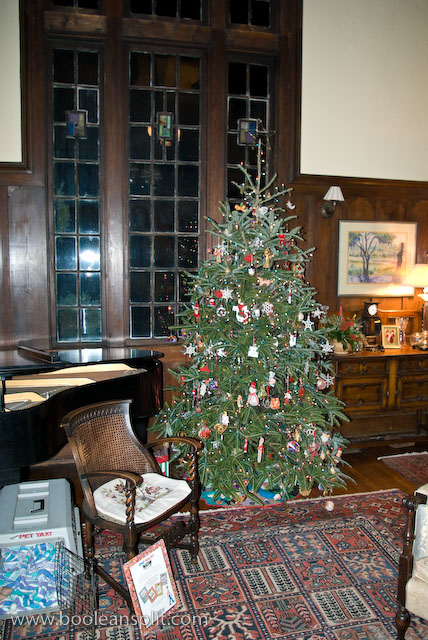
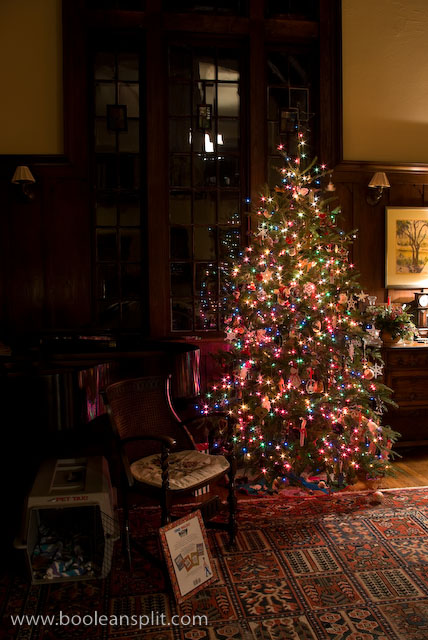
This is a 1/8 second hand-held exposure at f/3.5 and ISO 400. I actually had to dial in +1EV of exposure compensation because my Pentax K10D’s matrix metering was underexposing the image considerably trying to compensate for the brightness of the tree lights and lamp to the right just off frame. While the image more accurately captures the look and feel of the decorated tree, it isn’t very dynamic and compelling.

Steps 2 & 3: Get out the tripod and close down the aperture.

small aperture, long exposure

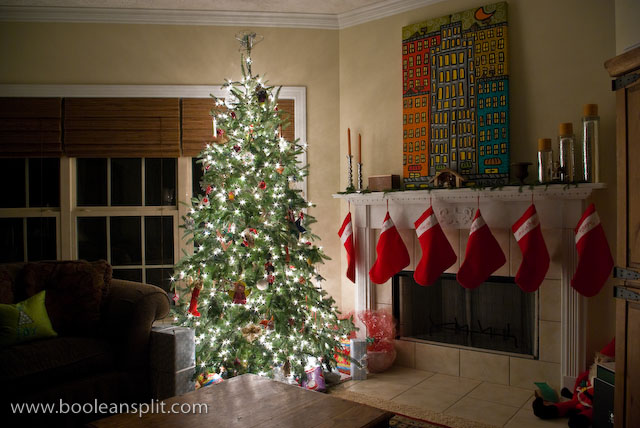
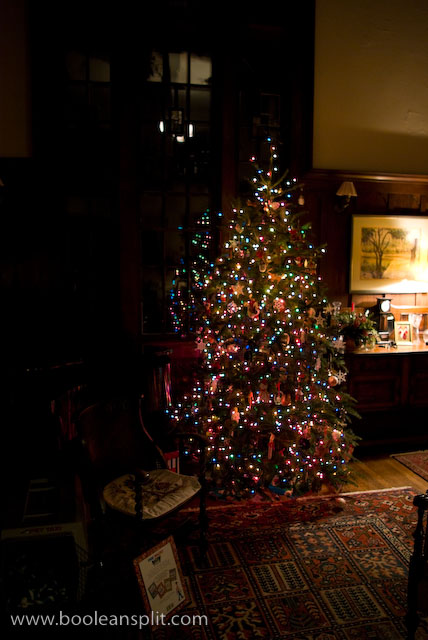
This shot is essentially identical to the previous shot except it is a 15 second exposure at f/16 and ISO 100 (shot in Aperture Priority mode). The small aperture does three things here. First it creates all those dreamy starbursts. Second, and more notably, it forces a long exposure. This long exposure time pulls in more ambient light, giving the entire scene more apparent dynamic range. Finally, it sharpens up the details. Zooming into this image you will find much crisper detail than the rather soft previous f/3.5 shot. As a bonus, using a lower ISO means richer colors, better detail, smoother gradients, and less noise.

Step 4: Attend to the details.

improved details

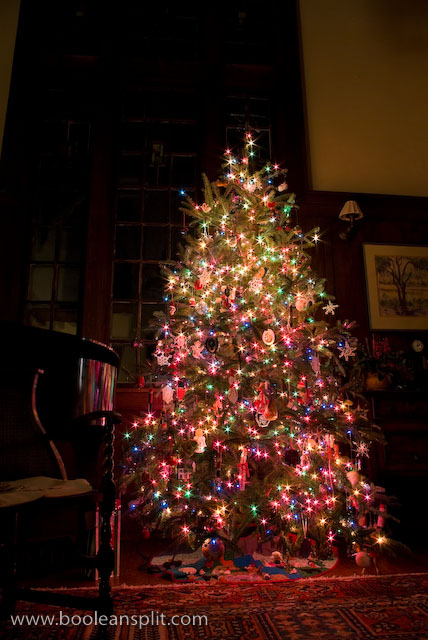
While the previous shot had come a long way from the Program Automatic blown-out flash shot, I felt there was still room for improvement. I didn’t like the reflections in the windows behind the tree coming from the upstairs lights and the lamp to the right was a bit harsh. Also, there were a few unsightly items cluttering up the foreground of the earlier shots and I wanted to add a better sense of grandeur to the shot.

For this final shot I turned off all the lights in the house except for a single 60 watt desk lamp behind the camera to add just a tad of ambient fill to the high ceilings. I moved the dog kennel and Where’s Waldo book. I then repositioned the tripod closer to the tree and lower before zooming out wider to exaggerate the scale of the tree and height of the room. This ended up being a 10 second exposure at f/16 and ISO 200- I bumped the ISO to 200 because the rest of the family was complaining about sitting in the dark during all my 20+ second shots ;-)

RAW file post processing in Lightroom was limited to setting the white balance (tungsten) and dialing in a bit of Sharpness, Clarity and Vibrance. You may want to tweak the Recovery slider a tad to compensate for any blown-out Christmas lights from the long exposure.

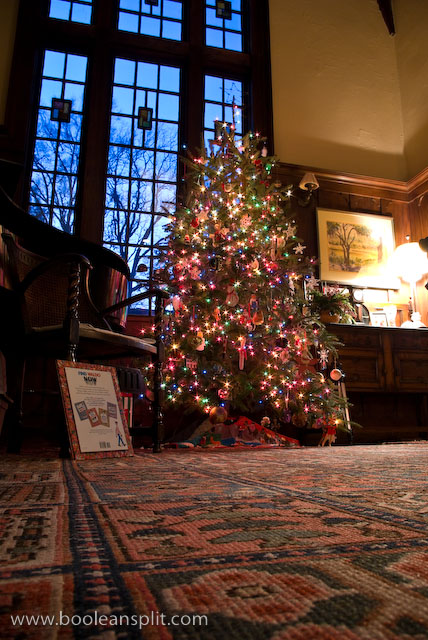
While I recommend shooting your Christmas tree photos at night, depending upon the situation, decent results can be achieved during the day. The wall of windows behind the tree here made daytime shots pretty much impossible. However, waiting until dusk I got this shot which was pretty nice:

Christmas tree at dusk

Step 5: Share!

my Christmas tree

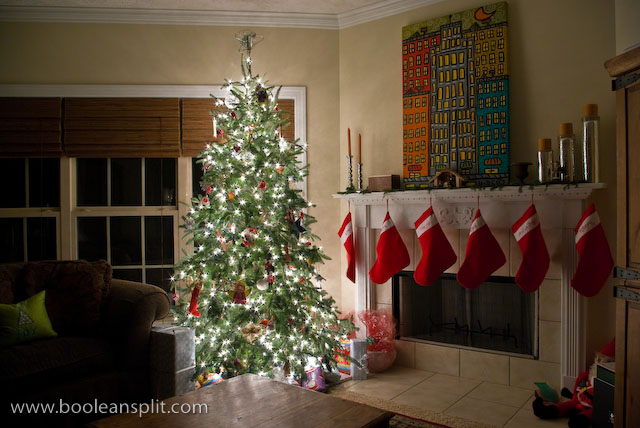
This is a picture of my Christmas tree I took last week using the small aperture/long exposure technique described above. The photos for this tutorial were shot at my in-laws house. When you travel to visit friends and family this Christmas be sure to pack your camera and tripod. Take pictures of your non-photographer friends’ trees and send them a copy as a Holiday treat! Tis the season of giving, right?

Merry Christmas!!

Christmas table centerpiece photo

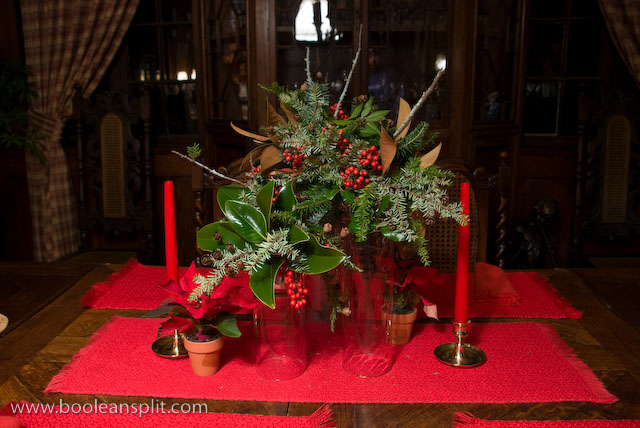
Christmas centerpiece arrangement

My father in-law asked me to take a picture of his Christmas table centerpiece arrangement so he could e-mail it to an out of town friend. My attempt at a quick snapshot didn’t meet my with my photographic standards so I spent the next hour playing with lighting to get the final shot above. This was a very challenging shot as I had to make do with what lighting I could find in the house. Here’s how I did it:

first shot with ambient light only

First of all, my in-laws’ house is DARK. Dark walls. Dark floors. Dark furniture. Dark lamps. You get the idea. Plus, it was night so the wall of windows to the left of the subject weren’t helping. Of course, I could have waited for morning but I always like a good challenge. Plus, I figured that if I got it right, a night shot would better capture the elegant and rich warmth of the table setting.

My first test shot was attampted with nothing but the incandescent  lamp light filtering in from the living room behind the camera. This required a 6 second exposure at f/8 and ISO 400 (a tripod was used so my K10D’s IS was OFF). I used f/8 to ensure that the entire arrangement was in sharp focus while the background was blurred a bit. I like the f/8 shot because there is enough background detail to clearly place this shot in my in-laws dining room while the subject focus was nicely isolated. The lighting in this first shot was too flat. I wanted more subject isolation so I grabbed a floor lamp and placed it to the left of the camera and tried again:

second shot w/ floor lamp at eye level

set-up for second shot

This set-up provided better subject isolation via lighting but the shadows seemed a bit harsh. I played around with a few combinations of settings and finally settled on 4 seconds at f/8 and ISO 100 but was still not happy with the results.

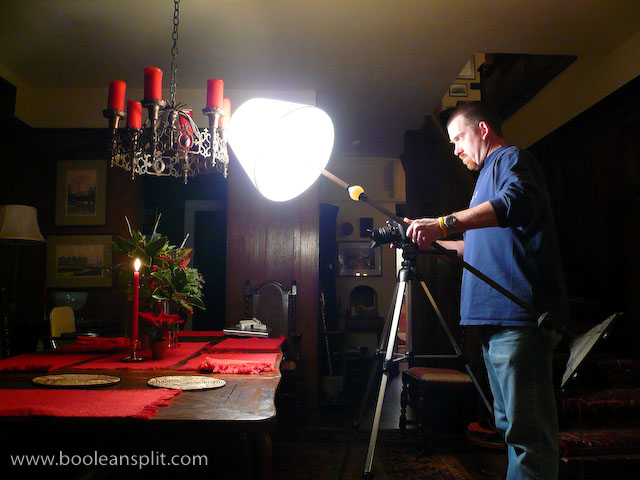
Recalling some studio shots that I did not long ago where I held a shaded lamp directly above my subjects, I decided to try holding the lamp above the centerpiece just out of the frame. I also turned off all the lights in the living room and opened the glass doors on the china cabinet behind the arrangement to eliminate the reflection of the lamp. Finally, I lit the candles to add another level of detail and ambiance to the shot.

set-up for final shot

This set-up is what I used for the final shot. (Note use of lens hood to quell flare). I sped up the ISO to 200 to get a 1.6 second exposure at f/8. This was mainly because the lamp was a bit heavy to be holding up like this for 6 seconds but also because a shorter exposure helped cut down on the ambient light bleeding in to the background. While the shutter was open I slowly arced the lamp from left to right to paint the entire arrangement and blur the shadows. The resulting image (top) ended up with shadows that were much softer at the subject with a nice gradual fall off of the light into the background. I couldn’t have done much better with an actual soft box in a studio ;-)

With a nice looking exposure I pulled the image into Lightroom to adjust the white balance (2625K) and apply my standard Sharpness (14), Detail (51), Clarity (30), and Vibrance (+25) settings. I also pushed the Recovery up to 73 to help correct some over exposure of the reds and knock back the highlights on the shiny green leaves a bit. A bit of final cropping (always leave room for cropping!) and off the image went to my father in-law.

Pocket Camera Bokeh Tutorial

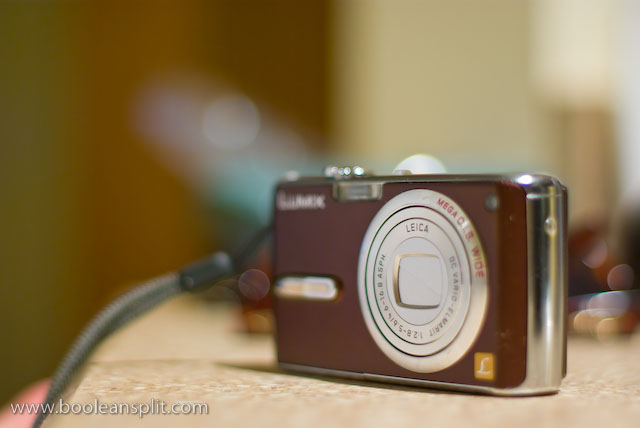
Panasonic Lumix FX07

Yesterday I posted a tutorial on photographing bokeh with a DSLR. Today I am going to attempt to do the same about pocket cameras. Please take a minute to read over the first part of my DSLR Bokeh Tutorial to familiarize yourself with the basic concepts of what bokeh is and how it is typically created. The photo above (taken with my Pentax K10D & 50mm f/1.7 SMC-A lens) is the closest most people think you can get to photographing bokeh with a compact pocket camera ;-)

The truth is you can shoot bokeh with a pocket or “push here dummy” (PhD) camera, but there are a few things you need to understand about the way they work first so you can set the camera up and compose your shot properly. The two biggest hurdles for getting good bokeh shots on the typical pocket camera are the extremely small objective lens (and resulting small aperture) and the auto focus system. At this point I should mention that there are “pocket” cameras with manual controls. Users of these cameras will have to read both tutorials and combine steps and settings to find what works with their cameras.
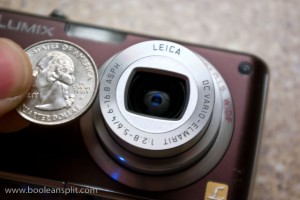
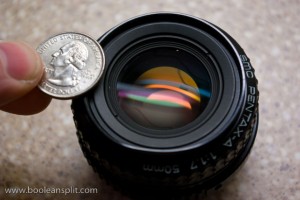
typical p&s lens & aperture size typical DSLR lens and aperture size

The first rule of bokeh is the bigger and rounder the aperture opening, the bigger and rounder the bokeh. The photos above do a pretty good job of illustrating the challenge facing PhD camera bokeh seekers. Also, since we don’t typically have control over the aperture setting used by the PhD camera, we have to be sure the camera is set up to give us the desired results.

The second challenge to overcome is the PhD camera’s fully-automatic-do-everything-for-you mindset. If you recall from my DSLR tutorial, to get good bokeh you need:

  • out of focus pin point light sources in the background
  • the largest possible aperture setting your lens will provide (f number)
  • a medium to long focal length (zoom in)
  • a short focal distance to the foreground subject
  • significant distance between the foreground subject and background points of light

Trying to get all of this in combination at the same time can be very frustrating with a PhD camera. PhD cameras are typically programmed to produce photographs where everything is in focus and evenly exposed. To get decent bokeh out of your pocket camera you have to play a few tricks on it’s single-minded little silicon brain. I did a little playing around with the trusty little Panasonic Lumix FX07 above this afternoon to illustrate this tutorial.

TUTORIAL:

First, we need to set up the camera. Most PhD cameras come out of the box in full-on idiot mode. These “Auto” settings are great for taking snapshots but leave very little room for creative control. There is usually a “Manual” or other mode that allows greater control over the camera’s settings. I suggest that you use this mode for this exercise (and everything else). However, since there are so many PhD cameras out there (with each having its own user interface) I’m going to stick to settings that should be universally addressable. If you are unsure how to change any of these settings please refer to your camera’s user manual.

Step 1: Turn off the flash (IMO you’ll be a better photographer if you never turn it back on).
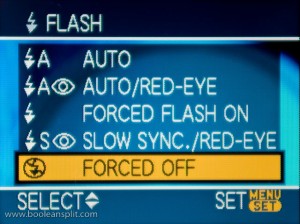
flash off

The PhD camera is going to try and fire the flash to fill in all the darkness between your bokeh balls. Not very helpful.

Step 2: Set the ISO to 200.
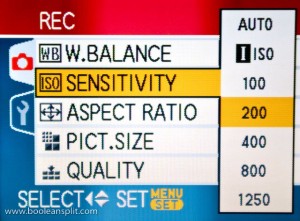
ISO 200

By forcing the camera to use a relatively slow ISO speed we ensure that the PhD’s brain will dial up the largest aperture opening to try and compensate for the lack of light while keeping the shutter speed as fast as possible.

Step 3: Turn on Image Stabilization (if available).
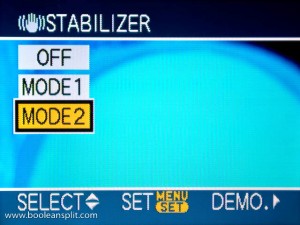
IS on

Image stabilization will help compensate for camera shake in what is bound to be a rather slow exposure. If you do not have IS you may have to play around with your ISO setting and/or use a tripod.

Step 4: Select MACRO focus mode.
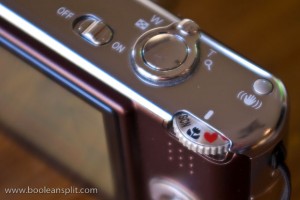
MACRO focus mode

Macro focus mode will enable us to dial in a very short focal distance to maximize depth of field.

Now that the camera is properly set up you need some nice pin point sources of light. Again, a Christmas tree on the far side of your living room makes an excellent subject this time of year. As we have not yet decorated our tree, some Christmas tree lights on the kitchen counter will have to do for this tutorial. Remember the Golden Rule of tutorials: “do as I say, not as I do” :D

Step 5: Find some pin point sources of light in a relatively dark setting.
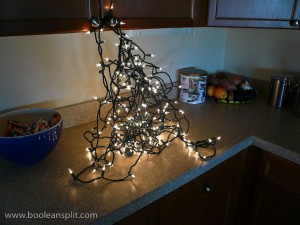
Christmas lights

My Lumix has a 3X zoom but the macro setting only works in the widest zoom position so these series of shots are at the widest zoom setting. If your camera can still focus in macro mode within about 6″ of the front of the lens when zoomed out then try zooming out for this tutorial. Otherwise, just do what I did and play with the distance to the lights (I was only 4-5′ away from this small section of lights- 10-12′ is likely a better distance from a full-on Christmas tree).

Step 6: Focus on something small up as close to the front of the camera lens as possible (half press and HOLD of the shutter button only-do not take the picture yet).
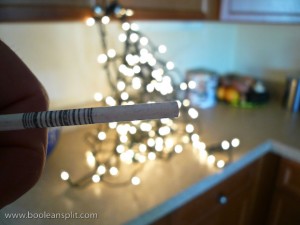
focus the camera

Here I’m using the stick from a Dum Dums lollipop. I like the sucker stick because it is small and white but its round shape provides enough highlight and shadow for the contrast detect auto focus to lock onto it. If you use your finger the camera will have difficulty focusing and the exposure will likely be blown out. Since PhD cameras lock exposure and focus at the same time, the trick here is to pre-focus on something very small in the foreground while not blocking too much light from the background and ruining the exposure of the bokeh.

Step 7: Move the foreground object from in front of the camera and fully depress the shutter button to take the picture.
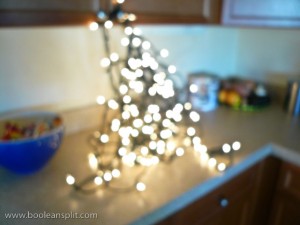
pocket camera bokeh

Admittedly this has a lot to be desired as it has not reached the heights of bokeh-dom as are possible with a DSLR and large aperture lens. However, it is bokeh and it was shot with a PhD pocket camera. Adding a subject back into the foreground after pre-focusing on the small foreground object (using the LCD viewfinder to achieve focus by manually moving the camera and/or subject in front of the lens while continuing to hold the shutter button at the halfway point) can make for some pretty interesting bokeh shots that will impress your friends and neighbors (unlike this example).
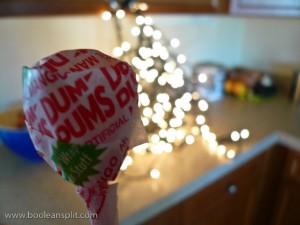
Dum-Dum bokeh

Happy pocket camera bokeh-ing! Let me know how it goes.

UPDATE:

So, we finally got our tree up and I took the opportunity to try my technique out for reals. This is the best I could get with my Panasonic Lumix FX07:
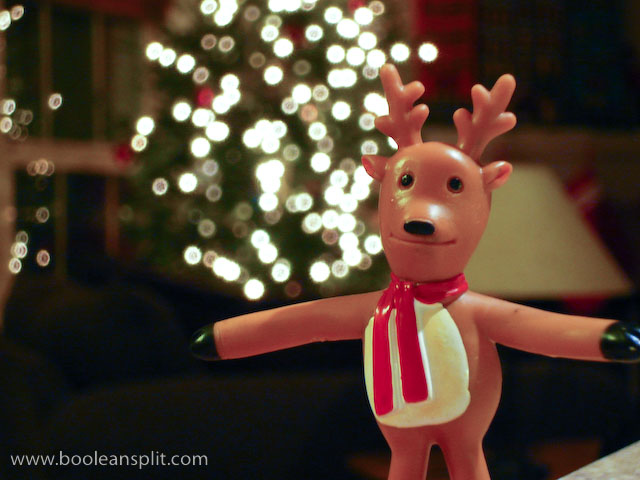
Panasonic Lumix FX07 bokeh

Not bad, but I figured the limited macro capability of my Lumix might be holding things up a bit so I borrowed the wife’s 3 year old Canon PowerShot SD400. Canon PhDs tend to feature extremely close macro focus capability. Sure enough, the results this time around were really not half bad:
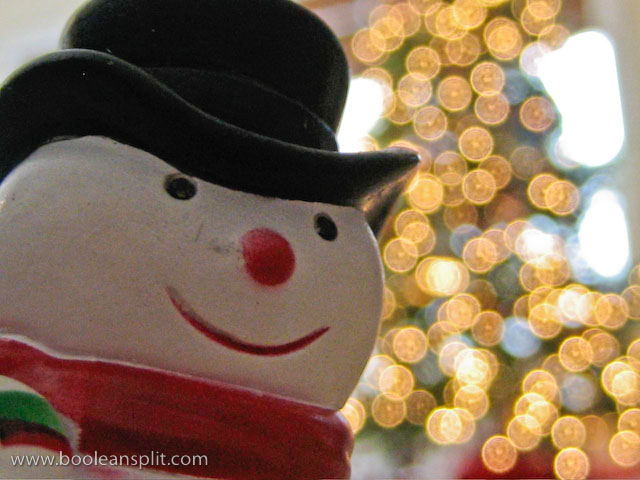
Canon SD450 bokeh

Merry Christmas!

Make wonderland out of this concrete jungle

ISO 100, 18mm, f/20, 30 seconds, IS off

I grew up in Mountain Brook, Alabama and these Christmas decorations always put me into the holiday spirit. I took this 30 second exposure back during Thanksgiving. I used a tripod and the 2 second self timer delay to prevent camera shake. I experimented with a few settings while in manual mode to get the right balance of ISO, aperture and shutter speed. I love all the starbursts from the small aperture and the way the wet streets reflect all the lights. I had another shot with no headlight trails but I liked they way they added some motion to this otherwise static shot.

This photo is a good illustration of where shooting RAW pays the most dividends. I know that you can get wonderful JPEGs straight out of the camera (SOOC), but I hate standing around in the rain tweaking white balance presets and hoping I got it right. Here, I just played around with my WB settings in Lightroom in the heated comfort of my living room until I got the right mix of white for the twinkle lights and blue for the sky. This is especially useful when you are shooting in mixed lighting conditions like this. I hate the orange cast sodium vapor lights give to everything. It is very difficult to remove this color cast in a JPEG but one click of the Temp slider in Lightroom and it’s all gone! (This shot = 2250 on Temp and 0 on Tint).

Here’s the original unedited shot. You can also see that I had to straighten it a bit as I didn’t realize that my tripod was a little cock-eyed on the sloping sidewalk where I was shooting.

original unedited shot

original unedited RAW shot

Anything else you want to know?

About

I'm an industrial designer and an avid hobbyist photographer. People are always asking me "how'd you do that?" So, I decided to create this site as a place to share my experiences and insights about photography, the gear and what it all means to me. I'm not sure if this site will make anyone besides myself a better photographer but I figure it's worth a try. Take a look around and let me know what you think. Thanks for stopping by!

Subscribe

Recent Posts

Categories

Pages

Flickr Friends

Links

My Sites

Archives