booleansplit.com

photos, tips, tricks, and thoughts from an avid amateur photographer


Posts tagged k10d

Pentax SMCP-DA 35mm f/2.8 Macro Limited User Review
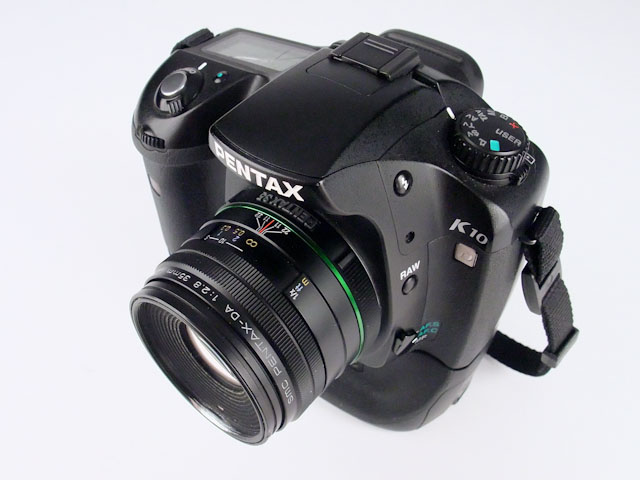
money1

Ever since I started shooting DSLRs with APS-C sized sensors I have struggled to find the perfect go-to lens for the majority of my photos. I love the speed and image quality of my old A series 50mm f/1.7 but the lack of autofocus and relatively tight F0V (75mm equiv.) makes it less than ideal for a lot of my shooting. When my friend Stephen said he was sending me his DA 35mm f/2.8 Macro Limited to take for a spin I was pretty sure that it was going to be the lens I have been looking for. I had read all the reviews so I knew that it was a sharp lens with top-notch build quality. All that remained was for me to live with it for a few days…

Pros:

  • Razor sharp starting at f/2.8.
  • Virtually no flare and very low CAs or fringing.
  • Wonderful bokeh (especially during macro use).
  • Impeccable Limited build quality.
  • Smaller and lighter than most 1:1 macro lenses.
  • Durable*
  • Ultra close focusing capability.
  • Built-in lens hood.
  • Excellent bang-for-the-buck.

*I didn’t test this lens’ durability but my friend Stephen did. Within minutes of opening the box he dropped it from a height of 1M onto concrete. The filter mount ring took the brunt of the impact (note silver filed away area in these shots) but the function of the lens was not otherwise affected. Wow!

Cons:

  • Slow focusing due to extremely long focal range.
  • Lack of focus limit switch (might correct previous point).
  • Focus ring spins during autofocus operation.
  • Included lens cap falls off too easily.
  • Extremely limited stand-off distance at 1:1 magnification (read: “none”).
  • Diffraction may be a problem above f/8 with non-macro shots.

Conclusion:

Turns out this is not the do-it-all lens I’ve been looking for. Now, before all you Pentaxians out there start accusing me of bashing Pentax again, let me explain…

The DA 35mm f/2.8 Macro Limited is one of the best macro lenses I have ever used. It absolutely blows everything away within 2 feet of the front of the lens. I love the natural look the 35mm (52.5mm equiv) FoV provides. I can easily see this being one of the best lenses available for shooting products in a studio setting. If I were still walking the floor at Asian electronics trade shows it would be my go-to lens (lots of close-up shots of products held in my hand). However, the things that make this lens so good at what it was designed to do also make it less than perfect for my everyday use. If your primary interest is up-close hand-held macro photography, look no further. Buy this lens. If, like me, you are thinking that this lens might double as a good medium focal length lens for everyday use, please read the rest of my review and decide for yourself:

More »

new toy

I love the smell...

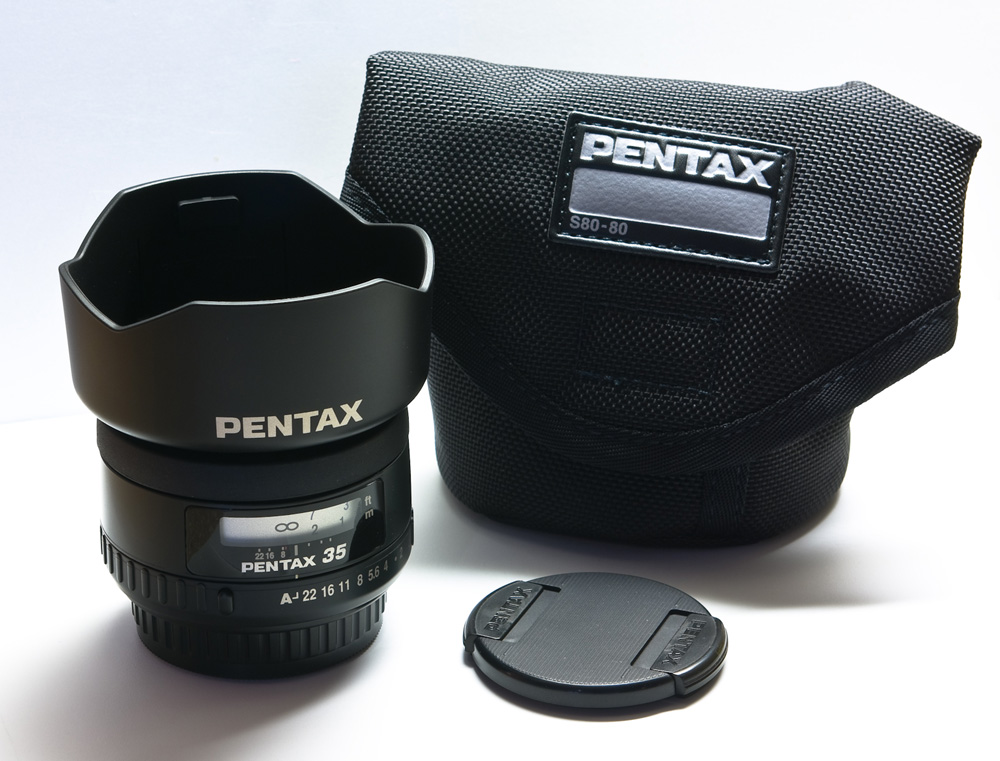
Mr. UPS brought my new Pentax FA 35mm f/2 AL lens today. It has an equivalent field of view on my K10d of 52.5mm, making it the closest you can get to a real “fast fifty” FoV on a Pentax DSLR. This lens has been discontinued by Pentax so I figured I’d better snap one up while I could. I paid $330 from B&H with free shipping. Good thing I acted when I did because it’s now not even listed on their site any more…

I’ll be testing it over the next few days for my review. Here’s a shot of the kit (shot in my kitchen studio):

imgp14281

I’m really digging the lens hood (and thus planning a new center-pinch lens cap purchace).

Christmas tree photo tutorial

Christmas ornament detail

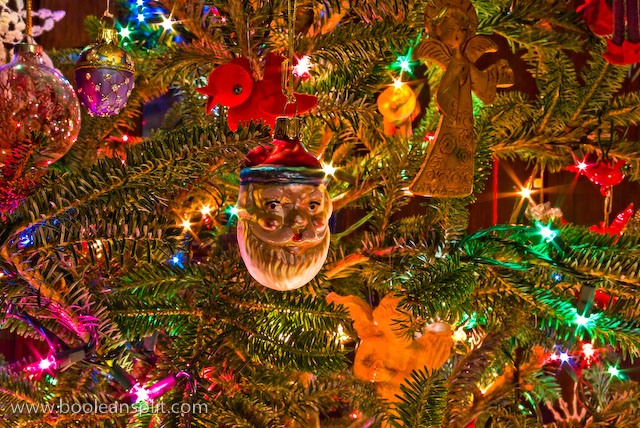
With Christmas just a couple of days away there is no doubt that many of you have been enjoying taking artistic photos of your Christmas tree and other Holiday decor. All those colorful and tiny lights make perfect bokeh fodder. And highly processed detail shots like this are also fun.

Problem is, many of us (present company included) forget to take good documentary photos of our holiday decor that we can pull out and reminisce over with the grand kids 30 years from now. While all those artsy detail shots are nice, none of them capture the full majesty of your 2008 Holiday decor. Going through my photos a few days ago I ran across this image I took of my mom’s Christmas tree back in 2005:

IMG_0096_2

This is one of my favorite Christmas photos of all time. Even in black and white (shot in B&W mode so there is no color version) I can totally feel the warmth of the twinkle lights and even smell the fresh pine fragrance of the Frasier fir tree. With this in mind I decided to figure out what makes good Christmas tree photos and do a bit of a tutorial aimed at DSLR users while I was at it.

Step 1: Turn off your flash!

flash tree

Out of the box in Program Auto mode just about all DSLRs are going to pop the flash in an attempt to achieve “proper” exposure. While this may accurately capture the image, I doubt that anyone will find the results very warm and inviting.

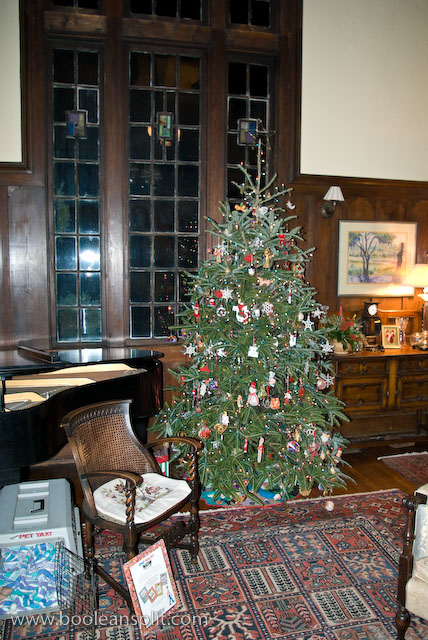
Switch your camera into Program mode and turn off the flash. With the flash off you’re likely to get something like this:

no flash, default settings

This is a 1/8 second hand-held exposure at f/3.5 and ISO 400. I actually had to dial in +1EV of exposure compensation because my Pentax K10D’s matrix metering was underexposing the image considerably trying to compensate for the brightness of the tree lights and lamp to the right just off frame. While the image more accurately captures the look and feel of the decorated tree, it isn’t very dynamic and compelling.

Steps 2 & 3: Get out the tripod and close down the aperture.

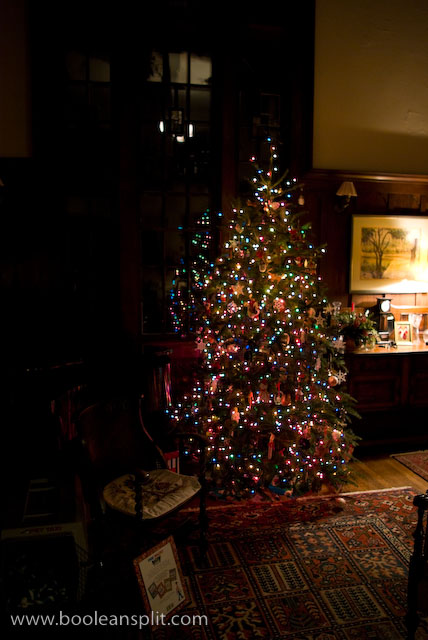
small aperture, long exposure

This shot is essentially identical to the previous shot except it is a 15 second exposure at f/16 and ISO 100 (shot in Aperture Priority mode). The small aperture does three things here. First it creates all those dreamy starbursts. Second, and more notably, it forces a long exposure. This long exposure time pulls in more ambient light, giving the entire scene more apparent dynamic range. Finally, it sharpens up the details. Zooming into this image you will find much crisper detail than the rather soft previous f/3.5 shot. As a bonus, using a lower ISO means richer colors, better detail, smoother gradients, and less noise.

Step 4: Attend to the details.

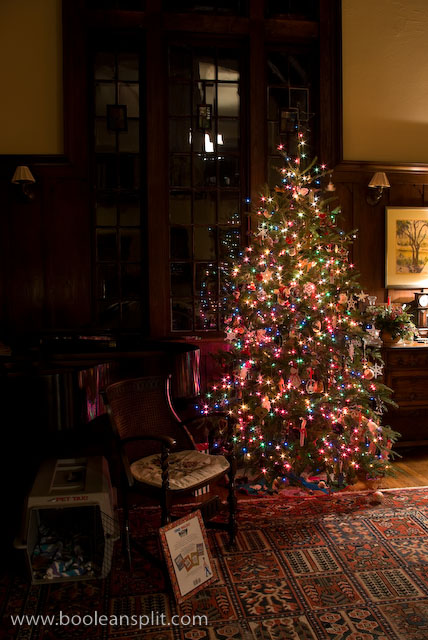
improved details

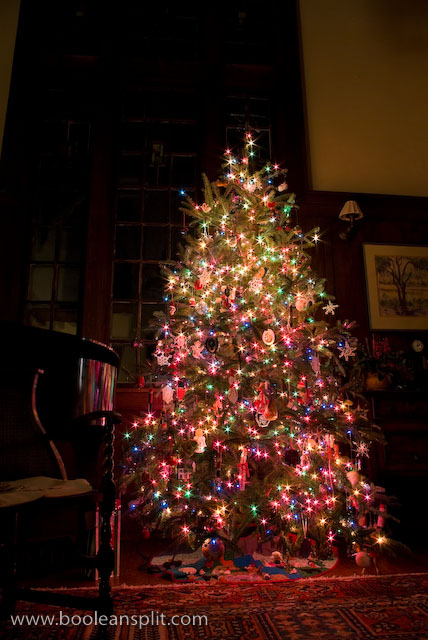
While the previous shot had come a long way from the Program Automatic blown-out flash shot, I felt there was still room for improvement. I didn’t like the reflections in the windows behind the tree coming from the upstairs lights and the lamp to the right was a bit harsh. Also, there were a few unsightly items cluttering up the foreground of the earlier shots and I wanted to add a better sense of grandeur to the shot.

For this final shot I turned off all the lights in the house except for a single 60 watt desk lamp behind the camera to add just a tad of ambient fill to the high ceilings. I moved the dog kennel and Where’s Waldo book. I then repositioned the tripod closer to the tree and lower before zooming out wider to exaggerate the scale of the tree and height of the room. This ended up being a 10 second exposure at f/16 and ISO 200- I bumped the ISO to 200 because the rest of the family was complaining about sitting in the dark during all my 20+ second shots ;-)

RAW file post processing in Lightroom was limited to setting the white balance (tungsten) and dialing in a bit of Sharpness, Clarity and Vibrance. You may want to tweak the Recovery slider a tad to compensate for any blown-out Christmas lights from the long exposure.

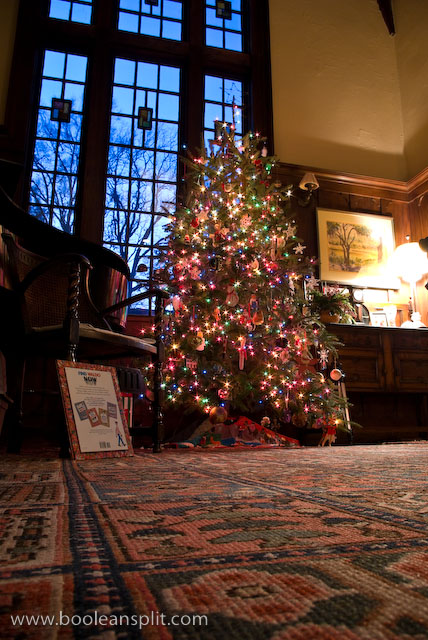
While I recommend shooting your Christmas tree photos at night, depending upon the situation, decent results can be achieved during the day. The wall of windows behind the tree here made daytime shots pretty much impossible. However, waiting until dusk I got this shot which was pretty nice:

Christmas tree at dusk

Step 5: Share!

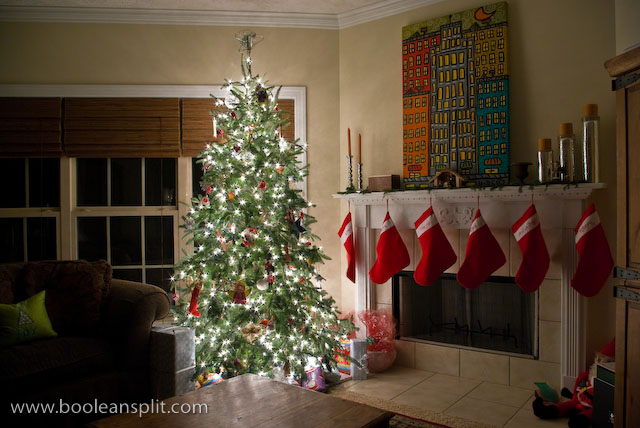
my Christmas tree

This is a picture of my Christmas tree I took last week using the small aperture/long exposure technique described above. The photos for this tutorial were shot at my in-laws house. When you travel to visit friends and family this Christmas be sure to pack your camera and tripod. Take pictures of your non-photographer friends’ trees and send them a copy as a Holiday treat! Tis the season of giving, right?

Merry Christmas!!

Christmas table centerpiece photo

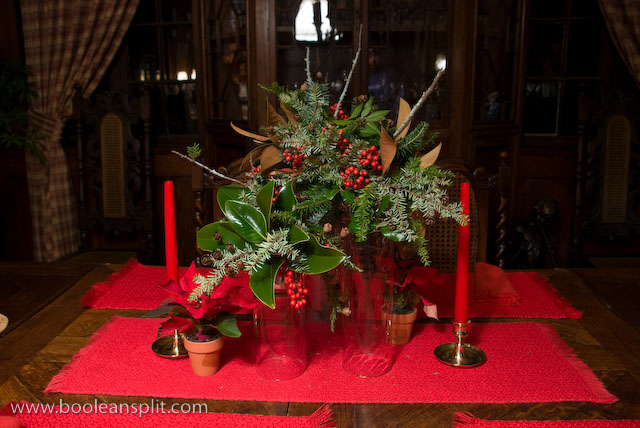
Christmas centerpiece arrangement

My father in-law asked me to take a picture of his Christmas table centerpiece arrangement so he could e-mail it to an out of town friend. My attempt at a quick snapshot didn’t meet my with my photographic standards so I spent the next hour playing with lighting to get the final shot above. This was a very challenging shot as I had to make do with what lighting I could find in the house. Here’s how I did it:

first shot with ambient light only

First of all, my in-laws’ house is DARK. Dark walls. Dark floors. Dark furniture. Dark lamps. You get the idea. Plus, it was night so the wall of windows to the left of the subject weren’t helping. Of course, I could have waited for morning but I always like a good challenge. Plus, I figured that if I got it right, a night shot would better capture the elegant and rich warmth of the table setting.

My first test shot was attampted with nothing but the incandescent  lamp light filtering in from the living room behind the camera. This required a 6 second exposure at f/8 and ISO 400 (a tripod was used so my K10D’s IS was OFF). I used f/8 to ensure that the entire arrangement was in sharp focus while the background was blurred a bit. I like the f/8 shot because there is enough background detail to clearly place this shot in my in-laws dining room while the subject focus was nicely isolated. The lighting in this first shot was too flat. I wanted more subject isolation so I grabbed a floor lamp and placed it to the left of the camera and tried again:

second shot w/ floor lamp at eye level

set-up for second shot

This set-up provided better subject isolation via lighting but the shadows seemed a bit harsh. I played around with a few combinations of settings and finally settled on 4 seconds at f/8 and ISO 100 but was still not happy with the results.

Recalling some studio shots that I did not long ago where I held a shaded lamp directly above my subjects, I decided to try holding the lamp above the centerpiece just out of the frame. I also turned off all the lights in the living room and opened the glass doors on the china cabinet behind the arrangement to eliminate the reflection of the lamp. Finally, I lit the candles to add another level of detail and ambiance to the shot.

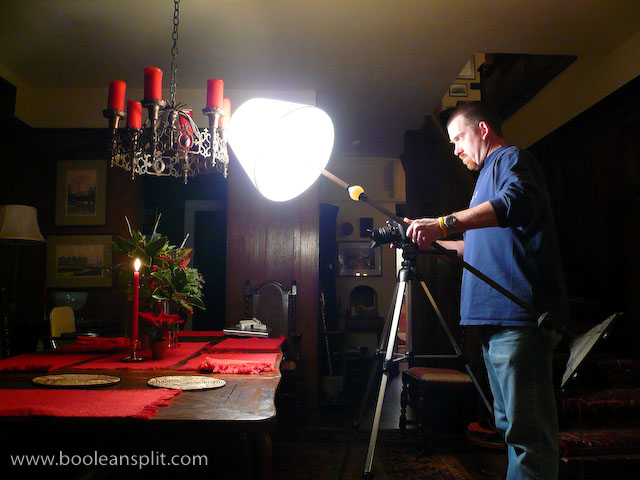
set-up for final shot

This set-up is what I used for the final shot. (Note use of lens hood to quell flare). I sped up the ISO to 200 to get a 1.6 second exposure at f/8. This was mainly because the lamp was a bit heavy to be holding up like this for 6 seconds but also because a shorter exposure helped cut down on the ambient light bleeding in to the background. While the shutter was open I slowly arced the lamp from left to right to paint the entire arrangement and blur the shadows. The resulting image (top) ended up with shadows that were much softer at the subject with a nice gradual fall off of the light into the background. I couldn’t have done much better with an actual soft box in a studio ;-)

With a nice looking exposure I pulled the image into Lightroom to adjust the white balance (2625K) and apply my standard Sharpness (14), Detail (51), Clarity (30), and Vibrance (+25) settings. I also pushed the Recovery up to 73 to help correct some over exposure of the reds and knock back the highlights on the shiny green leaves a bit. A bit of final cropping (always leave room for cropping!) and off the image went to my father in-law.

Flushed

ISO 200, 50mm, f/1.7, 1/60sec, IS on

ISO 200, 50mm, f/1.7, 1/60sec, +2 EV, IS on

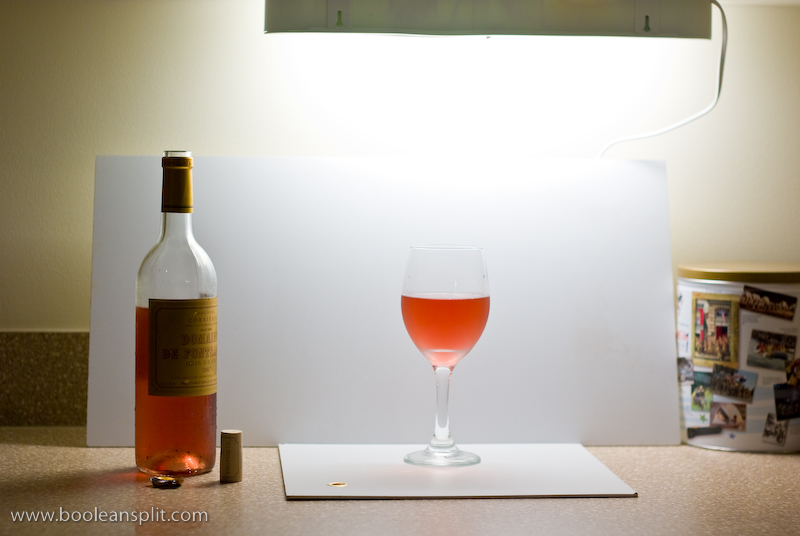
It’s quick and easy to get studio quality lighting in your home with almost no additional expense. Here’s a quick look behind the scenes of this photo:

set up

As you can see, all I did was set up a couple of white boards on the kitchen counter under a fluorescent light. I learned this trick when I was Design Director at Griffin Technology. Most of the pre-2007 product shots were done this way on a cubicle desk using the fluorescent light under the overhead storage bin. I’m happy to say that today Griffin employs a professional photographer and has a full photo studio.

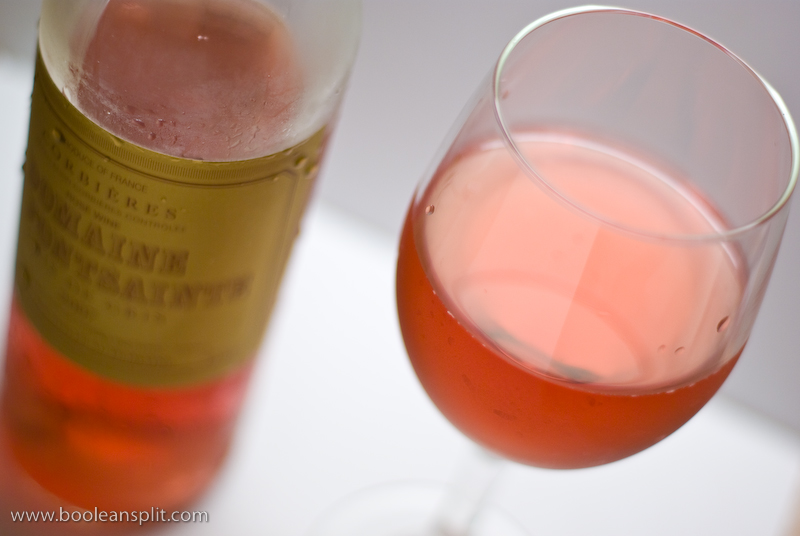
For this shot I dialed in +2 EV exposure compensation to adjust for the all-white background. By shooting RAW I was able to simply click the white balance eye dropper tool in Lightroom on the white background to dial out the color cast of the fluorescent light. I pushed up the exposure an additional +0.83 to get the high key look I was going for. Other than that, all I did was tweak the Vibrance a touch and added a bit of sharpening.

Here’s another composition using the same set up:

wine shot 2

By the way, the subject of these photos is the wonderful Corbières Domaine De Fontsainte Gris de Gris 2007 rosé imported by Kermit Lynch. This is one of my absolute favorite wines. It has a unique combination of dryness and intense fruit flavors. I picked it up for less than $10 at Kroger. Real men drink rosé ;-)

About

I'm an industrial designer and an avid hobbyist photographer. People are always asking me "how'd you do that?" So, I decided to create this site as a place to share my experiences and insights about photography, the gear and what it all means to me. I'm not sure if this site will make anyone besides myself a better photographer but I figure it's worth a try. Take a look around and let me know what you think. Thanks for stopping by!

Subscribe

Recent Posts

Categories

Pages

Flickr Friends

Links

My Sites

Archives