booleansplit.com

photos, tips, tricks, and thoughts from an avid amateur photographer


Posts tagged Christmas tree

DIY super macro DSLR lens
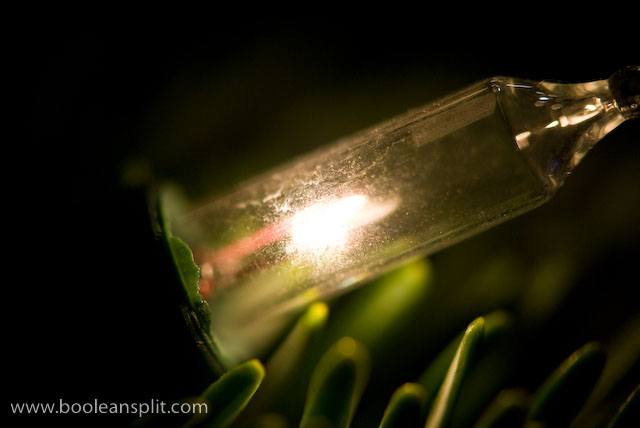
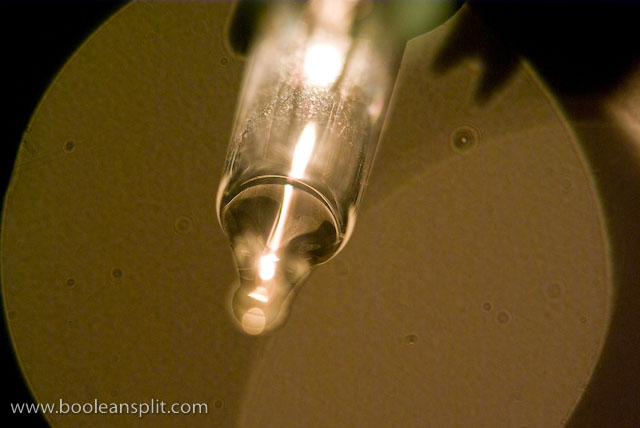
Christmas light super close-up

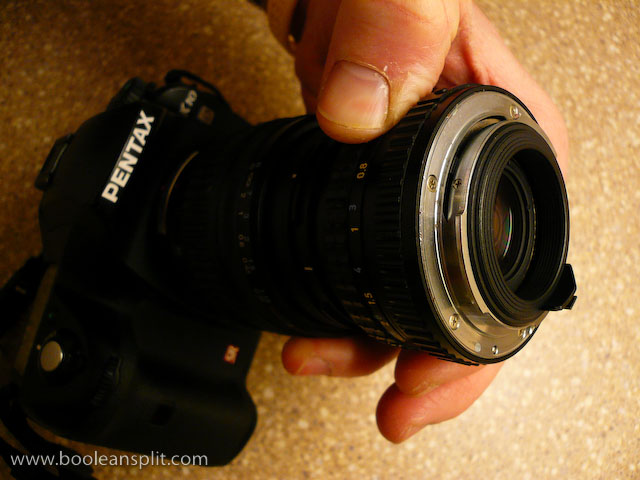
I got this idea from my Flickr friend Jim. I’ve played with this idea in the past but didn’t have the right combination of lenses to really make it work. Seems the kit lens on my Pentax K10D and my 20 year old Pentax-A 50mm f/1.7 make a pretty super duper super macro lens.

The trick is to shoot through a second lens, thus dramatically shortening the minimum focus distance of the combined lenses. This works best with a medium focal length primary lens (attached to the camera) and a fast secondary lens held (typically backwards) in front of the primary lens.
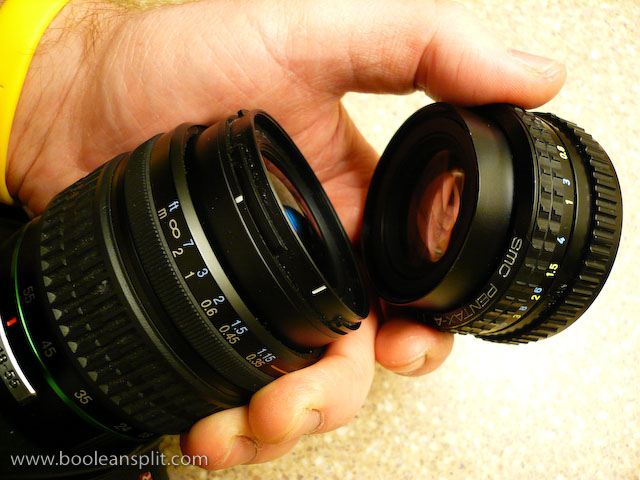
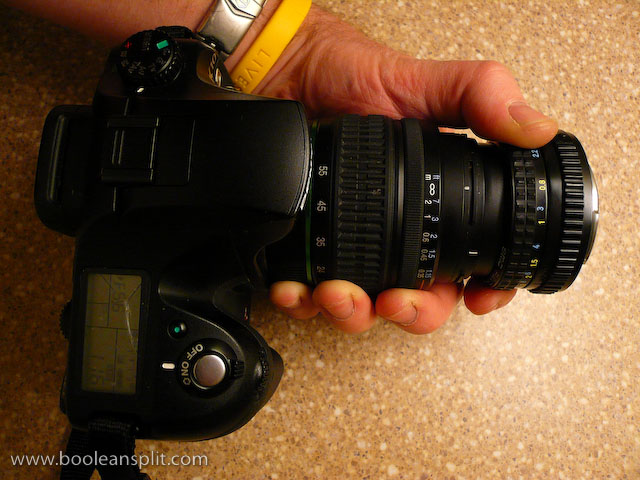
super macro lens assembly

Pentax 18-55mm kit lens with 50mm f/1.7 on front

business end

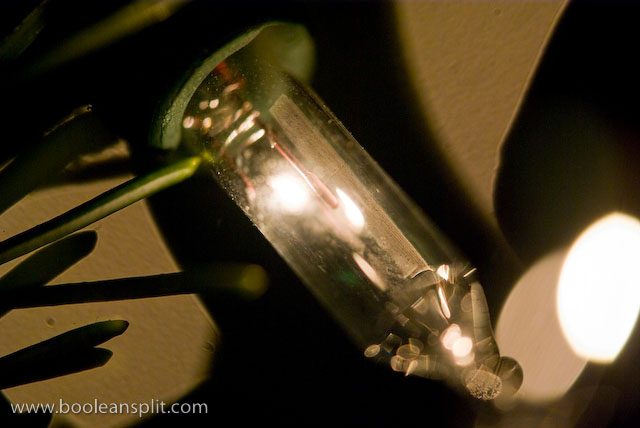
In this case, the 49mm diameter front element on the 50mm fits perfectly inside the 52mm diameter of the 18-55mm Pentax kit lens. I found that I had to zoom the kit lens all the way out to 55mm to eliminate vignetting. I tried reversing the set-up but the 18-55’s  smaller maximum aperture resulted in vignetting at all focal lengths (hence the need for a fast secondary lens). For the shot above I simply switched the camera into manual focus, dialed in a handful of positive exposure compensation and got up close on a bulb on our Christmas tree:
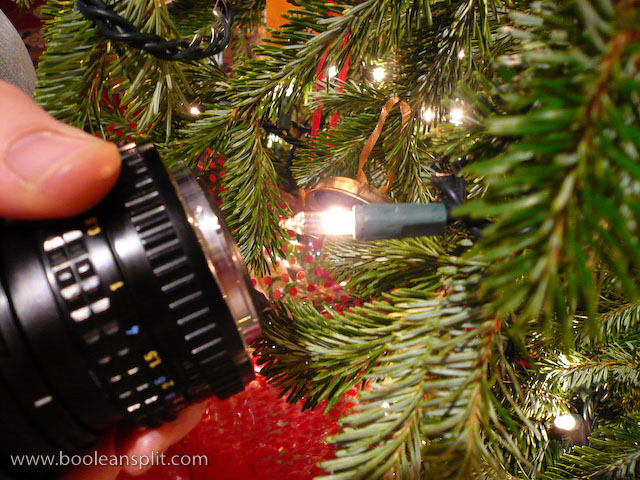
taking the shot

Depth of field is essentially non-existent- as is typically the case with all macro lenses. Changing the focus of ether lens had very little effect on the focal distance to the subject. To achieve focus you have to simply move the camera back and forth while composing through the viewfinder. The problem is that with such a micro thin slice of DOF any movement will throw off your composition. I ended up dialing up the ISO to 800 so that I could get a decently fast shutter speed (around 1/100 sec) and taking a bunch of hand held shots to get a couple of winners. Use of a tripod would have certainly helped, though holding the secondary lens in position while composing the shot on a tripod might be tricky.

A couple of additional shots taken with this set-up:
imgp6272

ISO 800, 50mm, f/5.6, 1/250sec

My understanding is that you can get similar results by simply reverse mounting certain types of lenses. There are accessories available to do this. Also, I think you may be able to use a threaded step-up adapter ring to attach the two lenses like in my set-up. The $20 screw-on close-up lens adapters (the kind that look like filters) IMO are pretty worthless unless you buy very nice quality ones but you might as well put that cash towards a dedicated macro lens.

The most popular macro accessories (besides a dedicated macro lens, of course) are extension tubes. Again, the price of entry here comes close to a decent dedicated macro lens (or zoom lens with macro capibility). There are cheaper alternatives and quality is less important if you are OK with losing auto focus and communication with your lens. I got some very nice results with my old Canon 5D and 85mm f/1.8 + 12mm Canon extension tube:

Keep in mind that all of these options will limit your focus distance to macro applications. A dedicated macro lens typically will be able to focus to infinity, making it usable as a regular lens in addition to a macro. However, if you have a couple of the right kind of lenses laying around and you want to take some close-up shots, now you know how. Thanks, Jim!

UPDATE:

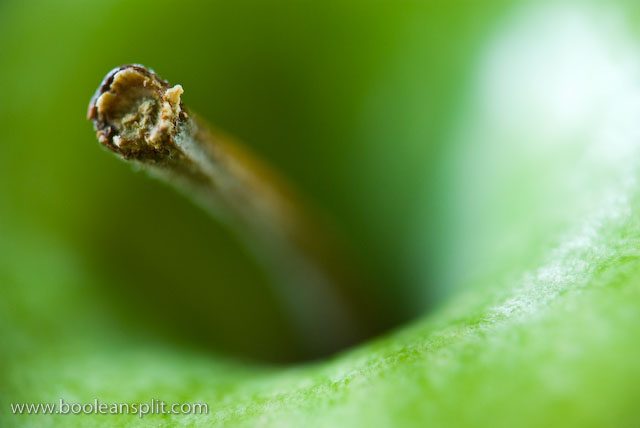
Playing around a bit more with this set-up and I got these shots:
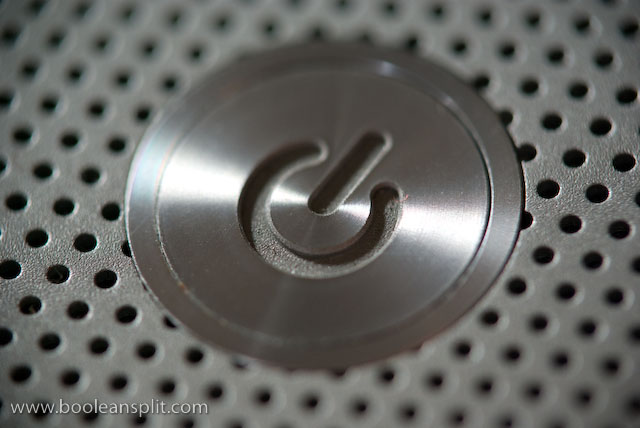
MacBook Pro power button

granny smith apple stem

It also occurred to me that one of the reasons my set-up works so well is that my old manual focus 50mm lens has an aperture ring. This means I can crank it open to f/1.7 to get a clear shot through. More modern lenses often lack an aperture ring and default to the smallest aperture when removed from the camera body. If this happens to you, look for the aperture lever on the inside face of the lens and try sliding the aperture open to get a clear view through your secondary lens.

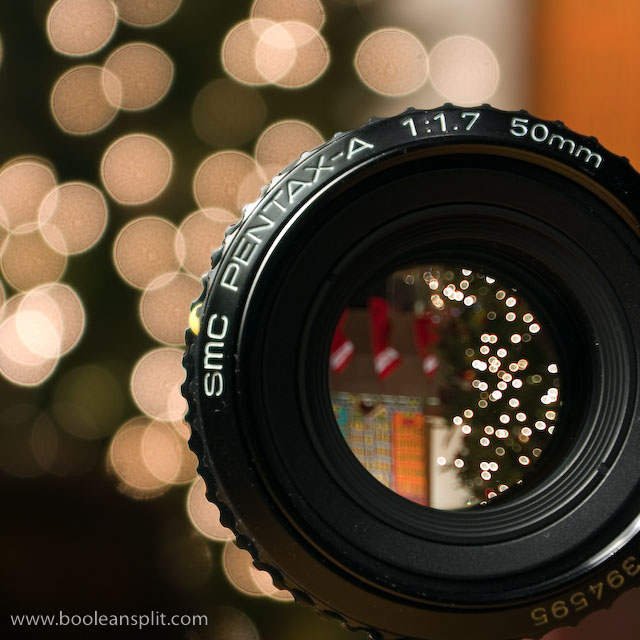
The world through my eyes

The World through my eyes

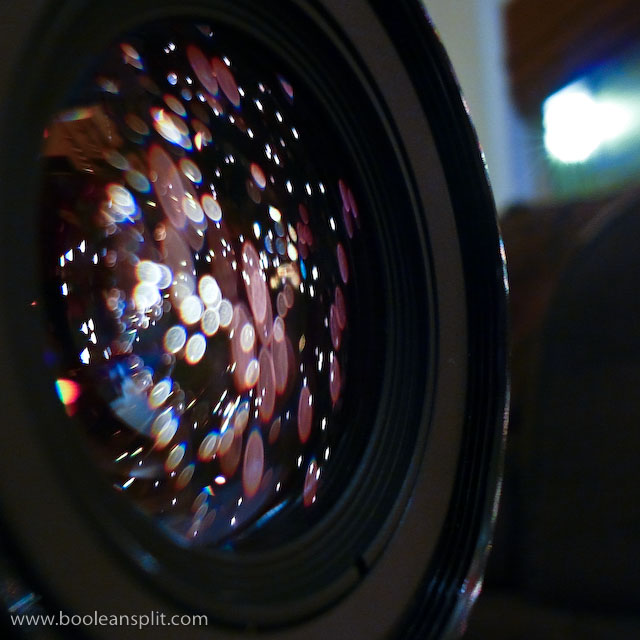
Following my experiment with shooting the Christmas tree lights reflecting in the front lens element of my 50mm f/1.7 I had the thought that it might be interesting to turn the lens around and see what things looked like through the lens. Again, this was in the interest of trying to find new ways to shoot Christmas tree bokeh (though, the old ways still work pretty well).

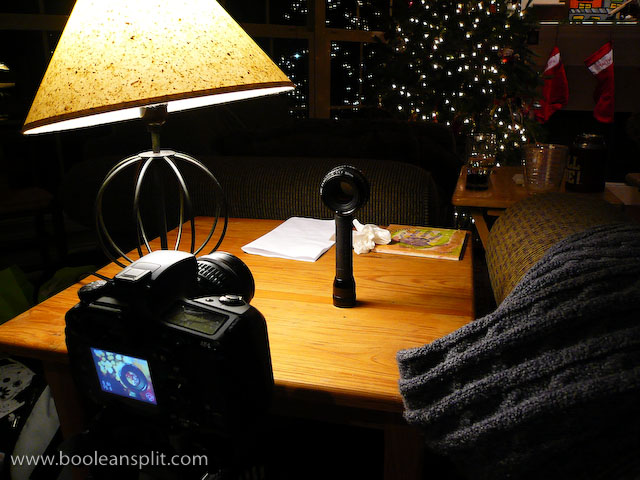
The set-up for this shot was pretty basic:

set-up shot

The 50mm lens is perched on top of a flashlight to get it up to the right height with the Pentax K10D on a tripod. The lamp to the left provides fill light for the front of the lens. I used the rule of thirds to frame the shot (knowing that I was going to crop to square later to eliminate the flashlight). I set the ISO to 100, zoomed to 55mm and selected an aperture of f/5.6 (the largest aperture my kit lens can achieve at 55mm). I dialed in the focus on the front of the lens manually before tripping the 0.6 second shutter with the 2 second delay self timer.

Post processing in Lightroom was limited to cropping, white balance (tungsten) and my usual mix of standard processing tweaks for this camera:

  • Clarity: 39
  • Vibrance: +25
  • Sharpening: 48
  • Detail: 49
  • Defringe: All Edges

Everything else was left at the Lightroom defaults.

The main thing to take away from this photo is that it doesn’t take much effort to do this kind of stuff. From start to finish this shot took me less than 5 minutes (including taking several test shots and set-up shots for this post with a 2nd camera). The only set-up required was balancing the lens on the end of the flashlight and tilting the lamp shade a touch to get the light right.

Oh the bokeh I have seen

Oh the bokeh I have seen

Sometimes cool pictures just come from thinking outside the box a bit. Here I was sitting in front of the Christmas tree contemplating what kind of unique Christmas tree bokeh photo I could take when I thought of my recent experience capturing bokeh with my pocket camera. I got to thinking that my 50mm f/1.7 lens might make a good subject for a shot, rather than simply the tool for capturing them.

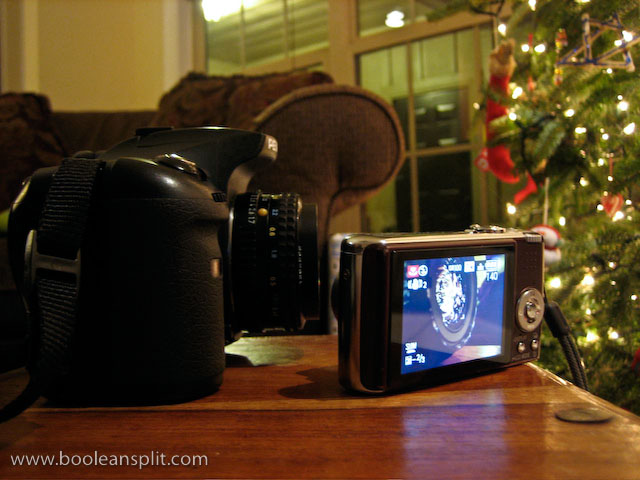
The set-up for this shot was pretty simple. I placed my Pentax K10D DSLR with the 50 attached on the coffee table in front of the Christmas tree. Next, I set my Panasonic Lumix FX07 on the table in front of the K10D and framed up the shot. I wasn’t happy with the vertical angle so I placed a quarter under the front edge of the bottom of the Lumix to prop it up a bit.

set-up shot

As you may be able to see, I also dialed in -2/3EV in exposure compensation. I’ll save it for another post, but understanding and properly using exposure compensation is one of the most important steps to good photography. Anyway, at this point all that was left was to do was fire, download, crop, and post.

In my opinion, the photo turned out pretty nice. I may try and re-shoot it with my K10D and 18-55 kit lens (with the 50mm not attached to the camera). If I do I’ll post the result here.

UPDATE:

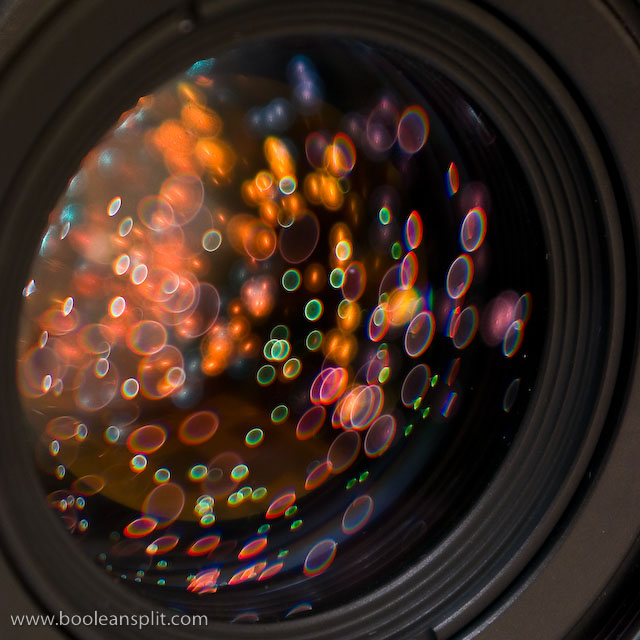
Re-shoot with the K10D and processed through Lightroom. This was one of those shots where when you see the image for the first time you say “whoa”. Pretty cool stuff!

Oh the bokeh I have seen II

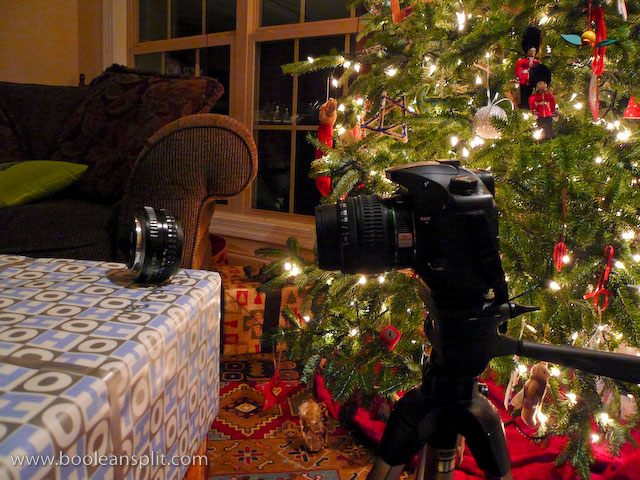
Behind the scenes:

Oh the bokeh I have seen II set up

Photo stats: ISO 100, f/5.6, 55mm, 4.0sec, IS off (tripod), 2 sec self timer release. Cropped, adjusted white balance and added a bit of sharpening in Lightroom.

About

I'm an industrial designer and an avid hobbyist photographer. People are always asking me "how'd you do that?" So, I decided to create this site as a place to share my experiences and insights about photography, the gear and what it all means to me. I'm not sure if this site will make anyone besides myself a better photographer but I figure it's worth a try. Take a look around and let me know what you think. Thanks for stopping by!

Subscribe

Recent Posts

Categories

Pages

Flickr Friends

Links

My Sites

Archives