booleansplit.com

photos, tips, tricks, and thoughts from an avid amateur photographer


Archive for December, 2008

Premium compact camera test

dpreview.com (best digital camera review site on the web) has just posted their comprehensive premium compact camera test. No surprise that the Canon SD880 IS is a favorite. I have owned a number of Canon point-and-shoot (p&s) cameras over the years- including the predecessor to the 880- and they have all performed at a very high level in all areas. Anytime someone asks for a recommendation for a digital p&s for a non-enthusiast I always point them towards the Canons. (BTW, I usually point enthusiasts toward Panasonic’s Lumix line of pocket cameras.)

The surprise here is that the Fuji FinePix F100fd ended up the Editors’ choice. It seems that Fuji has come a lot closer than the Big Brands to solving the high ISO noise problems typically associated with digital p&s cameras’ tiny sensors. I have zero experience with Fuji cameras but at under $300 on Amazon I might have to give it a shot as well as revising my recommendations. Chime in the comments if you have any experience with the Fuji p&s cameras (or any other favorites).

UPDATE: Check out Stephen Woolverton’s Flickr set of high ISO shots from the F100fd he ran out and bought immediately after reading this blog post ;-) Absolutely amazing stuff. ISO 12,800 looks like my Pentax K10D DSLR @ 800. Maybe I should consider trading down

Flushed

ISO 200, 50mm, f/1.7, 1/60sec, IS on

ISO 200, 50mm, f/1.7, 1/60sec, +2 EV, IS on

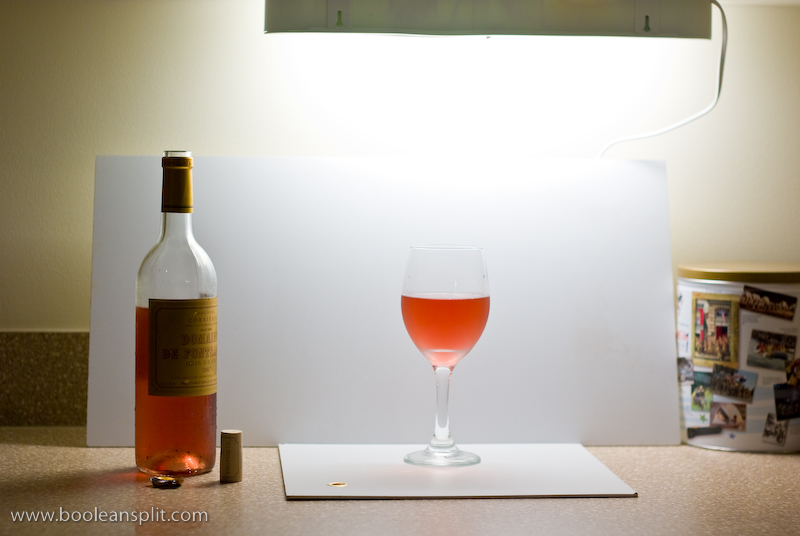
It’s quick and easy to get studio quality lighting in your home with almost no additional expense. Here’s a quick look behind the scenes of this photo:

set up

As you can see, all I did was set up a couple of white boards on the kitchen counter under a fluorescent light. I learned this trick when I was Design Director at Griffin Technology. Most of the pre-2007 product shots were done this way on a cubicle desk using the fluorescent light under the overhead storage bin. I’m happy to say that today Griffin employs a professional photographer and has a full photo studio.

For this shot I dialed in +2 EV exposure compensation to adjust for the all-white background. By shooting RAW I was able to simply click the white balance eye dropper tool in Lightroom on the white background to dial out the color cast of the fluorescent light. I pushed up the exposure an additional +0.83 to get the high key look I was going for. Other than that, all I did was tweak the Vibrance a touch and added a bit of sharpening.

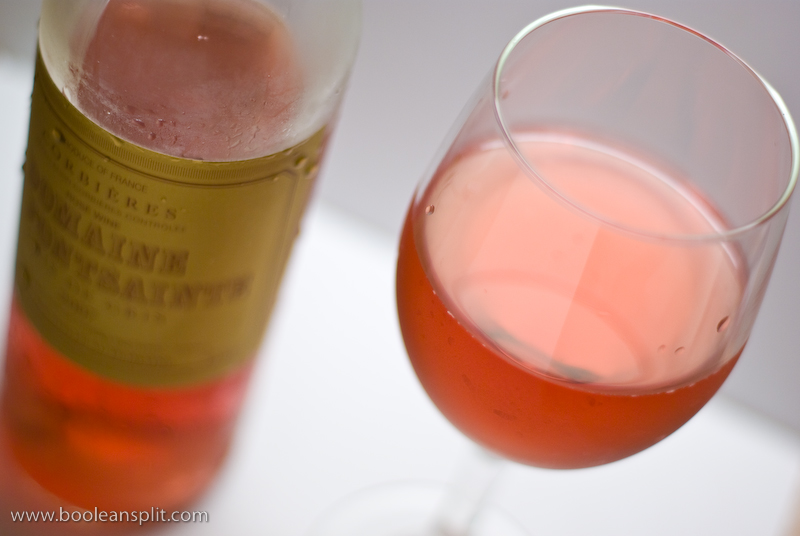
Here’s another composition using the same set up:

wine shot 2

By the way, the subject of these photos is the wonderful Corbières Domaine De Fontsainte Gris de Gris 2007 rosé imported by Kermit Lynch. This is one of my absolute favorite wines. It has a unique combination of dryness and intense fruit flavors. I picked it up for less than $10 at Kroger. Real men drink rosé ;-)

DSLR Bokeh Tutorial

bokehpalooza

It seems that many Flickrites out there are struggling to get good bokeh shots. The good news is that shooting bokeh is one of the easiest photographic techniques to learn. Unfortunately, it is also one of the hardest to master. Here I will attempt to get you started with the basics. You’ll have to do the mastery part on your own :-)

Bokeh (pronounced: “boke-aay” or “boke-uh”- I prefer the latter) is the out of focus or blurry areas of a photograph. Wikipedia has a much more detailed description of the definition of bokeh that’s worth a read. On Flickr I find most people use the term to specifically describe out of focus highlights in a photo. For the purposes of this how-to we’ll focus (pun intended) on out of focus highlight bokeh.

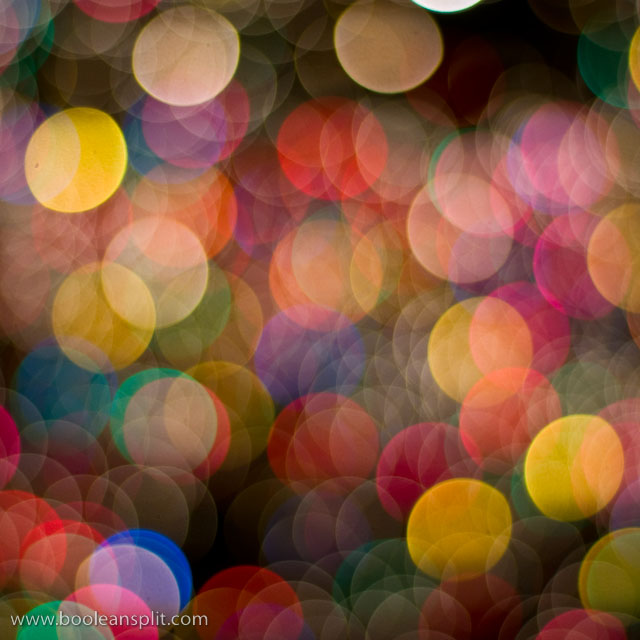
The photo above made the Front Page of Flickr’s Explore last week. I wish I could say that this was a difficult and challenging shot that called upon all of my skills as a photographer. The truth is this was one of the easiest shots I took that night. These small aperture long exposure shots were a lot more difficult to get right:

The secret to shooting bokeh lies in its definition: out of focus highlights. You need three things to shoot bokeh: pin point highlights, a large aperture and a short focal distance. When I say pin point highlights I mean small light sources. Trying to shoot a large area of light like a window or fluorescent light does not typically produce the type of bokeh “balls” that we are looking for here. Small lights like Christmas twinkle lights are an obvious source, but any light source that is far enough away will become infinitely small and can produce bokeh. I find street and car lights in the distance at night make wonderful bokeh.

Pentax-A 50mm f/1.7 SMC

Next, we need a large aperture. For the novice, the aperture is the opening in the lens that controls the amount of light that makes it through the lens and shutter to the film/sensor. The smaller the f number (or f-stop) the larger the opening. This is usually expressed as f/5.6, f/4, f/2.8, f/1.4, etc. Read more about aperture here.  Typically the larger the aperture the larger the bokeh. Fast lenses below f/2.8 like my 20 year old manual focus Pentax-A 50mm f/1.7 SMC are ideal for shooting bokeh (and is the lens I use for most of my bokeh shots on Fickr).

That is not to say that one can not get great bokeh using lenses with a smaller maximum aperture like the typical kit lenses sold with most entry level DSLRs. The trick is to make sure you are using the largest aperture possible (smallest f number). To do this I recommend switching your camera into Aperture Priority mode (typically labeled “A” or “Av” on the program mode dial) and dialing in the smallest f number possible. With most kit lenses this will be f/3.5. Here is another Explore bokeh photo of mine shot with my kit lens at f/3.5:

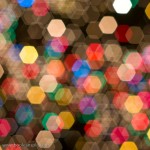
The other reason that you want the largest possible aperture your lens is capable of is to ensure that your bokeh is round and not faceted. You see, most lenses use 5-7 straight aperture blades to create the variable opening in the lens. Bokeh takes on the shape and size of the lens opening so smaller apertures will produce smaller, faceted and generally less pleasing bokeh. There are exceptions to this rule as most high end lenses use curved aperture blades that keep the aperture opening round at all f stops. However, if you’re shooting with a $1,500 Canon L series lens I trust you already know how to shoot bokeh ;-)

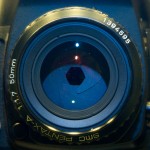
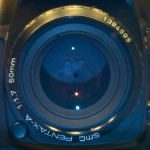
Aperture openings on a 6 bladed lens (mouse over for setting):
f/1.7f/5.6f/22

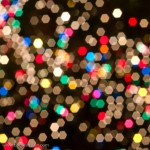
Bokeh shots at different aperture settings with this lens (mouse over for setting):
f/1.7 bokehf/4 bokehf/8 bokeh

The last component to getting good bokeh shots is the focus distance used. I have found that the shorter the focus distance to the foreground subject, the better the background bokeh I will get. The idea is to get as much distance between the subject and the bokeh producing highlights. Also, the closer you are focused to the camera the shorter the depth of field (DOF) will be. This ensures those lights way off in the background will be nice and blurred out.

The focal length of the lens is also a consideration. Depth of field is basically a function of focal length, distance to subject and aperture. At a given aperture and distance longer focal lengths result in shorter DOF. A short DOF is what we need to effectively blur the background highlights to produce bokeh. Getting close to the foreground subject and zooming to the longest setting on your lens will likely put you where you need to be to capture killer bokeh.

Here we have an example of close focus on the foreground subject coupled with a wide open aperture and longer focal length to create bokeh from small lights in the background:

When I took this shot I was at the minimum focus distance for my 50mm 1.7 lens (about 18-20″). The white (gold colored here) twinkle lights were on another Christmas tree approximately 8-10′ behind the light bulb and branch I focused on. The other smaller colored bokeh highlights were from other lights on the same tree that I focused on.

TUTORIAL:

Now that I’ve rambled on ad nauseam about all the intricate details of capturing bokeh, let’s get on to the part where you actually go do it!

For DSLR users (point ‘n shooters will have to wait for another tutorial):

  1. Set your camera to Aperture Priority mode (A or Av on the program dial).
  2. Select the smallest possible aperture (f) number for your lens (should be ≤f/4).
  3. Switch your camera to manual focus and manually adjust the focus to the closest setting.
  4. Zoom your lens to somewhere around 50mm.
  5. Find some nice points of light at a distance of 10′ or greater from the camera (your Christmas tree is the perfect subject this time of year).
  6. Fire away!

If you get a shutter speed that’s too slow (ie: less than 1/30 second), try bumping the ISO up to 400 or more. If you do the Christmas tree thing what you should get is something like this:

Depending on how dark the background is (darker usually = better) you might have to dial in some exposure compensation to get your bokeh to really pop. This image looks like it came out fine without any, but I often have to dial in +2/3 to +1 EV for my 50mm 1.7 on my Pentax K10D.

Next, try putting a subject of some sort in front of the camera at the minimum focus distance (or there about) with the bokeh highlights in the background. It’ll take a little playing around with subject matter and lighting (both foreground and background) but in no time you should be shooting bokeh like a pro! For more examples, be sure to check out my bokehliscious set on Flickr.

Please let me know in comments if this is helpful to you and/or if you have any questions or suggestions. Also, feel free to post links of your bokeh attempts for everyone to enjoy. Thanks for stopping by.

Happy bokeh-ing!

UPDATE: This is my single most popular post on my blog. Please let me know what else you would like for me to share about bokeh!

Make wonderland out of this concrete jungle

ISO 100, 18mm, f/20, 30 seconds, IS off

I grew up in Mountain Brook, Alabama and these Christmas decorations always put me into the holiday spirit. I took this 30 second exposure back during Thanksgiving. I used a tripod and the 2 second self timer delay to prevent camera shake. I experimented with a few settings while in manual mode to get the right balance of ISO, aperture and shutter speed. I love all the starbursts from the small aperture and the way the wet streets reflect all the lights. I had another shot with no headlight trails but I liked they way they added some motion to this otherwise static shot.

This photo is a good illustration of where shooting RAW pays the most dividends. I know that you can get wonderful JPEGs straight out of the camera (SOOC), but I hate standing around in the rain tweaking white balance presets and hoping I got it right. Here, I just played around with my WB settings in Lightroom in the heated comfort of my living room until I got the right mix of white for the twinkle lights and blue for the sky. This is especially useful when you are shooting in mixed lighting conditions like this. I hate the orange cast sodium vapor lights give to everything. It is very difficult to remove this color cast in a JPEG but one click of the Temp slider in Lightroom and it’s all gone! (This shot = 2250 on Temp and 0 on Tint).

Here’s the original unedited shot. You can also see that I had to straighten it a bit as I didn’t realize that my tripod was a little cock-eyed on the sloping sidewalk where I was shooting.

original unedited shot

original unedited RAW shot

Anything else you want to know?

Where do I find this stuff?

ISO 100, 50mm, f/1.7. 1/15 sec, +7/10EV, IS on

Welcome to my new photo blog! Please take a minute to read my about page for more information about this new venture of mine. The short version is this: people are always asking me “how did you do that?” and “where did you take that?” so I thought I’d create a website where I could go into greater detail about those things than is feasible on Flickr.

The photo above was taken at the Home Depot in Opelika, AL with my Pentax K10D and 50mm f/1.7 SMC-A lens. I often take my camera with me shopping as I have found supermarkets and home centers to be great sources for photographic fodder. In this case I was looking specifically for Christmas light bokeh and knew that the home centers (we hit both Lowe’s and Home Depot on this outing) would provide me with the appropriate subject matter and the right environment for me to shoot it in the middle of the day. Lowe’s was a bit of a let down on the Christmas lights but Home Depot had a dozen decorated and illuminated trees standing guard just inside the front door.

This was the only shot I took of the trees as we were in a bit of a rush by this time. The keys to success here were having the camera properly set up ahead of time and shooting RAW. The K10D tends to underexpose in an effort to retain highlight detail in JPEG images. However, the RAW files tend to have 1.5-2 stops of additional headspace (as do most RAW files). My old manual focus 50mm f/1.7 overwhelms the exposure meter in the K10D at anything below f/2.0 so I am in the habit of dialing in +2/3 of exposure compensation whenever I’m shooting it wide open (which is my preferred way to use this lens).

I generally shoot in aperture priority mode, using the front control wheel to adjust exposure compensation and the rear to dial in the desired aperture (custom configured in the K10D settings menu). Obviously I’m shooting manual focus with this lens. I typically only use the center focus point whether I’m shooting manual or auto focus as I’m a focus-and-recompose type of shooter. The K10D has a nice feature wherein the focus point and the focus confirmation icon in the viewfinder both light when manual focus is achieved. I have left the focus confirmation beep turned on as an additional aid in manual focusing this lens. At f/1.7 there is essentially no depth of field and it is next to impossible to determine correct focus through the reduced viewfinder of a crop sensor camera- a problem I did not have on my old Canon 5D ;-)

For this shot, the Christmas trees were displayed on a raised section of warehouse rack shelving (sorry, no establishing shot for this post). I simply walked up to the first tree, set the focus to its closest setting (0.45M on this lens) and honed in on one of the light bulbs. I then rotated around that point until I saw some good bokeh balls in the background and fired. The secret to this kind of awesome bokeh is shooting wide open and putting as much distance between the foreground subject and the points of light in the background as possible. Very high end lenses (like Canon’s professional L series) generally have curved aperture blades which will produce nice round bokeh balls at just about any aperture setting. With most lenses and their straight bladed apertures, it’s best to shoot wide open to get nice round bokeh like this.

When shooting in manual focus the K10D does not lock exposure unless focus is also locked. Since I focused on the light bulb then recomposed with it slightly off center, the exposure adjusted slightly and let more light in. This was exactly as I planned it as I could tell from the relatively high initial shutter speed (1/100sec) that the light bulb was blowing out the exposure. The unprocessed and un-cropped RAW image looked like this:

the original image as shot and unprocessed (LR default import settings)

I could tell from the LCD that the image was a little flat but the histogram looked good so I quickly caught up with the wife to complete our shopping task. BTW, we were shopping for matchstick blinds for the living room. Another good reason to take your camera shopping is to document what you find for later review.

sizes and inventory

sizes and inventory

Also, if you are legitimately taking pictures of products that you are considering returning to purchase the stores typically do not have much of a problem if you snap a few other random photos. Just avoid taking pictures of customers (or at least avoid getting caught) as they will complain and get you a meeting with a manager. Trust me on that one :-)

Back to the photo. Once I returned home I downloaded my RAW images into Lightroom for processing. With this image I knew I wanted a square crop so that was the first order of business. Then, I applied the Direct Positive preset, dialed the Clarity up to 33, the Vibrance up to +21, Saturation +2, Sharpening to 47, and Detail up to 48. The exposure was a bit hot with the default Direct Positive settings so I pulled it down to +0.25 and nudged the Recovery up to 25. I played around with the white balance a bit but settled on the as shot settings for this image.

That’s it! Let me know what you think and if there is anything I missed. This is my first attempt at this sort of thing so your input is highly desired!

UPDATE: Check out my new Bokeh Tutorial!

About

I'm an industrial designer and an avid hobbyist photographer. People are always asking me "how'd you do that?" So, I decided to create this site as a place to share my experiences and insights about photography, the gear and what it all means to me. I'm not sure if this site will make anyone besides myself a better photographer but I figure it's worth a try. Take a look around and let me know what you think. Thanks for stopping by!

Subscribe

Recent Posts

Categories

Pages

Flickr Friends

Links

My Sites

Archives