booleansplit.com

photos, tips, tricks, and thoughts from an avid amateur photographer


Posts tagged Wikipedia

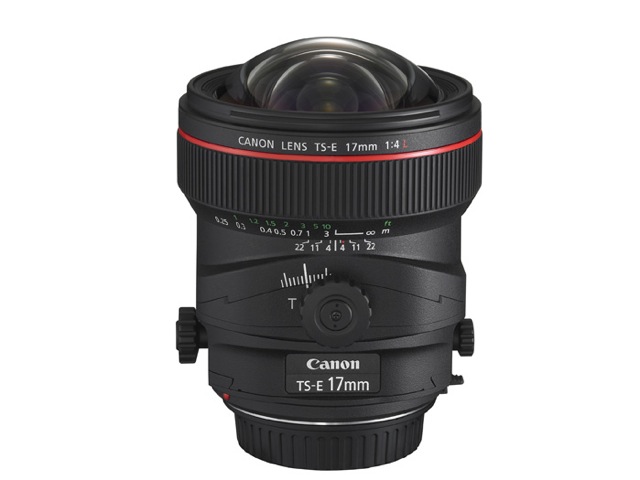
Canon TS-E 17mm f/4L

canon-ts-e-17mm

Tilt/shift photography (the real kind, not the kind you fake with a computer) can be quite fascinating and is a key component of high quality architectual photography. I have often wondered why Canon’s tilt/shift lenses didn’t come in wider focal lengths than 24mm. Tuesday, Canon announced the TS-E 17mm f/4L lens. This lens promises to make high quality wide angle tilt/shift photography available to APS-C sensor cameras (27.2mm equiv) while allowing full frame and 35mm film users to explore a whole new world of creative possibilities. If it is anything like Canon’s other TS-E lenses I’m sure (to the right people) it will be worth every penny of the $2,500 Canon is asking for it. Scheduled to ship in May.

It’s the lens that matters most

new toy

I have been thinking a lot lately about lenses and I thought I’d share some of my thoughts. I’m planning on doing a more specific lens comparison but I will save that for a later date. For now I just want to talk about my general thoughts about lenses and their applications. Why is this important? Well, as you begin to expand your collection of lenses you will soon learn that what you have really invested in is a lens system and not a camera system. Quality glass (lenses) will last a lifetime and will likely outlast the latest whiz bang technology of the latest DSLR you just bought. Hopefully by sharing my thoughts and experiences some of you will have an easier time of navigating the confusing quagmire that comes along with upgrading your DSLR’s optics and make the most out of your investment.

For this discussion I am going to primarily refer the standard 35mm film focal lengths of lenses. I will add APS-C (1.6X) focal length or 35mm equivalents in brackets [ ] where appropriate. In general, if I say 50mm I mean 50mm focal length on a 35mm film camera or full frame sensor DSLR. The reason I am doing it this way is that the 35mm equivalent focal length of a lens describes its field of view (FoV) more accurately than APS-C (or DX) format measurement does. If any of this is confusing to you I strongly suggest reading the Wikipedia page on the APS-C format before continuing.

What would I buy?

Let’s imagine for a moment that money is no object and I could fill my camera bag with whatever I wished. What would that be? While we’re in dreamland, let’s assume that the camera I’ll be shooting with all this fictional glass is Canon’s awesome new 5D Mark II. Here are the lenses I’d want to have available and why (I’m sure I could find similar choices for Nikon but I know the Canon stuff better):

  • 17-40mm f/4 L wide angle zoom. Why if money is no object would I choose the 17-40 f/4L over the faster 16-35 f/2.8L? Simple, the extra speed the 2.8 provides is not worth the extra weight.  A super wide lens like this is something I’m most likely to carry around with me while traveling and the lighter it is the more likely I’ll take it with me. Also, the idea of wide angle shots is usually to capture as much detail as possible (think streetscape, landscape or 5-year-old birthday party action) so a larger aperture is just going to work against you. I’m sure there are specific situations where the extra speed of the 16-35 f/2.8 would come in handy but for me I’d most likely choose the slower and lighter option here and just dial up the ISO as needed in low light situations. The only caveat here is if I was shooting an APS-C body. Then the 16-35mm [26-56mm] would make a logical upgrade for the standard 18-55 kit lens. See my comments below for APS-C wide angle lens thoughts.
  • 35mm f/1.4 L wide angle prime. I really like having a fast wide angle lens for available light shots of the kids around the house and for other times when a 50mm lens just doesn’t provide quite enough FoV to capture a scene the way I want to. In fact, while a 50mm lens best reproduces the magnification the human eye sees, a 35mm lens better represents the field of view our eyes can see (in focus). Having never owned a fast 35mm I can only guess but I bet it would end up being my standard lens mounted on my camera 90% of the time. Becomes a medium angle lens [56mm] on an APS-C camera.
  • 24-105 f/4 IS L zoom. This is a close call. The 24-70 f/2.8 L is a very tempting choice. I have rented both lenses and they are both superb. The 24-105 f/4 is the one I’d put in my bag though because money is no object here and I’m going to have all these other lenses to choose from. Huh? Well, if I could only have one lens it would be the 24-70 f/2.8 L. Easy. However, if I’m going to be toting around a bag full of glass the 24-105 f/4 just makes more sense. It is lighter (see argument for 17-40 above), has a wider zoom range (better for “walking around”) and has IS. There are times when a slower shutter speed (1/30-1/4 second) is what you need to capture action and IS is the only way to get get these shots w/o the hassle of a tripod. The 24-105 focal range means I would have a stabilized lens that covers all wide to medium telephoto applications. Also an awesome all-purpose [38-168mm] lens on APS-C bodies (though lacking a bit on the wide end).
  • 50mm f/1.4 USM prime. Here I go again cheaping out even though money is no object. Yes, Canon’s 50mm f/1.2L is the Mother of All fiddies. However, from what I can tell it is not that much better than the non-L 50 1.4 but it is that much bigger and heavier (and somewhat slower to focus). I know this whole weight thing is getting long in the tooth, but for the way I shoot it is important. When I travel I typically head out on foot to explore which means I have to carry my gear on my person. After spending an entire days lugging an overloaded camera bag around Hong Kong and Paris I can tell you that less is definitely more. The main problem is that you get to these wonderful places and you are faced with making the choice of picking one or two lenses and hoping for the best- or lugging your entire kit with you. I’ve done both and can say that whatever the choice the weight of what you carry always remains an issue. Studio, sports and landscape “trunk” photographers are the only ones that don’t have issues with how much stuff weighs. As for me, I carry my camera almost everywhere (including on my bike) so I want to find the best balance between size and performance. Here, the 50 1.2 just doesn’t make sense for me. YMMV. See fast prime suggestions for APS-C cameras below.
  • 100mm f/2.8 USM Macro. You can’t beat a dedicated macro lens. I like the 100 f/2.8 on a full frame body as it provides the right mix of magnification and stand-off distance from the subject. I like to shoot most of my macro shots at arm’s length. Canon’s 50mm f/2.5 Macro is OK but I have found that I often have to get too close with the camera to get the magnification I want (often blocking out the available light). Meanwhile, Canon’s 180mm f/3.5 L Macro is an awesome lens but its longer focal length pretty much requires a tripod to get decent results. APS-C photographers should check out Canon’s EF-S 60mm f/2.8 Macro.
  • 70-200 f/2.8 IS L zoom. This is one of photography’s greatest lenses. Perfect for portraiture, sports action, school plays, wildlife, the occasional macro shot, and pulling in details in just about any situation. The f/2.8 version gets the nod over the f/4 version even though it is larger and heavier. You’ll need the speed to catch those low light shots and the shorter DoF will make your subjects pop. My bet is that you’ll rarely shoot this lens at anything other than wide open. Works great on both full frame and APS-C bodies.
  • 400mm f/2.8 IS L super telephoto. Here’s where the “money is no object” part really pays off. I have always wanted a fast super telephoto for getting in tight to stuff you can’t get up close to. I’m thinking sports car racing, school plays, African safaris, and the occasional full moon. Not a lens I would carry around in my bag but definitely one I’d like to have if the situation warranted it. I’d skip the 100-400 f/4.5-5.6 IS L in favor of lens speed and ultimate image quality. Have an APS-C camera? Then your 1.6X crop factor makes this monster a 640mm f/2.8 equivalent for no extra charge ;-)

OK, so back to reality for a second. Most of us are amateurs and can not justify dropping $15K on our camera gear. Therefore, what should you take away from all of this?

  • Buy the best lenses you can afford. It will outlast your camera and you’ll never find yourself second guessing a lens purchase. If you find you don’t use a lens enough to justify keeping it, you’ll also find that pro-quality glass earns top-dollar on the used market. If you are thinking of dropping $180 on a Canon 28mm f/2.8 to get a wide angle prime do yourself a favor and save your pennies until you can step up at least to the $420 28mm f/1.8 USM. What you will gain in ultimate image quality and versatility will pay off many times over in your photographs. That 28 2.8 will end up in a drawer somewhere collecting dust as soon as you realize that its useless below f/4 anyway. Trust me. I know.
  • Do your research. This may directly contradict what I just said as you will find bargains out there. The non-L 50 1.4 I mentioned above is one example. In fact, at only $90 brand new Canon’s 50mm f/1.8 II is probably the best value in lenses anywhere. (Check out dpreview.com’s new review of the Canon EF 50mm f/1.8 II.) That being said, do your research so you know what you are getting. Personally, I would wait and save up for the 50 1.4 just to get the speed and silence of the USM focus motor. Also, the 50 1.4’s 8 bladed diaphragm produces far superior bokeh and starbursts when stopped down than the 50 1.8’s 5 bladed diaphragm. Buy the 50 1.8 II and you’ll be perfectly happy with it until you shoot one of the USM lenses. Then you’ll start beating yourself up. The best places to research are websites that actually test equipment. I prefer the-digital-picture.com, photozone.de, and dpreview.com because they use standardized testing procedures. There are blogger/photographers (like me) who “test” lenses and write their opinions about them. Take those with a grain of salt but they are usually pretty useful. Be wary of discussion forums and Amazon.com review ratings and the like. These are typically very unreliable sources for quality information.
  • Pick up a fast prime lens. My recommendation is a 50mm equivalent focal length at f/1.8 or faster. If you are shooting an APS-C sensor camera this is going to be tough. Technically you’ll need a 31mm lens to get an equivalent 50mm focal length. Sigma is one of the only lens manufacturers making a lens like this. Their 30mm f/1.4 EX DG HSM looks like it fits the bill perfectly. However, it’s relatively pricey ($500) and tests say it is very soft off center. Pentax’s SMCP-FA 31mm f/1.8 AL Limited is an ideal choice for Pentax shooters but at $800 you’ve got to be mighty deep into Pentax. 35mm focal length lenses are probably your best bet. Unfortunately, truly fast versions are usually pricey and hard to come by (see the $1,200 35mm f/1.4 L above). If you can’t find a 30-35mm f/1.8 or faster lens do what most everyone else does and put your money into a fast 50mm. It’ll end up being a bit long on an APS-C sensor camera [80mm] but at least you can start exploring the Wonderful World of Bokeh and available light photography.
  • Consider an ultra wide angle zoom. I’m not talking fisheye. I am talking at least 15-17mm on the wide end, though. A super wide angle lens opens a whole new world of photography for less money than most lens investments. I’ve already shared my feelings above about Canon’s 17-40 f/4L and 16-35 f/2.8L lenses for full-frame applications. However, neither of these fit the bill for an APS-C body. Look for something around 10mm [16mm] on the wide end. There are a number of choices depending on your camera so do your homework. I hear Canon’s EF-S 10-22 f/3.5-4.5 USM is superb. I’ve owned Sigma’s 10-20 f/4-5.6 EX DC lens and thought it was great.
  • Avoid super zooms. These are the 18-200mm+ do-it-all lenses that are so popular at camera stores and on-line discounters. Sure, the idea of one lens for every situation seems like a good idea, but the reality of making such a lens results in some pretty significant compromises in lens speed, image quality and usability. While prime lenses will always give you the best ultimate image quality they may not be the right choice for every situation. However, you will be much better off if you limit the range of your zooms and follow suggestion number one above. In my experience you can get very decent results from mid-level primes but anything other than top-of-the-line zooms are likely to suffer in more than one area (speed, sharpness, vignetting, chromatic aberrations, etc).
  • Save up for that super telephoto. Don’t waste your money on bargain brand telephoto lenses. There are a lot out there (Phoenix) but most of them aren’t worth the plastic they are made of. If dropping $5K on a lens doesn’t seem like it will ever fit into your plan then…
  • Rent before you buy. So, if you’re following my advice and buying the high dollar glass maybe you should take it for a test drive before you take the plunge. There are a number of camera equipment rental services out there. I have only rented locally while I am traveling so I can’t recommend any of the on-line services, but I hear good things about many of them. Also, renting is a great way to get those awesome once-a-year close-up Christmas school program photos of Jr. from the back row of the gymnasium. No sense putting that $5K lens in the closet until next year, right?

I hope this helps clear up the mystery of lens selection a bit for those of you who are just starting to wade into the hobby. Feel free to post specific questions in the comments or drop me an email. Those of you who are more experienced please take a moment to share your thoughts on the subject as well.

The world through my eyes

The World through my eyes

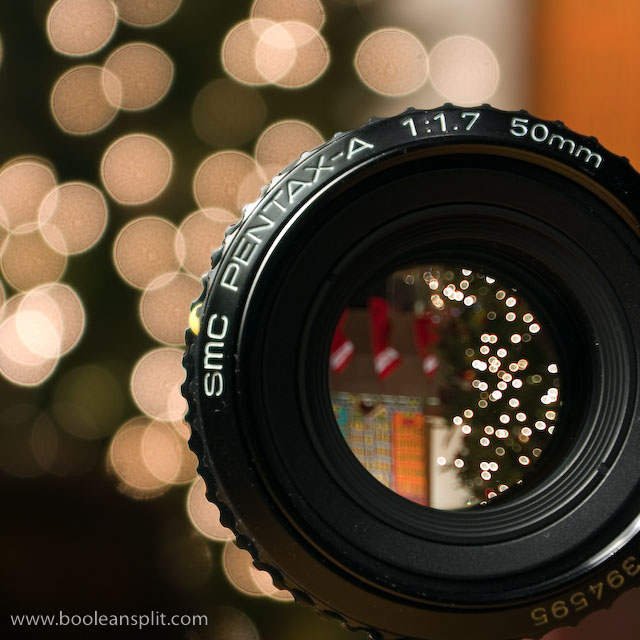
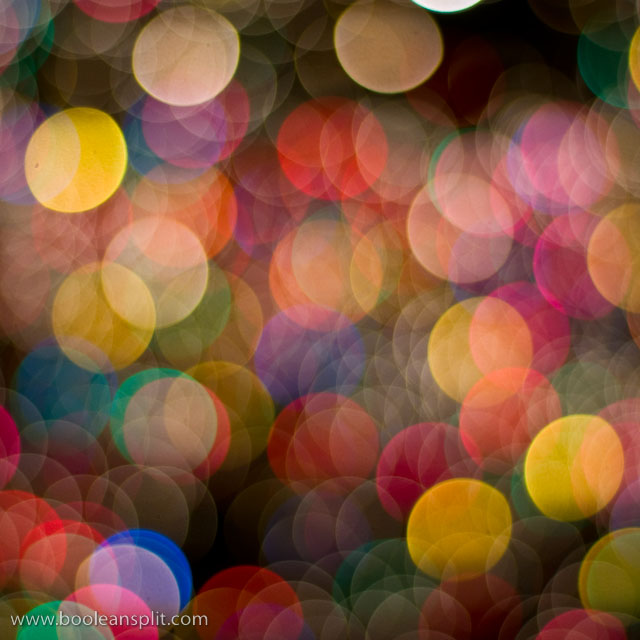
Following my experiment with shooting the Christmas tree lights reflecting in the front lens element of my 50mm f/1.7 I had the thought that it might be interesting to turn the lens around and see what things looked like through the lens. Again, this was in the interest of trying to find new ways to shoot Christmas tree bokeh (though, the old ways still work pretty well).

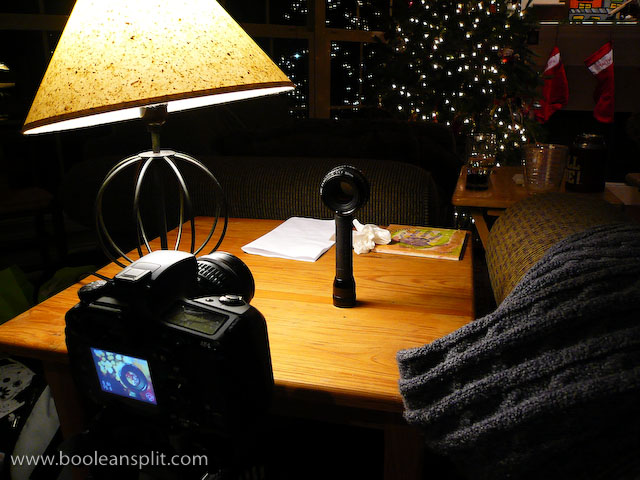
The set-up for this shot was pretty basic:

set-up shot

The 50mm lens is perched on top of a flashlight to get it up to the right height with the Pentax K10D on a tripod. The lamp to the left provides fill light for the front of the lens. I used the rule of thirds to frame the shot (knowing that I was going to crop to square later to eliminate the flashlight). I set the ISO to 100, zoomed to 55mm and selected an aperture of f/5.6 (the largest aperture my kit lens can achieve at 55mm). I dialed in the focus on the front of the lens manually before tripping the 0.6 second shutter with the 2 second delay self timer.

Post processing in Lightroom was limited to cropping, white balance (tungsten) and my usual mix of standard processing tweaks for this camera:

  • Clarity: 39
  • Vibrance: +25
  • Sharpening: 48
  • Detail: 49
  • Defringe: All Edges

Everything else was left at the Lightroom defaults.

The main thing to take away from this photo is that it doesn’t take much effort to do this kind of stuff. From start to finish this shot took me less than 5 minutes (including taking several test shots and set-up shots for this post with a 2nd camera). The only set-up required was balancing the lens on the end of the flashlight and tilting the lamp shade a touch to get the light right.

DSLR Bokeh Tutorial

bokehpalooza

It seems that many Flickrites out there are struggling to get good bokeh shots. The good news is that shooting bokeh is one of the easiest photographic techniques to learn. Unfortunately, it is also one of the hardest to master. Here I will attempt to get you started with the basics. You’ll have to do the mastery part on your own :-)

Bokeh (pronounced: “boke-aay” or “boke-uh”- I prefer the latter) is the out of focus or blurry areas of a photograph. Wikipedia has a much more detailed description of the definition of bokeh that’s worth a read. On Flickr I find most people use the term to specifically describe out of focus highlights in a photo. For the purposes of this how-to we’ll focus (pun intended) on out of focus highlight bokeh.

The photo above made the Front Page of Flickr’s Explore last week. I wish I could say that this was a difficult and challenging shot that called upon all of my skills as a photographer. The truth is this was one of the easiest shots I took that night. These small aperture long exposure shots were a lot more difficult to get right:

The secret to shooting bokeh lies in its definition: out of focus highlights. You need three things to shoot bokeh: pin point highlights, a large aperture and a short focal distance. When I say pin point highlights I mean small light sources. Trying to shoot a large area of light like a window or fluorescent light does not typically produce the type of bokeh “balls” that we are looking for here. Small lights like Christmas twinkle lights are an obvious source, but any light source that is far enough away will become infinitely small and can produce bokeh. I find street and car lights in the distance at night make wonderful bokeh.

Pentax-A 50mm f/1.7 SMC

Next, we need a large aperture. For the novice, the aperture is the opening in the lens that controls the amount of light that makes it through the lens and shutter to the film/sensor. The smaller the f number (or f-stop) the larger the opening. This is usually expressed as f/5.6, f/4, f/2.8, f/1.4, etc. Read more about aperture here.  Typically the larger the aperture the larger the bokeh. Fast lenses below f/2.8 like my 20 year old manual focus Pentax-A 50mm f/1.7 SMC are ideal for shooting bokeh (and is the lens I use for most of my bokeh shots on Fickr).

That is not to say that one can not get great bokeh using lenses with a smaller maximum aperture like the typical kit lenses sold with most entry level DSLRs. The trick is to make sure you are using the largest aperture possible (smallest f number). To do this I recommend switching your camera into Aperture Priority mode (typically labeled “A” or “Av” on the program mode dial) and dialing in the smallest f number possible. With most kit lenses this will be f/3.5. Here is another Explore bokeh photo of mine shot with my kit lens at f/3.5:

The other reason that you want the largest possible aperture your lens is capable of is to ensure that your bokeh is round and not faceted. You see, most lenses use 5-7 straight aperture blades to create the variable opening in the lens. Bokeh takes on the shape and size of the lens opening so smaller apertures will produce smaller, faceted and generally less pleasing bokeh. There are exceptions to this rule as most high end lenses use curved aperture blades that keep the aperture opening round at all f stops. However, if you’re shooting with a $1,500 Canon L series lens I trust you already know how to shoot bokeh ;-)

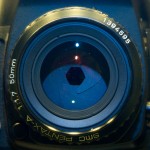
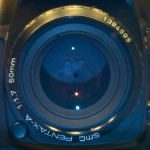
Aperture openings on a 6 bladed lens (mouse over for setting):
f/1.7f/5.6f/22

Bokeh shots at different aperture settings with this lens (mouse over for setting):

f/1.7 bokehf/4 bokehf/8 bokeh

The last component to getting good bokeh shots is the focus distance used. I have found that the shorter the focus distance to the foreground subject, the better the background bokeh I will get. The idea is to get as much distance between the subject and the bokeh producing highlights. Also, the closer you are focused to the camera the shorter the depth of field (DOF) will be. This ensures those lights way off in the background will be nice and blurred out.

The focal length of the lens is also a consideration. Depth of field is basically a function of focal length, distance to subject and aperture. At a given aperture and distance longer focal lengths result in shorter DOF. A short DOF is what we need to effectively blur the background highlights to produce bokeh. Getting close to the foreground subject and zooming to the longest setting on your lens will likely put you where you need to be to capture killer bokeh.

Here we have an example of close focus on the foreground subject coupled with a wide open aperture and longer focal length to create bokeh from small lights in the background:

When I took this shot I was at the minimum focus distance for my 50mm 1.7 lens (about 18-20″). The white (gold colored here) twinkle lights were on another Christmas tree approximately 8-10′ behind the light bulb and branch I focused on. The other smaller colored bokeh highlights were from other lights on the same tree that I focused on.

TUTORIAL:

Now that I’ve rambled on ad nauseam about all the intricate details of capturing bokeh, let’s get on to the part where you actually go do it!

For DSLR users (point ‘n shooters will have to wait for another tutorial):

  1. Set your camera to Aperture Priority mode (A or Av on the program dial).
  2. Select the smallest possible aperture (f) number for your lens (should be ≤f/4).
  3. Switch your camera to manual focus and manually adjust the focus to the closest setting.
  4. Zoom your lens to somewhere around 50mm.
  5. Find some nice points of light at a distance of 10′ or greater from the camera (your Christmas tree is the perfect subject this time of year).
  6. Fire away!

If you get a shutter speed that’s too slow (ie: less than 1/30 second), try bumping the ISO up to 400 or more. If you do the Christmas tree thing what you should get is something like this:

Depending on how dark the background is (darker usually = better) you might have to dial in some exposure compensation to get your bokeh to really pop. This image looks like it came out fine without any, but I often have to dial in +2/3 to +1 EV for my 50mm 1.7 on my Pentax K10D.

Next, try putting a subject of some sort in front of the camera at the minimum focus distance (or there about) with the bokeh highlights in the background. It’ll take a little playing around with subject matter and lighting (both foreground and background) but in no time you should be shooting bokeh like a pro! For more examples, be sure to check out my bokehliscious set on Flickr.

Please let me know in comments if this is helpful to you and/or if you have any questions or suggestions. Also, feel free to post links of your bokeh attempts for everyone to enjoy. Thanks for stopping by.

Happy bokeh-ing!

UPDATE: This is my single most popular post on my blog. Please let me know what else you would like for me to share about bokeh!

About

I'm an industrial designer and an avid hobbyist photographer. People are always asking me "how'd you do that?" So, I decided to create this site as a place to share my experiences and insights about photography, the gear and what it all means to me. I'm not sure if this site will make anyone besides myself a better photographer but I figure it's worth a try. Take a look around and let me know what you think. Thanks for stopping by!

Subscribe

Recent Posts

Categories

Pages

Flickr Friends

Links

My Sites

Archives