booleansplit.com

photos, tips, tricks, and thoughts from an avid amateur photographer


Archive for December, 2008

holiday parade photography tips

digital-photography-school.com just posted a great guide to taking pictures at all those parades that are so popular this time of year. My favorite tip is to shoot the crowd reactions. My best shots from these types of events are always of the spectators and not the activity itself.

The only thing missing is any mention of what to do for night parades. A lot of Christmas parades are at night with the only lighting coming from the holiday decorations. Here a fast lens (f/2.8 or better) is a must have. Also, shooting wider angle shots can help reduce motion blur at slower shutter speeds. It goes without saying that you will have to bump your ISO up to get hand-holdable shutter speeds. Finally, don’t be afraid to brace up against a light pole and get some long exposure motion blurred shots!

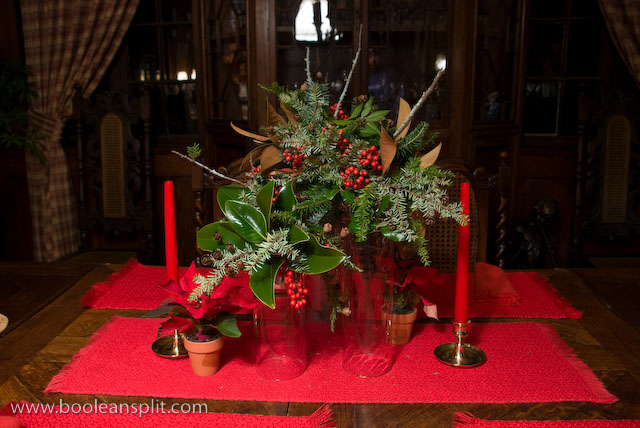
Christmas table centerpiece photo

Christmas centerpiece arrangement

My father in-law asked me to take a picture of his Christmas table centerpiece arrangement so he could e-mail it to an out of town friend. My attempt at a quick snapshot didn’t meet my with my photographic standards so I spent the next hour playing with lighting to get the final shot above. This was a very challenging shot as I had to make do with what lighting I could find in the house. Here’s how I did it:

first shot with ambient light only

First of all, my in-laws’ house is DARK. Dark walls. Dark floors. Dark furniture. Dark lamps. You get the idea. Plus, it was night so the wall of windows to the left of the subject weren’t helping. Of course, I could have waited for morning but I always like a good challenge. Plus, I figured that if I got it right, a night shot would better capture the elegant and rich warmth of the table setting.

My first test shot was attampted with nothing but the incandescent  lamp light filtering in from the living room behind the camera. This required a 6 second exposure at f/8 and ISO 400 (a tripod was used so my K10D’s IS was OFF). I used f/8 to ensure that the entire arrangement was in sharp focus while the background was blurred a bit. I like the f/8 shot because there is enough background detail to clearly place this shot in my in-laws dining room while the subject focus was nicely isolated. The lighting in this first shot was too flat. I wanted more subject isolation so I grabbed a floor lamp and placed it to the left of the camera and tried again:

second shot w/ floor lamp at eye level

set-up for second shot

This set-up provided better subject isolation via lighting but the shadows seemed a bit harsh. I played around with a few combinations of settings and finally settled on 4 seconds at f/8 and ISO 100 but was still not happy with the results.

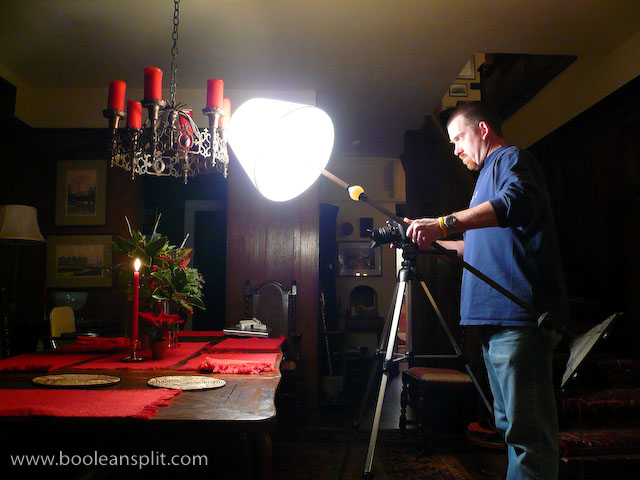
Recalling some studio shots that I did not long ago where I held a shaded lamp directly above my subjects, I decided to try holding the lamp above the centerpiece just out of the frame. I also turned off all the lights in the living room and opened the glass doors on the china cabinet behind the arrangement to eliminate the reflection of the lamp. Finally, I lit the candles to add another level of detail and ambiance to the shot.

set-up for final shot

This set-up is what I used for the final shot. (Note use of lens hood to quell flare). I sped up the ISO to 200 to get a 1.6 second exposure at f/8. This was mainly because the lamp was a bit heavy to be holding up like this for 6 seconds but also because a shorter exposure helped cut down on the ambient light bleeding in to the background. While the shutter was open I slowly arced the lamp from left to right to paint the entire arrangement and blur the shadows. The resulting image (top) ended up with shadows that were much softer at the subject with a nice gradual fall off of the light into the background. I couldn’t have done much better with an actual soft box in a studio ;-)

With a nice looking exposure I pulled the image into Lightroom to adjust the white balance (2625K) and apply my standard Sharpness (14), Detail (51), Clarity (30), and Vibrance (+25) settings. I also pushed the Recovery up to 73 to help correct some over exposure of the reds and knock back the highlights on the shiny green leaves a bit. A bit of final cropping (always leave room for cropping!) and off the image went to my father in-law.

Take better sunset pictures

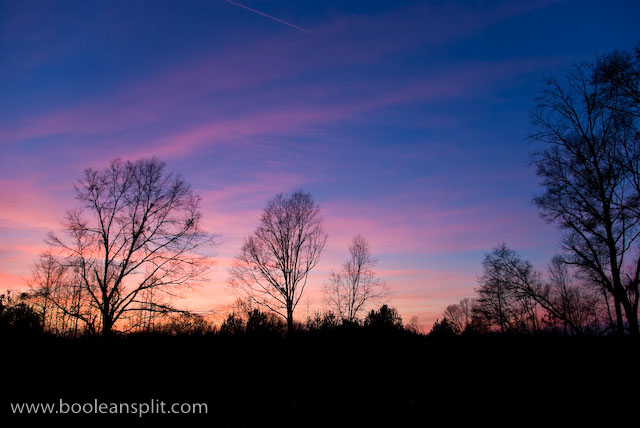
Alabama sunset

There are few things more beautiful than a good sunset or sunrise photograph. However, if you’ve ever tried to do it you know it can be frustrating. How many times have you seen a beautiful sunset like the one above only to have your photo turn out something like this?
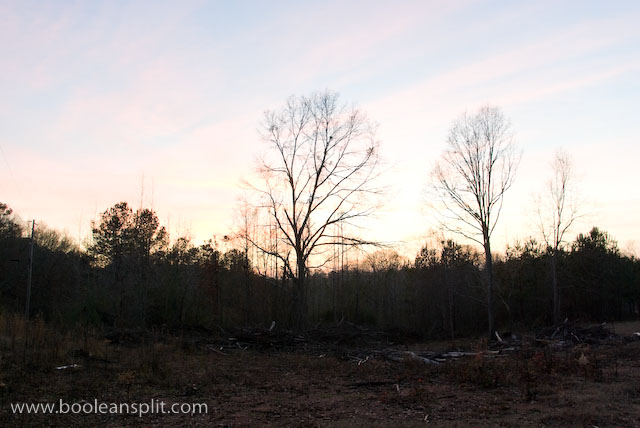
overexposed sunset

There are a couple of easy things you can do to get great sunset photos. First, turn off your flash. The only thing the flash is good for during a sunset is to add fill to illuminate a foreground subject. Unfortunately, getting the right mix of fill flash and background exposure can be very tricky:

Nevis sunset flash

Not a very inspiring photo (though after the number of rum punches I had I didn’t care). For now, let’s just turn the flash off and focus on capturing a brilliant sunset photo.

Next, set your white balance to auto. You can also try daylight but I have always found the auto setting gives the best mix of deep blues, pinks, reds and oranges.

I like to shoot sunsets with a wide angle lens to get as much of the sky in the picture as possible. This ensures a full mix of colors from the darkest indigo blues overhead to the brightest pinks and oranges at the horizon. Usually I leave only a strip of ground/foreground across the bottom to anchor the photo- letting the sky dominate the scene for maximum impact.

The main challenge with sunset photos is getting around the camera’s matrix metering’s natural tendency to balance exposure across the frame. The camera doesn’t know what’s going on and tries to balance the dark foreground with the bright background. The washed out example at the top is what you get when you just point-n-click. To get a decent sunset exposure you either need to dial in some negative exposure compensation (usually -2/3EV to -1EV). An easier method is to just aim the camera at an unobstructed portion of the sky, focus, lock exposure, recompose, and shoot. I typically use a little of both.

For the best sunset photos I typically like to wait for the sun to be fully below the horizon. That beautiful glowing orange ball of the sun absolutely wrecks exposure on a camera and typically results in pretty disappointing shots. Also, some cloud texture in the sky helps provide a good mix of colors. Be sure to look behind you as many times clouds away from the setting sun pick up some awesome colors. Finally, some good foreground silhouettes can help add additional visual interest (especially helpful if the sky itself is not as dramatic as it could be).
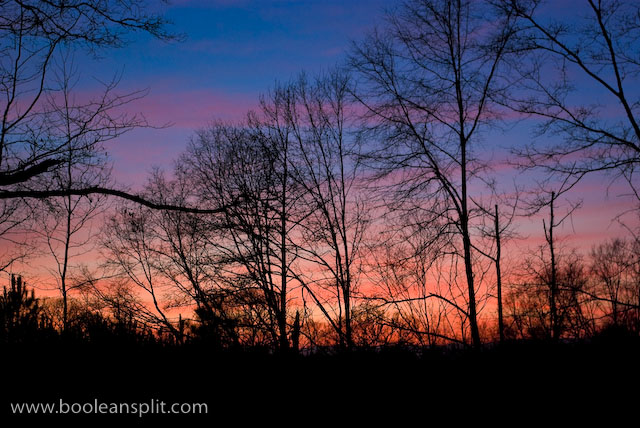
foreground texture sunset

A medium aperture like f/8-f/10 is best to ensure the best detail and sharpness across the frame and eliminate vignetting typical at larger apertures when shooting at a wide zoom setting. Since I generally like to wait for the sun to drop fully, there’s typically not very much ambient light. This means I either need to be shooting on a tripod at a low ISO and slow shutter speed or bump the ISO up to prevent camera shake. These samples were all shot hand-held at ISO 200-400 and f/8 and f/10 at around 1/4 second. The combination of the K10D’s in-body IS and the wide focal length meant it only took a few tries to get sharp shots (wider zoom angles can be hand held at slower shutter speeds than longer ones).

Typically a properly shot sunset photo doesn’t require much post-processing. Since I shoot everything in RAW I have to tweak sharpness and saturation on all my photos in Lightroom. I can also play around with the white balance a bit to get the best pop from my images- though the as-shot (Auto) setting worked best for these images. Often I find the fluorescent WB preset works well for sunsets for some reason.

While a DSLR gives the most control over all of these settings, I have gotten wonderful sunset photos with a pocket camera by simply turning off the flash and using the focus, recompose and shoot method. Here is a collection of some of my other sunset photos on Flickr.

The most difficult part about getting good sunset shots is being at the right place at the right time with your camera. I hope this helps you get that great shot the next time that happens!

Enthusiast compact camera test

dpreview.com has concluded their compact camera tests with a look at enthusiast cameras. The choice of the Panasonic Lumix DMC-LX3 as the overall winner is no real surprise to me. I picked up an LX2 back in February ‘07 in an attempt to replace my DSLR. I was incredibly impressed with the camera’s overall performance. My biggest complaint (and the thing that caused me to return it in exchange for a Canon G7) was the heavy handed noise reduction at all ISOs that ruined the 100% magnified detail of my shots. I’m a pixel peeper so this was a deal breaker for me. Also, the separate lens cap was a huge annoyance. Otherwise, it was one hell of a camera packed into a realistically pocket-able form factor (unlike the G series Canons).

Panasonic Lumix LX2 test shot

Apparently, Panasonic has listened to the complaints of photographers like myself and made improvements to the image quality. Meanwhile, the solid build, wonderful wide angle Leica lenses, built-in IS, and user-centric controls continue to make the Lumix line one of my favorites. While I ultimately decided that an advanced compact camera was not a viable substitute for a DSLR, I did settle upon a Lumix for my pocket camera of choice.

DIY super macro DSLR lens

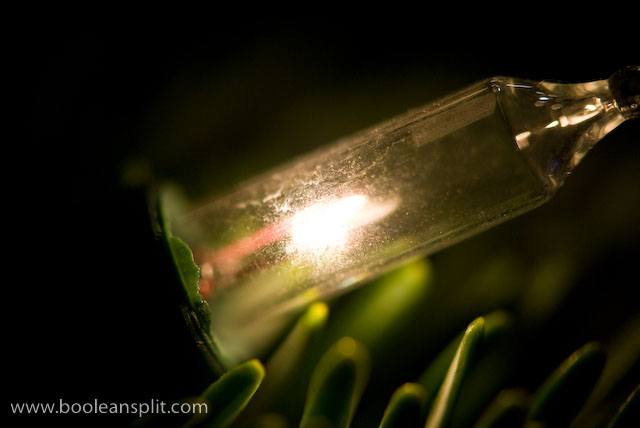
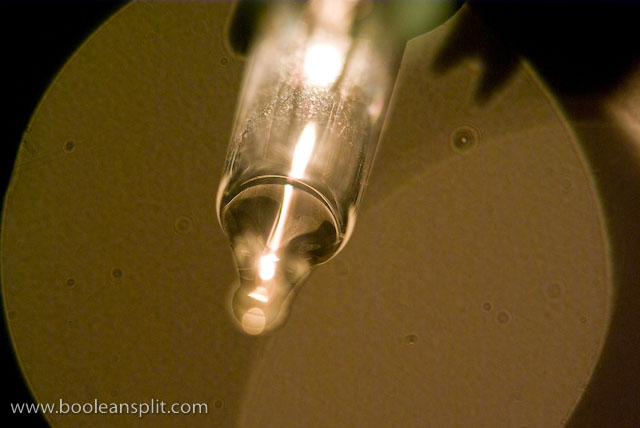
Christmas light super close-up

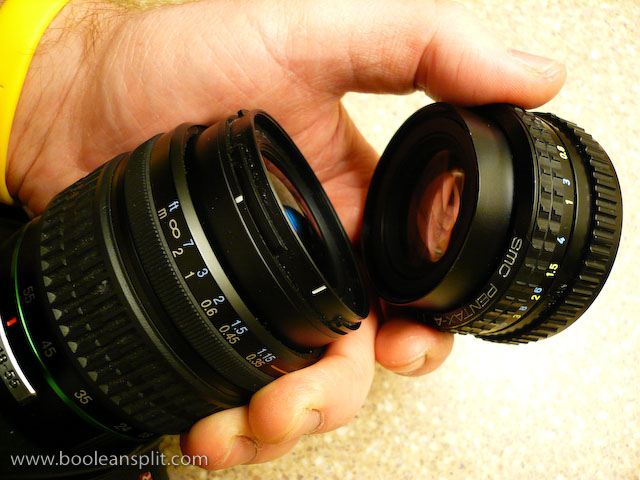
I got this idea from my Flickr friend Jim. I’ve played with this idea in the past but didn’t have the right combination of lenses to really make it work. Seems the kit lens on my Pentax K10D and my 20 year old Pentax-A 50mm f/1.7 make a pretty super duper super macro lens.

The trick is to shoot through a second lens, thus dramatically shortening the minimum focus distance of the combined lenses. This works best with a medium focal length primary lens (attached to the camera) and a fast secondary lens held (typically backwards) in front of the primary lens.

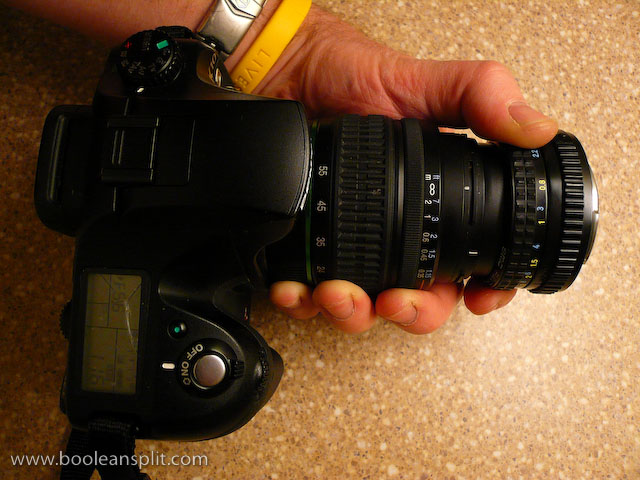
super macro lens assembly

Pentax 18-55mm kit lens with 50mm f/1.7 on front

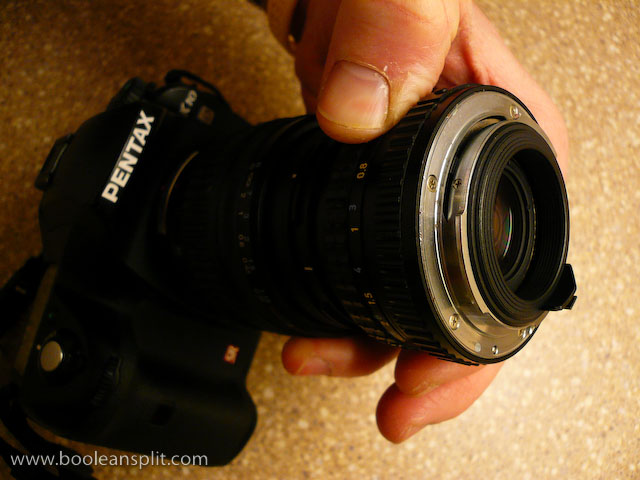
business end

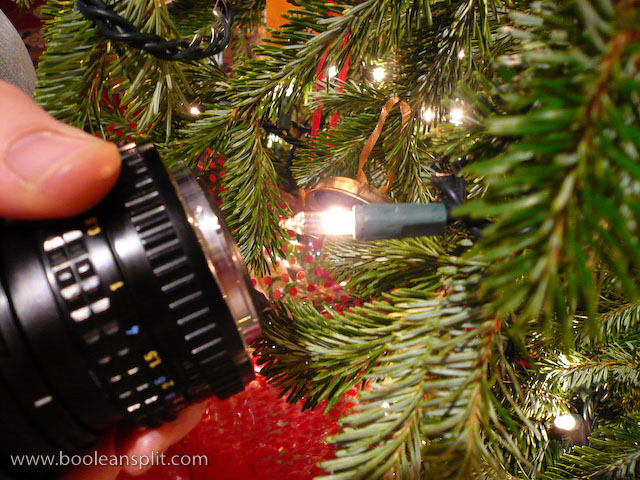
In this case, the 49mm diameter front element on the 50mm fits perfectly inside the 52mm diameter of the 18-55mm Pentax kit lens. I found that I had to zoom the kit lens all the way out to 55mm to eliminate vignetting. I tried reversing the set-up but the 18-55’s  smaller maximum aperture resulted in vignetting at all focal lengths (hence the need for a fast secondary lens). For the shot above I simply switched the camera into manual focus, dialed in a handful of positive exposure compensation and got up close on a bulb on our Christmas tree:

taking the shot

Depth of field is essentially non-existent- as is typically the case with all macro lenses. Changing the focus of ether lens had very little effect on the focal distance to the subject. To achieve focus you have to simply move the camera back and forth while composing through the viewfinder. The problem is that with such a micro thin slice of DOF any movement will throw off your composition. I ended up dialing up the ISO to 800 so that I could get a decently fast shutter speed (around 1/100 sec) and taking a bunch of hand held shots to get a couple of winners. Use of a tripod would have certainly helped, though holding the secondary lens in position while composing the shot on a tripod might be tricky.

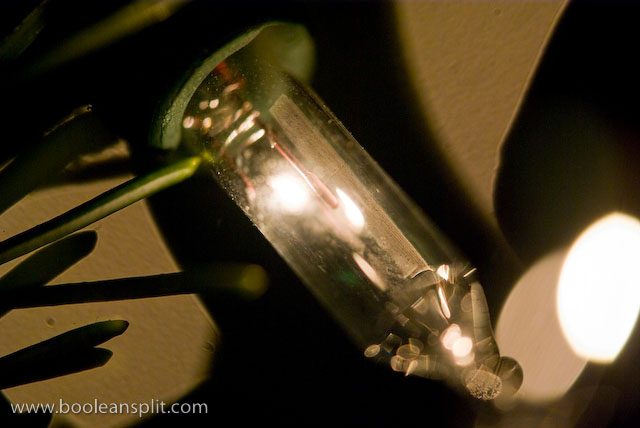
A couple of additional shots taken with this set-up:

imgp6272

ISO 800, 50mm, f/5.6, 1/250sec

My understanding is that you can get similar results by simply reverse mounting certain types of lenses. There are accessories available to do this. Also, I think you may be able to use a threaded step-up adapter ring to attach the two lenses like in my set-up. The $20 screw-on close-up lens adapters (the kind that look like filters) IMO are pretty worthless unless you buy very nice quality ones but you might as well put that cash towards a dedicated macro lens.

The most popular macro accessories (besides a dedicated macro lens, of course) are extension tubes. Again, the price of entry here comes close to a decent dedicated macro lens (or zoom lens with macro capibility). There are cheaper alternatives and quality is less important if you are OK with losing auto focus and communication with your lens. I got some very nice results with my old Canon 5D and 85mm f/1.8 + 12mm Canon extension tube:

Keep in mind that all of these options will limit your focus distance to macro applications. A dedicated macro lens typically will be able to focus to infinity, making it usable as a regular lens in addition to a macro. However, if you have a couple of the right kind of lenses laying around and you want to take some close-up shots, now you know how. Thanks, Jim!

UPDATE:

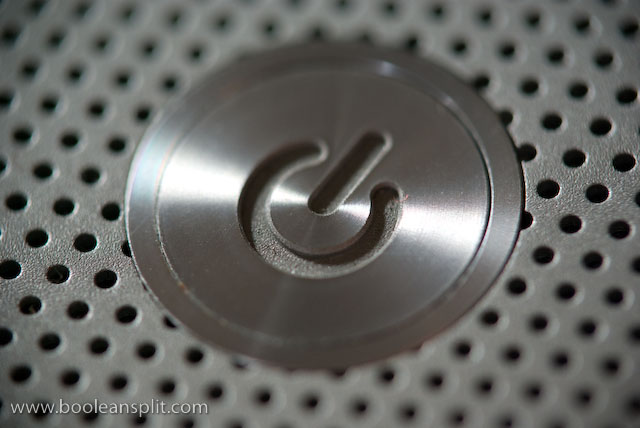
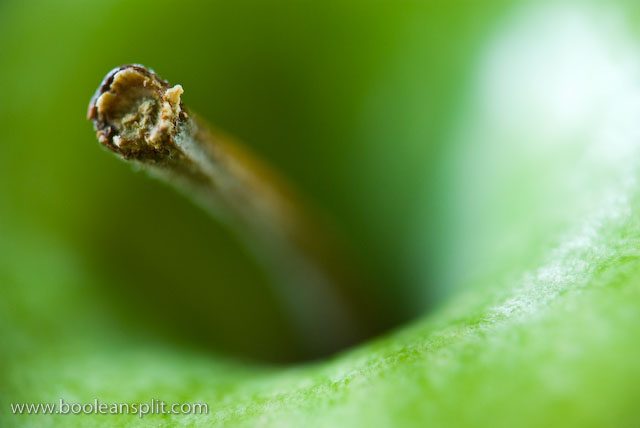
Playing around a bit more with this set-up and I got these shots:

MacBook Pro power button

granny smith apple stem

It also occurred to me that one of the reasons my set-up works so well is that my old manual focus 50mm lens has an aperture ring. This means I can crank it open to f/1.7 to get a clear shot through. More modern lenses often lack an aperture ring and default to the smallest aperture when removed from the camera body. If this happens to you, look for the aperture lever on the inside face of the lens and try sliding the aperture open to get a clear view through your secondary lens.

About

I'm an industrial designer and an avid hobbyist photographer. People are always asking me "how'd you do that?" So, I decided to create this site as a place to share my experiences and insights about photography, the gear and what it all means to me. I'm not sure if this site will make anyone besides myself a better photographer but I figure it's worth a try. Take a look around and let me know what you think. Thanks for stopping by!

Subscribe

Recent Posts

Categories

Pages

Flickr Friends

Links

My Sites

Archives