Pentax vs Canon AF Performance
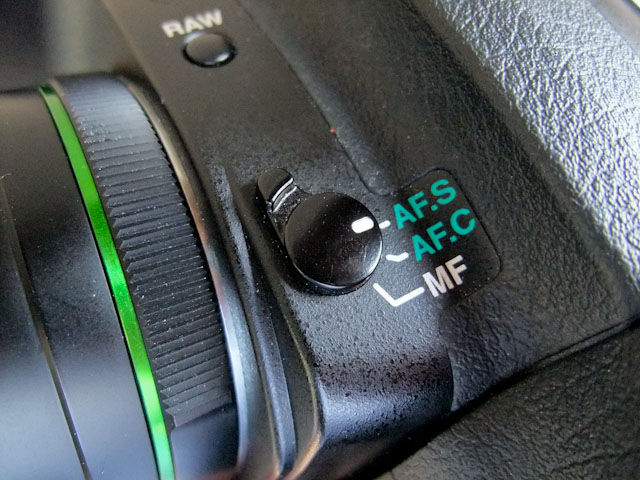
I’m a little concerned about the focus performance of my Pentax K10D DSLR. Before I get too far into it, let me establish a little background first…

I’m a little concerned about the focus performance of my Pentax K10D DSLR. Before I get too far into it, let me establish a little background first…
Pentax K10D, Pentax SMC-A 50mm f/1.7 (manual focus), ISO 800, f/1.7, 1/25 sec, +0.7 EV, IS on
Another shot from the Centrifuge Bar at the MGM Grand Casino in Las Vegas while I was enjoying a beer and winding down from 3 days at the PMA show. In this shot I simply opened the aperture all the way up and with the camera on my lap played around with the manual focus (using the distance markings of the focus ring on my manual 50mm f/1.7 lens while estimating the distance) and let my Pentax K10D do the rest. It took 3 or 4 tries to get the framing right but using this technique saved me from getting down on my knees in the bar- something I try to avoid these days. This picture is essentially straight out of the camera with nothing more than my Lightroom default import processing of the RAW file. White balance was set to auto and has not been adjusted. Doesn’t get much easier than this!
Pentax K10D, Pentax SMC-A 50mm f/1.7 (manual focus), ISO 800, f/1.7, 1/50 sec, +0.7 EV, IS on
Speak to me…as in little green men from outer space ;-) This image makes me think of Close Encounters of the Third Kind. Taken in the bar at the MGM Grand casino in Las Vegas. The Centrifuge bar (as it is known) is designed around a central cylinderical tower covered in tiny color changing LED or fiber optic lights. I was sitting about 12-15′ away from the bar when I took this relaxing from 3 days of walking the show floor at PMA. I simply manually set the focus on my 50mm lens (at f/1.7) to around 3′ and let the camera do the rest. Shooting bokeh is really one of the easiest things to do once you understand the technique. The hard part becomes making an actual composition out of the bokeh. In this case the arrangeent of the lights themselves was all I needed. Tomorrow I’ll have another example shot in the same place.
The BlackRapid R-Strap RS-4 camera strap was only product I came across at PMA that I decided to buy and try for myself because I thought it was such a clever solution for an age-old problem. BlackRapid has obviously gotten a lot of press for this product because I am seeing a high percentage of Google hits on my site from my single mention of it last week. So, I decided to forgo the usual studio photography routine and go ahead and publish my user review to help all of those of you obviously trying to figure out if this thing is worth all the hype.
Pros:
Cons:
Conclusion:
I’m guessing by this point you can tell that I’m not a huge fan of the R-Strap. The most disappointing thing is that I had such high hopes for this product. In fact, I made a special trip back to BlackRapid’s booth and forked over $40 (PMA show special- $8 off their MSRP) just so I could start using it right away even though they promised to mail me a review unit after the show. Eager to get rid of my 12 year old Nikon branded neoprene shoulder strap, I stepped around the corner and quickly tore into the package. Immediately, I encountered difficulty with the connector clip. Then, I struggled to get the length of the strap adjusted to suit my preference. After spending a good 6-8 minutes squatting behind a trash can I was finally ready to put the R-Strap to use.
Within the first 5 minutes I was already starting to think I had made a mistake. My camera just wouldn’t stay put. It kept gravitating to the bottom of the strap which put it on my right hip with the lens sticking straight out into my arm and oncoming traffic. I tried turning and shifting my camera sideways and around to the small of my back like the BlackRapid people had shown me to do standing in their booth. But as soon as I started walking it would quickly slide back around front where I’d smack my lens against my arm or some poor soul walking by. I knocked the lens hood off my little kit lens 3 times in the first 10 minutes of use. I can’t imagine how bad it would have been had I been sporting a longer lens.
Thinking that maybe I hadn’t gotten used to this new-and-improved way of carrying my camera, I was determined to give it the ol’ college try and muddled through the rest of the day and half through the following day. Yes, the R-Strap did make it quite quick and efficient for me to get my camera to my eye and snap a picture. And, I love the fact that the strap doesn’t get all tangled up across the eyepiece like a traditional strap always seems to do. However, I just couldn’t get used to my camera dangling, twirling and knocking into everything while I was walking the show and the streets and casinos of Las Vegas.
BlackRapid seems to market their product to people on the go. From my experience the R-Strap is really only suitable for photographers in a static position that need quick access to their camera (like sports photographers standing on a sideline with three cameras around their neck). I can see how it might work better attached to the tripod collar on a larger telephoto lens- though the laws of gravity seem to suggest that it’s always going to seek the lowest point and not stay behind your back as BlackRapid suggests. As it is- combined with the geeky styling, camera dings and high price tag- I can not recommend the R-Strap. And I’m really bummed about that. Be that as it may, lot’s of people seem to swear by it so make your own choice.
Now for the details and photos: More »

Pentax K10D, Pentax SMC-A 50mm f/1.7 (manual focus), ISO 800, f/1.7, 1/60 sec, +0.7 EV, IS on
Sitting in the Southwest Airlines C gate departure lounge at Las Vegas international Airport yesterday this is pretty much what I was seeing through my glazed-over post-PMA eyes. This image is pretty much SOOC (straight of out of the camera). I did apply my standard Lightroom import processing but didn’t have to do much else. For the shot I just opened up the aperture, focused on the backrest of the seat across the aisle from me, recomposed and shot. The large aperture took care of blurring out the background and created the nice bokeh balls from all the lights. The sun had set behind me about 20 minutes before so I got a nice blue hour band through the east facing windows in the background. This is the original composition:
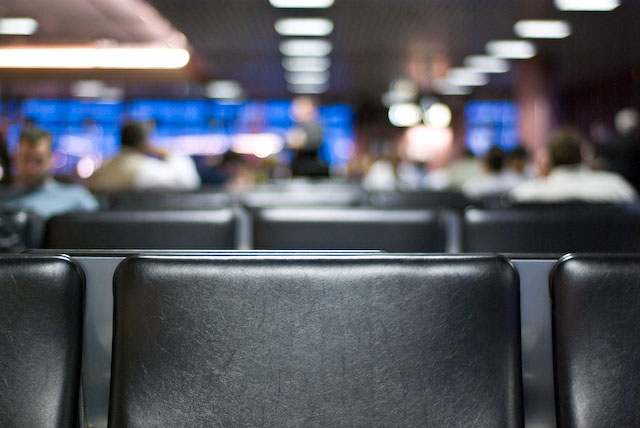
It took a few tries to get the focus right but I figured I had a pretty good shot on about the third or fourth try. A few minutes later, the gentleman on the right walked up, sat down in the second row and pulled out his headphones and I knew that the shot I was looking for had finally materialized.
Shooting in airports is one of my favorite locations but they can be a mixed bag. There is so much to see and so many walks of life confined in a relatively small and typically interestingly designed space. However, you have to be careful of invading peoples’ privacy too much since there’s usually nowhere to run and hide. Shooting shots like this though, can be quite innocent as most people are lost in their own little iPod-isolated world. Also, if they give you a hard time you can show them the shot and prove that they’re nothing more than background texture ;-)
Technical difficulties involve poor and variable lighting conditions and constantly moving subjects. I tend to set my Pentax K10D’s auto ISO to 100-800 (or maybe 1000) and shoot in RAW so I can tweak the white balance later if needed. Generally I like to use my old 50mm lens left wide open at f/1.7. It is small with decent reach and not nearly as imposing as a larger and longer lens might be. Personally, I think Pentax’s SMCP-FA 77mm f/1.8 Limited lens would be a better choice for this type of photography. It is just as small and fast, sharper wide open, has longer reach, and is autofocus. Autofocus here is nice as it allows you to compose and shoot much faster with better accuracy than a manual focus lens (at least for me). That way you draw less attention to yourself while taking pictures.
Anyway, next time you find yourself at the airport, take your camera out of your bag and see what you can get! Here’s a few more that I took:
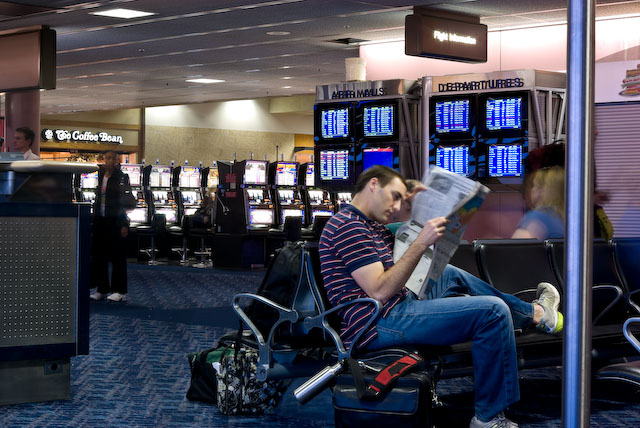
13 second exposure @ f/16. Camera was set on window sill and triggered with the 2 second delay self timer.
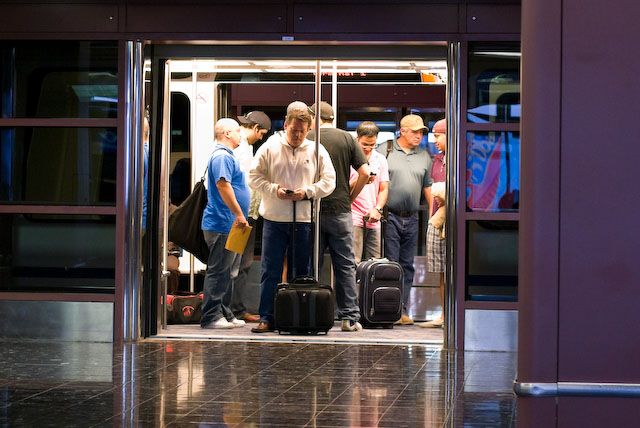
Tram passengers.
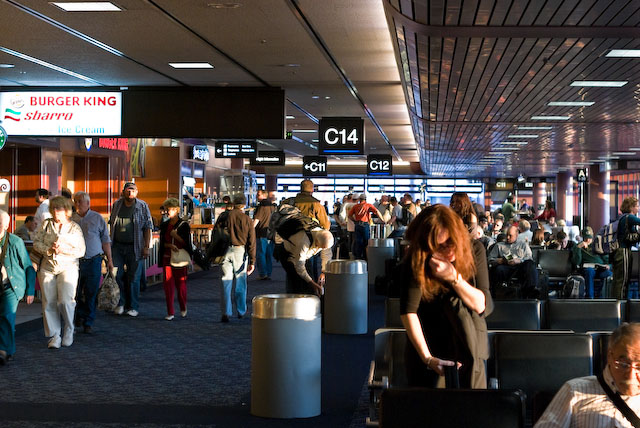
This shot was taken at f/4 to give a bit more DoF and sharpen things up a bit.
This was shot from the hip and I knew it would be out of focus but somehow it still works.
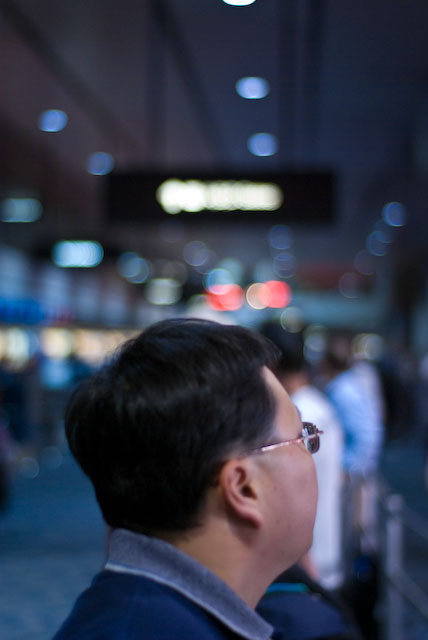
Waiting in line at the ticket counter. The shutter release caused him to turn around but I feigned taking a picture of the ceiling to avoid conflict ;-)