booleansplit.com

photos, tips, tricks, and thoughts from an avid amateur photographer


Posts tagged RAW

Pentax K10D RAW noise reduction

I shoot a lot of long exposure shots with my Pentax K10D. One of my pet peeves is waiting for the built-in noise reduction to take a 1:1 dark frame subtraction exposure. This ends up doubling the length of time for each shot. Not that big of a deal if you are shooting 1 second exposures but a bit of a PITA if you’re shooting 5 minute bulb shots.

In-camera noise reduction is pretty critical for shooting JPEGs. Sure, you can always shoot your own series of dark frames at different ISOs and use them with 3rd party software to remove hot spots, etc. but this seems a bit extreme. So, I have just left the in-camera NR on and lived with the dark frame subtraction double exposure.

Many times I’ve noticed that there are hot spots in the initial Adobe Lightroom previews of my long exposure RAW files that disappear the first time I zoom in to 100%. This got me to thinking that maybe Lightroom could take care of long exposure noise on its own without the camera’s help. After searching Google in vain for a definitive answer, I decided a quick test was in order. I was pleased to learn that, now that I am shooting exclusively in RAW, I can turn off the in-camera noise reduction on my K10D and eliminate the wait between long exposure shots. (In-camera NR is still recommended for JPEG shooting).

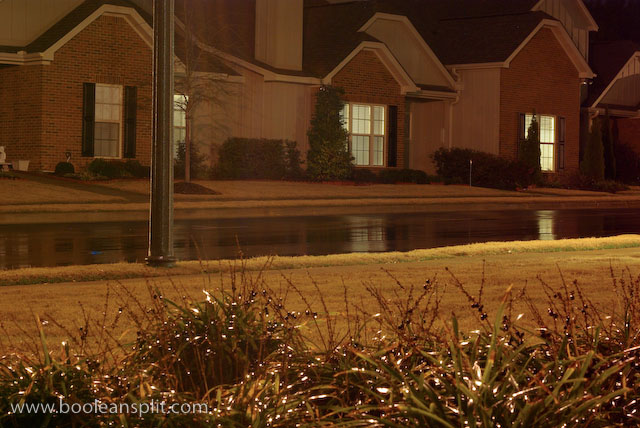
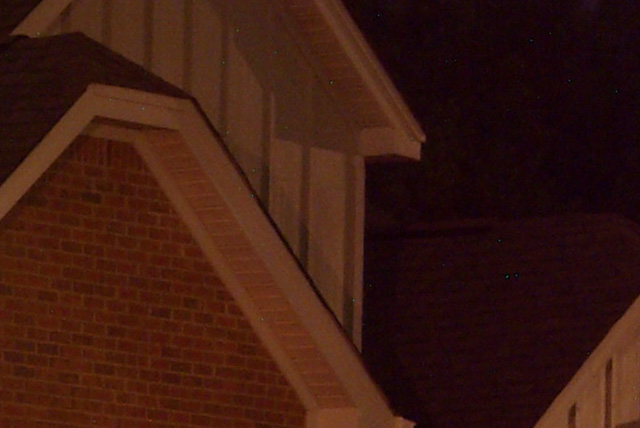
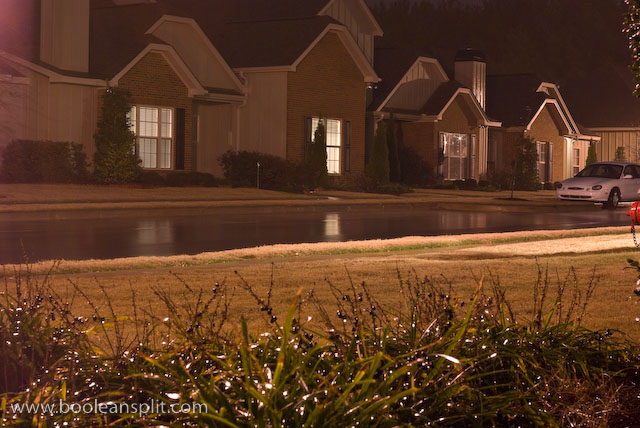
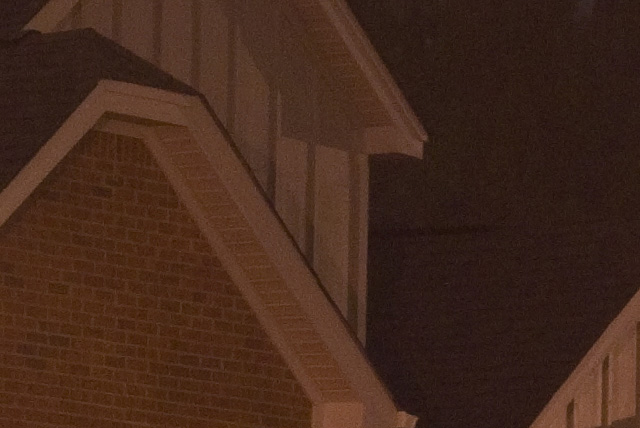
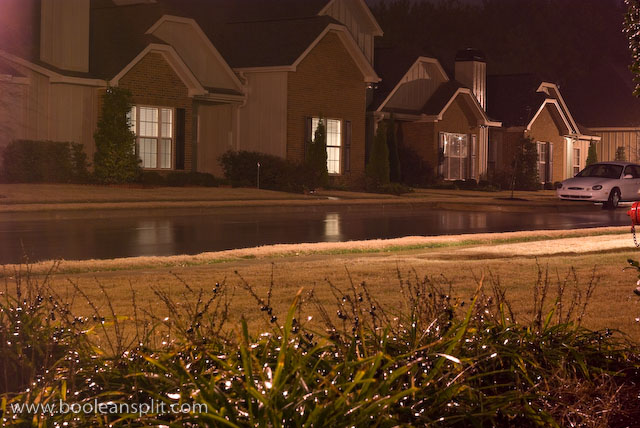
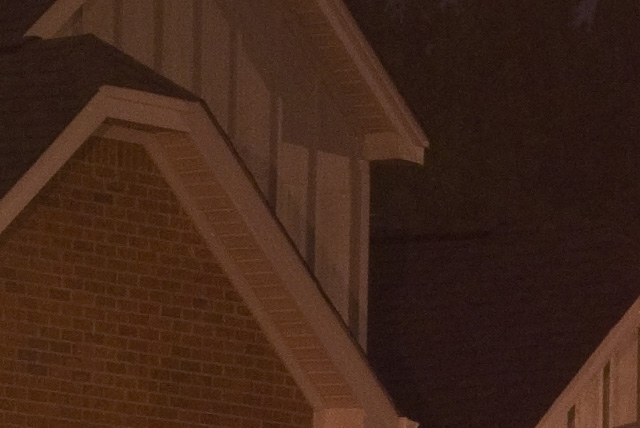
Here’s what I found in the test. All shots are 30 seconds at f/16 and ISO 400 using my 50mm f/1.7 SMC-A lens with only LR’s default processing applied. Sorry for the crude composition…

JPEG with NR OFF

JPEG with NR OFF

100% crop of JPEG w/ NR OFF

100% crop of JPEG w/ NR OFF

RAW with NR ON

RAW with NR ON

100% crop of RAW w/ NR ON

100% crop of RAW w/ NR ON

RAW with NR OFF

RAW with NR OFF

100% crop of RAW w/ NR OFF

100% crop of RAW w/ NR OFF

From what I could tell from this test, there is virtually no difference in noise between the RAW images with and without in-camera noise reduction. In fact, to me the images without the NR has slightly better contrast and more shadow detail. Keep in mind that these are unprocessed RAW files so I could easily get similar contrast and saturation as the JPEG image while maintaining the greater detail and dynamic range of the RAW images.

Twilight

twilight

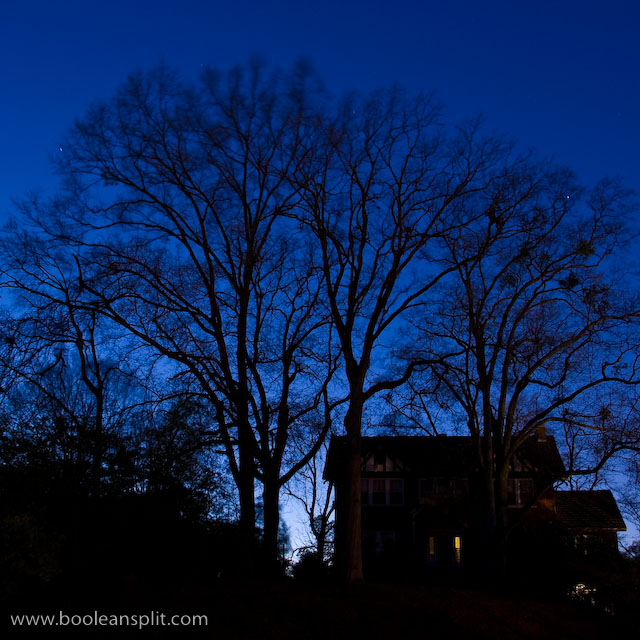
Dusk is my favorite time of day. I love the rich blues of the sky and the contrast of dark trees and such in the foreground. Normally, these shots require long exposures and a tripod to capture and a bit a tweaking post-process to get the lighting and color right.

This shot required a 30 second exposure at f/9 and ISO 100 with +1EV exposure compensation. I chose f/9 for two reasons. First, f/9 was the smallest aperture I could use and still keep the exposure under 30 seconds in Aperture Priority mode (maximum shutter time without switching to Bulb mode) at ISO 100. I wanted to keep the shot at ISO 100 to ensure tack sharp details, rich saturation and no noise. Second, I have found that my kit lens is its sharpest between f/8 and f/11, so f/9 was a logical place to start.

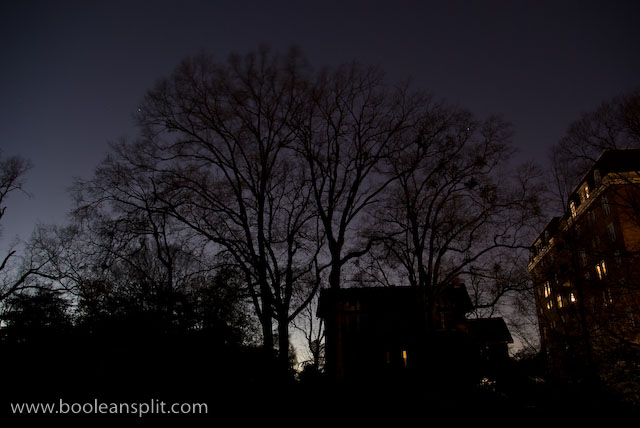
This photo was processed in Adobe Lightroom to look as close to what my eyes saw as possible. Here’s the original RAW shot straight out of the camera (SOOC) with nothing but my default import processing:

original SOOC unprocessed shot

Since I was shooting in RAW I left the white balance at Auto and simply used the histogram display on the LCD to verify a good mix of highlight and shadow detail. After downloading I started off by cropping and straightening the shot a bit. Next I tweaked the white balance to 3700K to get the blue to pop (the sky was too purple at the Daylight/5500 setting and too blue at Tungsten/2850). I then pushed the exposure up another +1EV and dropped the Black slider to 3. Nudging the Fill Light slider to 21 pulled even more shadow detail out. I set Clarity to 11, Vibrance to +25 and Saturation to +21. Finally, I added a touch of Sharpening and Detail (50 & 50) and Defringed all edges.

The Clarity, Vibrance, Sharpening, Detail, and Defringe settings are pretty standard for most of my shots with the Pentax K10D. I find the SOOC RAW files are a little flat color-wise and softer than I like. Also, the kit lens leaves a bit of color fringing on hard edges that Defringing seems to fix well.

The final result turned out very true to what I recall seeing that night in Birmingham. It was a bit windy so the tops of the tree branches are motion blured. The tiny star trails were an unexpected surprise.

Take better sunset pictures

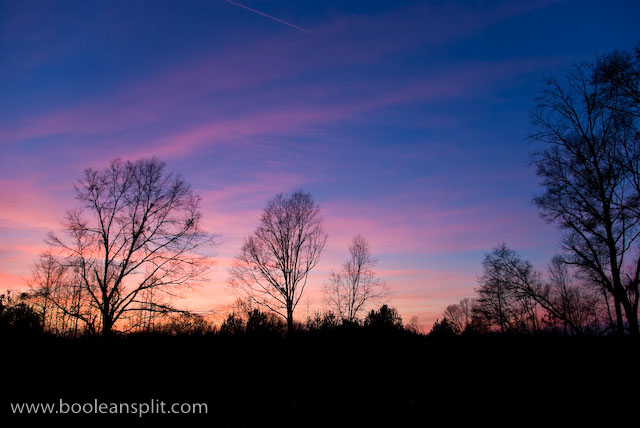
Alabama sunset

There are few things more beautiful than a good sunset or sunrise photograph. However, if you’ve ever tried to do it you know it can be frustrating. How many times have you seen a beautiful sunset like the one above only to have your photo turn out something like this?
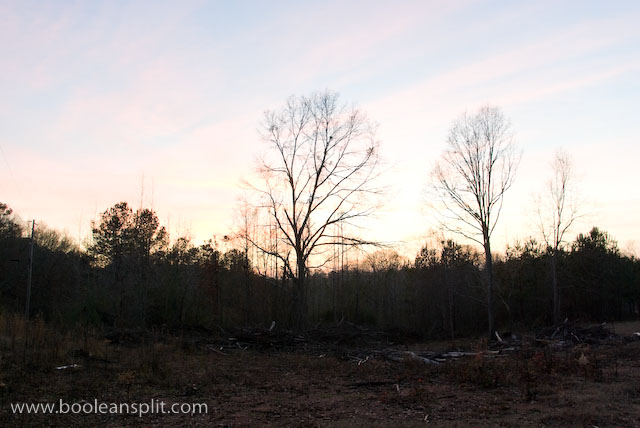
overexposed sunset

There are a couple of easy things you can do to get great sunset photos. First, turn off your flash. The only thing the flash is good for during a sunset is to add fill to illuminate a foreground subject. Unfortunately, getting the right mix of fill flash and background exposure can be very tricky:

Nevis sunset flash

Not a very inspiring photo (though after the number of rum punches I had I didn’t care). For now, let’s just turn the flash off and focus on capturing a brilliant sunset photo.

Next, set your white balance to auto. You can also try daylight but I have always found the auto setting gives the best mix of deep blues, pinks, reds and oranges.

I like to shoot sunsets with a wide angle lens to get as much of the sky in the picture as possible. This ensures a full mix of colors from the darkest indigo blues overhead to the brightest pinks and oranges at the horizon. Usually I leave only a strip of ground/foreground across the bottom to anchor the photo- letting the sky dominate the scene for maximum impact.

The main challenge with sunset photos is getting around the camera’s matrix metering’s natural tendency to balance exposure across the frame. The camera doesn’t know what’s going on and tries to balance the dark foreground with the bright background. The washed out example at the top is what you get when you just point-n-click. To get a decent sunset exposure you either need to dial in some negative exposure compensation (usually -2/3EV to -1EV). An easier method is to just aim the camera at an unobstructed portion of the sky, focus, lock exposure, recompose, and shoot. I typically use a little of both.

For the best sunset photos I typically like to wait for the sun to be fully below the horizon. That beautiful glowing orange ball of the sun absolutely wrecks exposure on a camera and typically results in pretty disappointing shots. Also, some cloud texture in the sky helps provide a good mix of colors. Be sure to look behind you as many times clouds away from the setting sun pick up some awesome colors. Finally, some good foreground silhouettes can help add additional visual interest (especially helpful if the sky itself is not as dramatic as it could be).
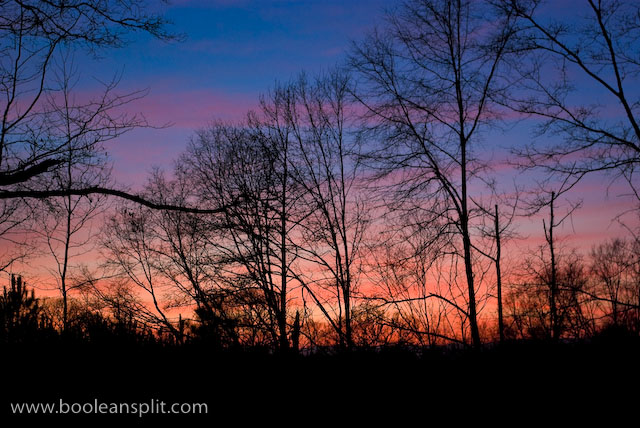
foreground texture sunset

A medium aperture like f/8-f/10 is best to ensure the best detail and sharpness across the frame and eliminate vignetting typical at larger apertures when shooting at a wide zoom setting. Since I generally like to wait for the sun to drop fully, there’s typically not very much ambient light. This means I either need to be shooting on a tripod at a low ISO and slow shutter speed or bump the ISO up to prevent camera shake. These samples were all shot hand-held at ISO 200-400 and f/8 and f/10 at around 1/4 second. The combination of the K10D’s in-body IS and the wide focal length meant it only took a few tries to get sharp shots (wider zoom angles can be hand held at slower shutter speeds than longer ones).

Typically a properly shot sunset photo doesn’t require much post-processing. Since I shoot everything in RAW I have to tweak sharpness and saturation on all my photos in Lightroom. I can also play around with the white balance a bit to get the best pop from my images- though the as-shot (Auto) setting worked best for these images. Often I find the fluorescent WB preset works well for sunsets for some reason.

While a DSLR gives the most control over all of these settings, I have gotten wonderful sunset photos with a pocket camera by simply turning off the flash and using the focus, recompose and shoot method. Here is a collection of some of my other sunset photos on Flickr.

The most difficult part about getting good sunset shots is being at the right place at the right time with your camera. I hope this helps you get that great shot the next time that happens!

Where do I find this stuff?

ISO 100, 50mm, f/1.7. 1/15 sec, +7/10EV, IS on

Welcome to my new photo blog! Please take a minute to read my about page for more information about this new venture of mine. The short version is this: people are always asking me “how did you do that?” and “where did you take that?” so I thought I’d create a website where I could go into greater detail about those things than is feasible on Flickr.

The photo above was taken at the Home Depot in Opelika, AL with my Pentax K10D and 50mm f/1.7 SMC-A lens. I often take my camera with me shopping as I have found supermarkets and home centers to be great sources for photographic fodder. In this case I was looking specifically for Christmas light bokeh and knew that the home centers (we hit both Lowe’s and Home Depot on this outing) would provide me with the appropriate subject matter and the right environment for me to shoot it in the middle of the day. Lowe’s was a bit of a let down on the Christmas lights but Home Depot had a dozen decorated and illuminated trees standing guard just inside the front door.

This was the only shot I took of the trees as we were in a bit of a rush by this time. The keys to success here were having the camera properly set up ahead of time and shooting RAW. The K10D tends to underexpose in an effort to retain highlight detail in JPEG images. However, the RAW files tend to have 1.5-2 stops of additional headspace (as do most RAW files). My old manual focus 50mm f/1.7 overwhelms the exposure meter in the K10D at anything below f/2.0 so I am in the habit of dialing in +2/3 of exposure compensation whenever I’m shooting it wide open (which is my preferred way to use this lens).

I generally shoot in aperture priority mode, using the front control wheel to adjust exposure compensation and the rear to dial in the desired aperture (custom configured in the K10D settings menu). Obviously I’m shooting manual focus with this lens. I typically only use the center focus point whether I’m shooting manual or auto focus as I’m a focus-and-recompose type of shooter. The K10D has a nice feature wherein the focus point and the focus confirmation icon in the viewfinder both light when manual focus is achieved. I have left the focus confirmation beep turned on as an additional aid in manual focusing this lens. At f/1.7 there is essentially no depth of field and it is next to impossible to determine correct focus through the reduced viewfinder of a crop sensor camera- a problem I did not have on my old Canon 5D ;-)

For this shot, the Christmas trees were displayed on a raised section of warehouse rack shelving (sorry, no establishing shot for this post). I simply walked up to the first tree, set the focus to its closest setting (0.45M on this lens) and honed in on one of the light bulbs. I then rotated around that point until I saw some good bokeh balls in the background and fired. The secret to this kind of awesome bokeh is shooting wide open and putting as much distance between the foreground subject and the points of light in the background as possible. Very high end lenses (like Canon’s professional L series) generally have curved aperture blades which will produce nice round bokeh balls at just about any aperture setting. With most lenses and their straight bladed apertures, it’s best to shoot wide open to get nice round bokeh like this.

When shooting in manual focus the K10D does not lock exposure unless focus is also locked. Since I focused on the light bulb then recomposed with it slightly off center, the exposure adjusted slightly and let more light in. This was exactly as I planned it as I could tell from the relatively high initial shutter speed (1/100sec) that the light bulb was blowing out the exposure. The unprocessed and un-cropped RAW image looked like this:

the original image as shot and unprocessed (LR default import settings)

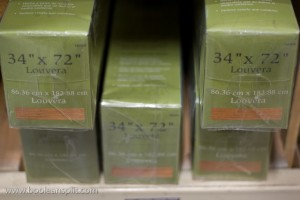
I could tell from the LCD that the image was a little flat but the histogram looked good so I quickly caught up with the wife to complete our shopping task. BTW, we were shopping for matchstick blinds for the living room. Another good reason to take your camera shopping is to document what you find for later review.

sizes and inventory

sizes and inventory

Also, if you are legitimately taking pictures of products that you are considering returning to purchase the stores typically do not have much of a problem if you snap a few other random photos. Just avoid taking pictures of customers (or at least avoid getting caught) as they will complain and get you a meeting with a manager. Trust me on that one :-)

Back to the photo. Once I returned home I downloaded my RAW images into Lightroom for processing. With this image I knew I wanted a square crop so that was the first order of business. Then, I applied the Direct Positive preset, dialed the Clarity up to 33, the Vibrance up to +21, Saturation +2, Sharpening to 47, and Detail up to 48. The exposure was a bit hot with the default Direct Positive settings so I pulled it down to +0.25 and nudged the Recovery up to 25. I played around with the white balance a bit but settled on the as shot settings for this image.

That’s it! Let me know what you think and if there is anything I missed. This is my first attempt at this sort of thing so your input is highly desired!

UPDATE: Check out my new Bokeh Tutorial!

About

I'm an industrial designer and an avid hobbyist photographer. People are always asking me "how'd you do that?" So, I decided to create this site as a place to share my experiences and insights about photography, the gear and what it all means to me. I'm not sure if this site will make anyone besides myself a better photographer but I figure it's worth a try. Take a look around and let me know what you think. Thanks for stopping by!

Subscribe

Recent Posts

Categories

Pages

Flickr Friends

Links

My Sites

Archives